

How to Connect Facebook Lead Ads to Sender
Sender is an email marketing and automation platform that helps businesses manage subscribers, create email campaigns, and automate customer communication. If you use Facebook Lead Ads to generate new prospects, you can connect Facebook leads to Sender with LeadsNotify and automatically send…

Table of contents
Sender is an email marketing and automation platform that helps businesses manage subscribers, create email campaigns, and automate customer communication. If you use Facebook Lead Ads to generate new prospects, you can connect Facebook leads to Sender with LeadsNotify and automatically send new lead information to your Sender account.
Instead of manually exporting Facebook leads and importing them into your email marketing platform, you can automate the process and send new leads directly from your Facebook Lead Ads forms to Sender. In this guide, we’ll show you how to connect Facebook Lead Ads to Sender using LeadsNotify in a few simple steps.
How to Connect Facebook Lead Ads to Sender
The integration connects your Facebook Lead Ads forms with Sender through LeadsNotify. Once the setup is complete, new leads submitted through your selected Facebook forms can be sent automatically to Sender, where you can manage them as subscribers and include them in your email marketing workflows.
“`htmlStep 1: Sign Up and Log In to LeadsNotify
First, sign up for LeadsNotify or log in to your existing account.
Step 2: Connect Your Facebook Account
Connect your Facebook account with LeadsNotify. If you haven’t connected your Facebook Pages yet, follow the instructions in our Facebook Lead Ads connection guide.
Step 3: Create a Sender Notifier
After connecting Facebook, log in to LeadsNotify and click Create Notifier. From the integration listing, search for the Sender integration and click Try Now.
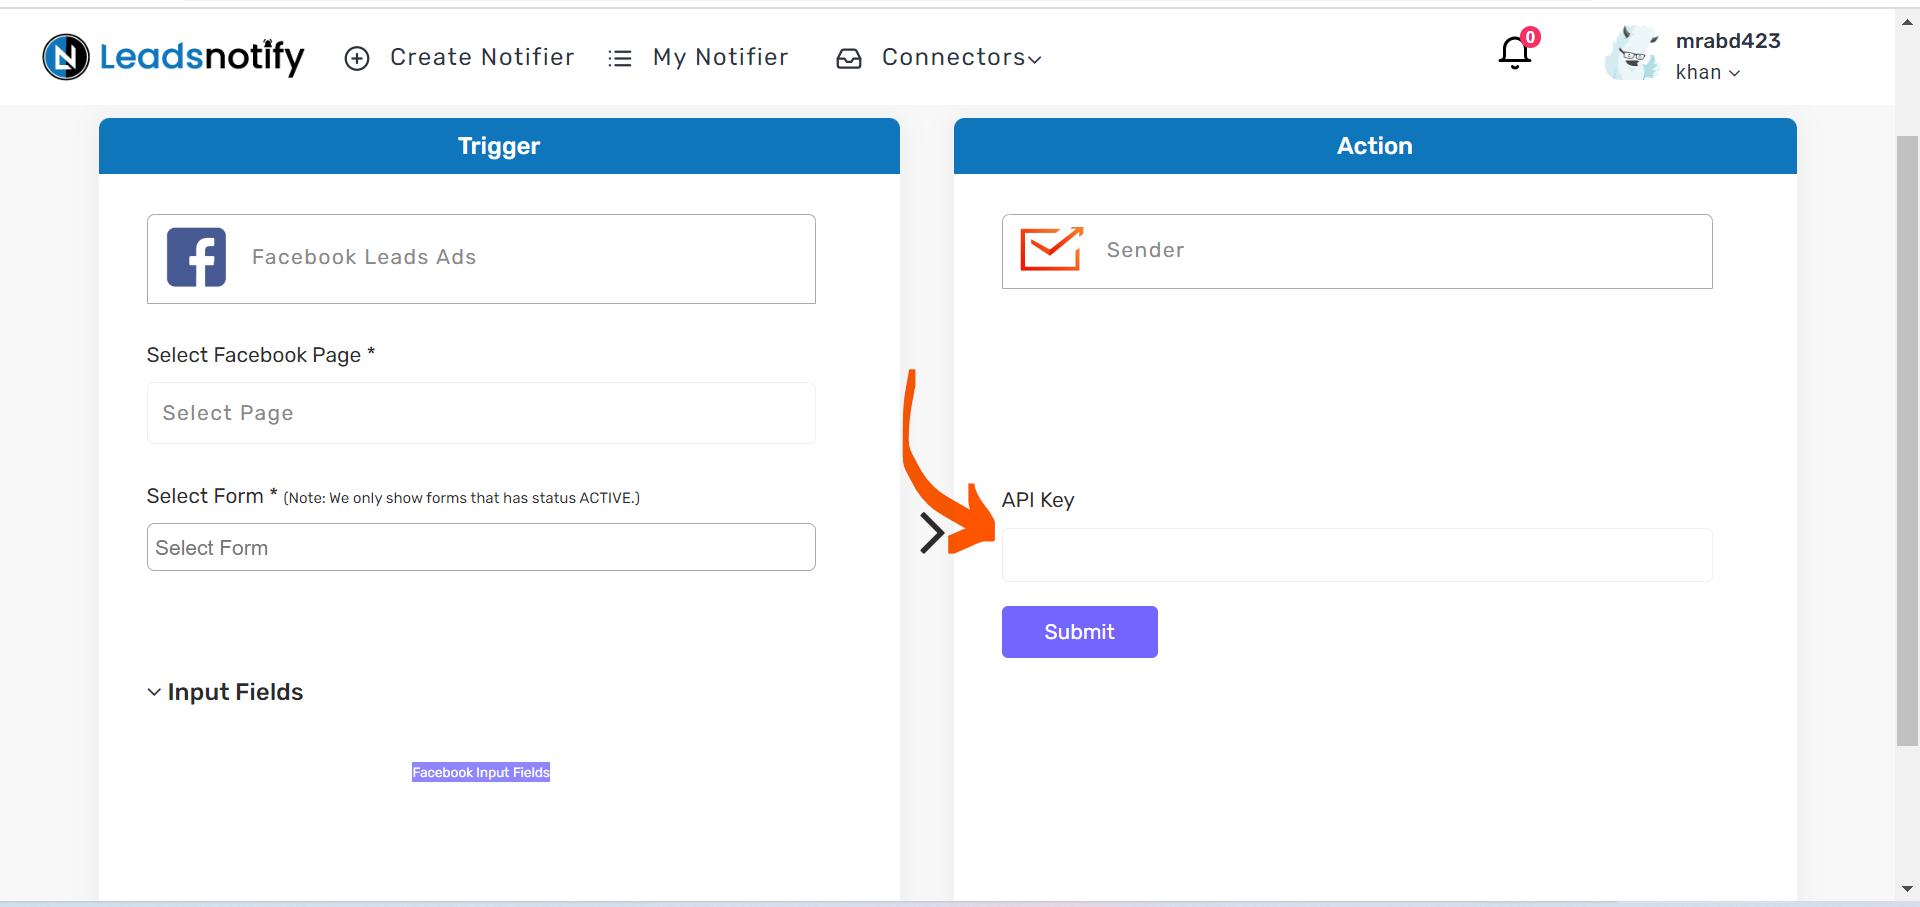
LeadsNotify will display the Facebook Pages you have already authorized. Select the Facebook Page you use for your lead campaigns and choose the Instant Forms you want to connect. LeadsNotify will then retrieve the available fields from the selected forms.
Get Your Sender API Access Token
In the Action section, you’ll need to enter an API access token from your Sender account. This token allows LeadsNotify to connect to your Sender account and transfer your Facebook lead data.
To get your Sender API access token:
- Log in to your Sender account.
- Open Settings.
- Find and open API Access Tokens.
- Use an existing token or create a new access token.
- For better security, create a dedicated token that is only used for your LeadsNotify integration.
- Copy the access token and return to the Sender integration in LeadsNotify.
Paste the access token into the API field in LeadsNotify and continue with the setup.
Step 4: Map Facebook Lead Fields to Sender
After you enter the API access token and click Submit, LeadsNotify will verify the token and retrieve the available fields from your Sender account, including custom fields.
You will also be able to select the Sender group where you want the new subscriber to be created. Choose the appropriate group for your Facebook leads.
LeadsNotify allows you to map the fields from your Facebook Instant Form to the corresponding fields in Sender. For example, you can map the lead’s name and email address to the appropriate subscriber fields.
Sender and Facebook Lead Ads Configuration
Before saving the notifier, review your configuration to make sure the correct Facebook Page, Instant Forms, Sender group, and field mappings are selected.
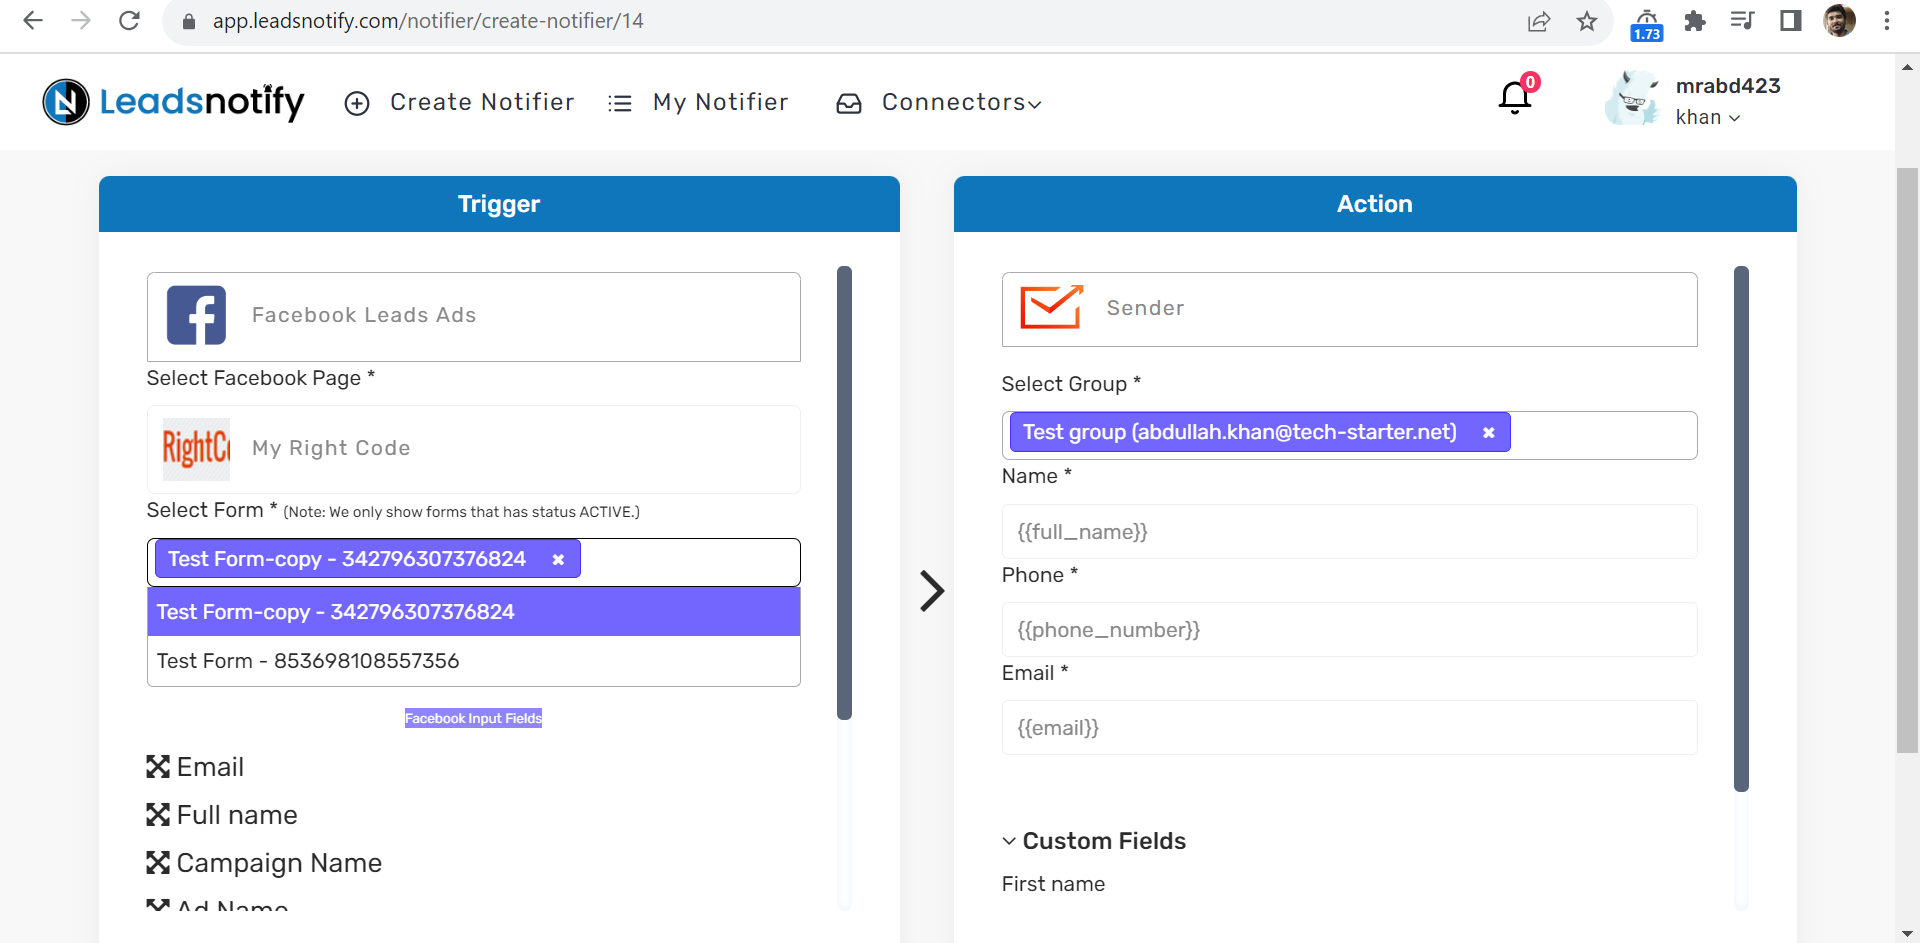
Your configuration may look different depending on the Facebook Page, lead forms, Sender group, and fields you select.
Step 5: Save and Test the Sender Integration
Once you’ve finished configuring the integration, click Save. LeadsNotify will reload the page and ask you to send a test lead to verify the connection.
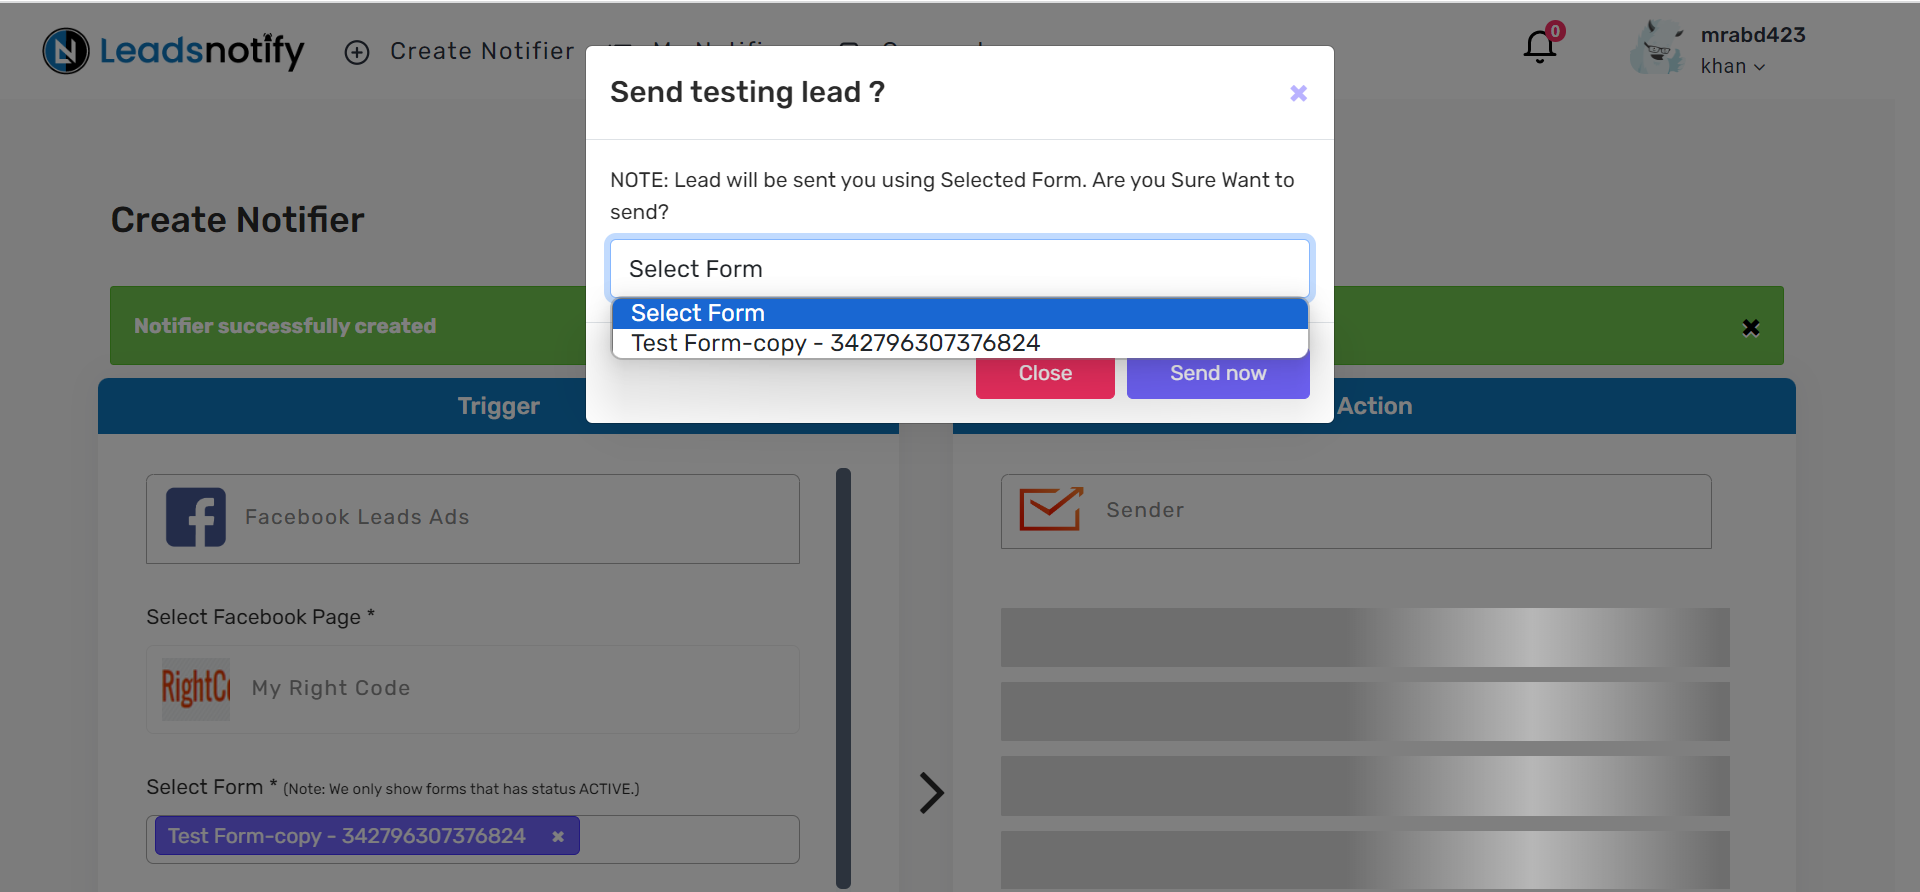
Select the Facebook Instant Form you want to use for the test and click Send Now. LeadsNotify will process the test lead and display a Success message if the integration is working correctly.
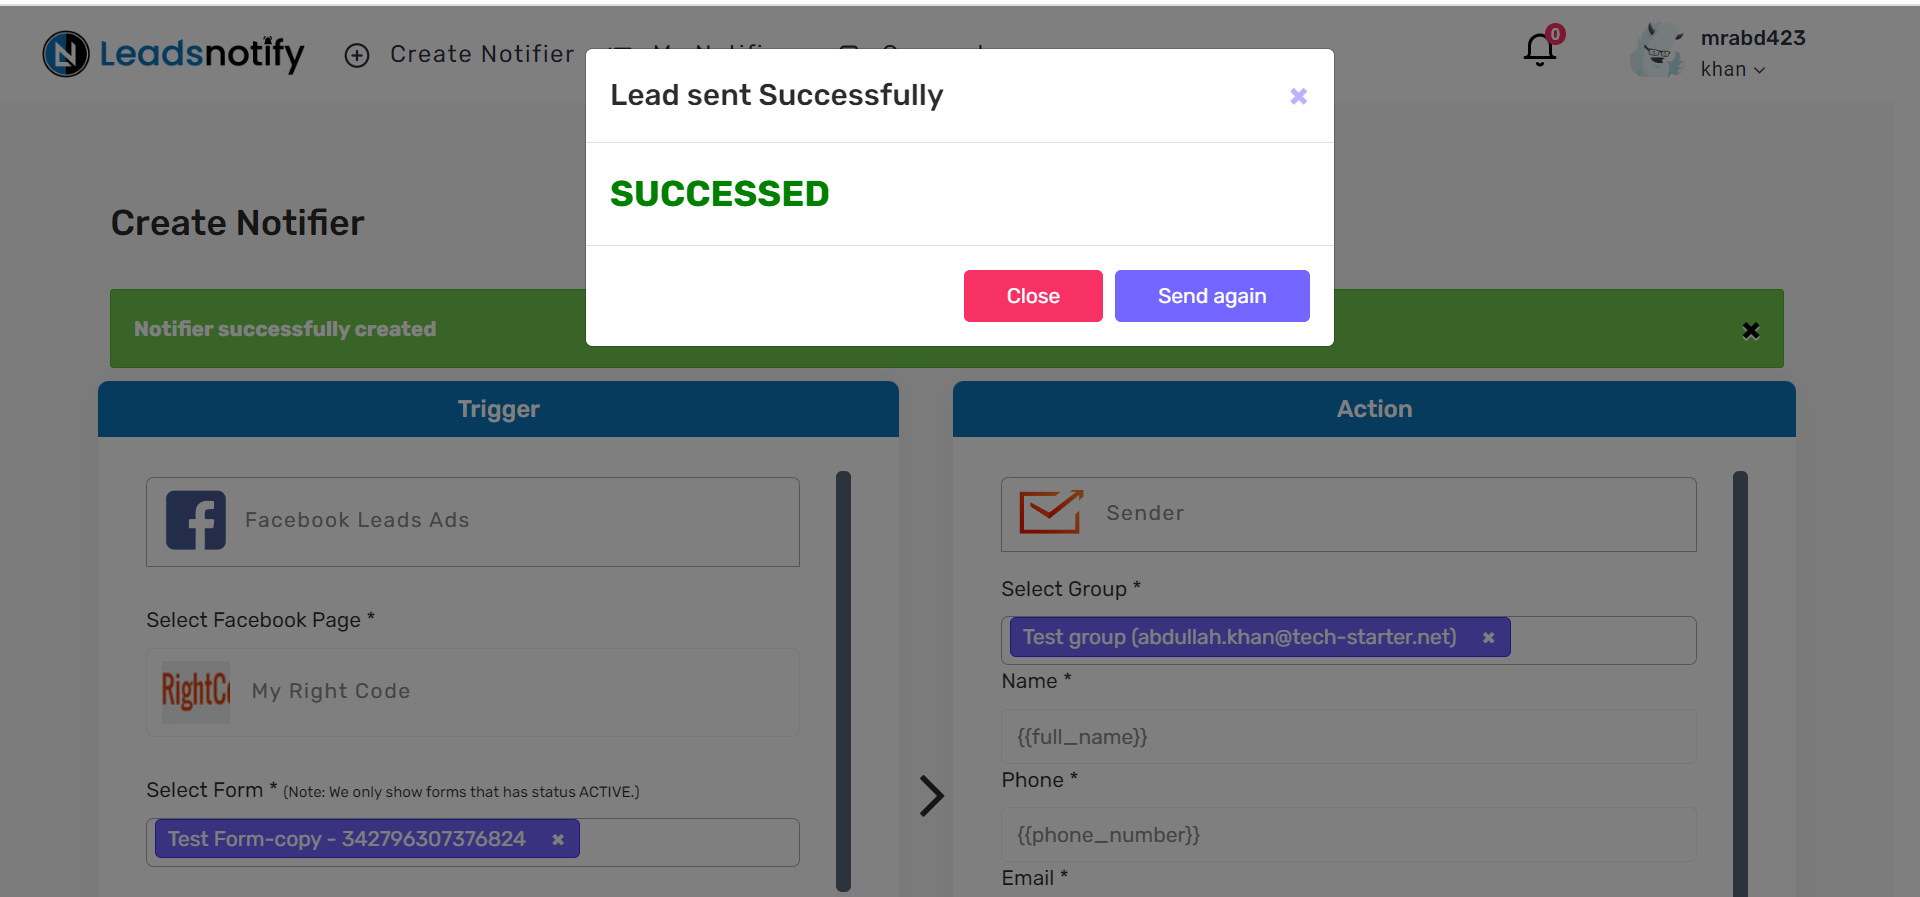
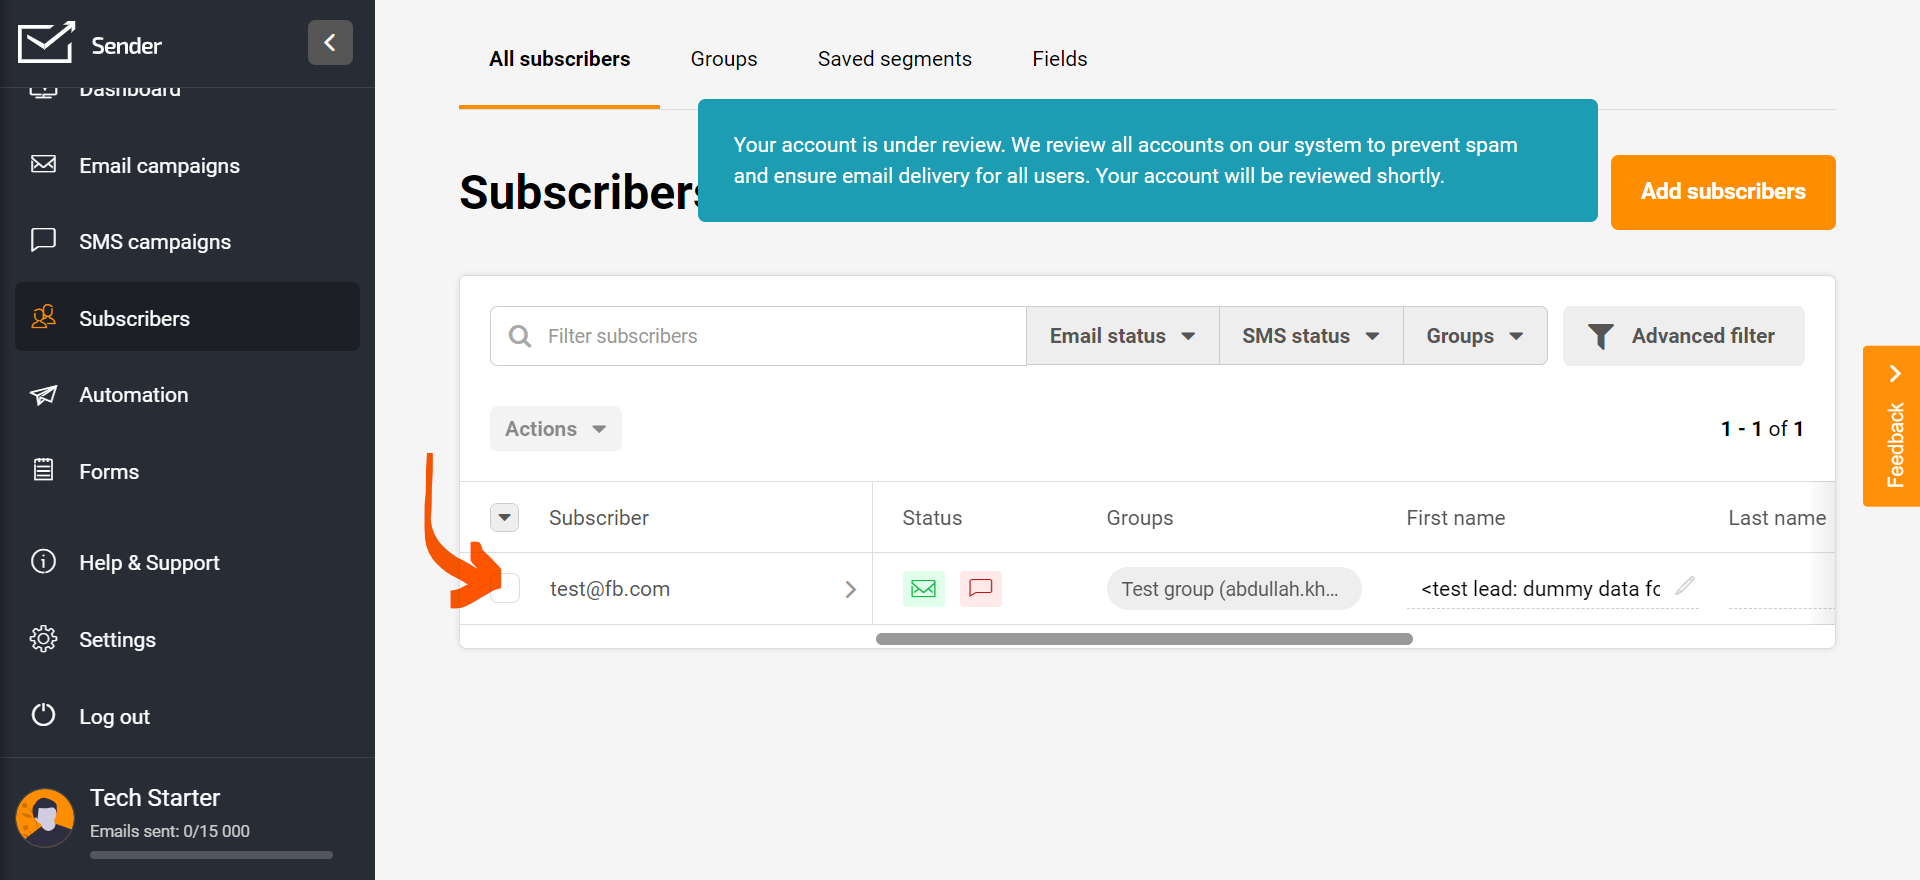
After the test is successful, open your Sender account and check your subscriber list. The test lead should appear in the Sender group you selected during the configuration.
How the Facebook Lead Ads to Sender Integration Works
Once your LeadsNotify notifier is active, the workflow is straightforward:
- A prospect submits your Facebook Lead Ad form.
- LeadsNotify receives the new Facebook lead.
- LeadsNotify sends the lead information to your connected Sender account.
- The lead information is mapped to the appropriate Sender subscriber fields.
- The subscriber is added to the Sender group you selected.
This automated workflow eliminates the need to repeatedly export Facebook leads and manually import them into Sender.
Why Connect Facebook Lead Ads to Sender?
Facebook Lead Ads make it easy to collect prospect information, but manually transferring those leads into your email marketing platform can slow down your workflow. Connecting Facebook Lead Ads to Sender helps automate the process.
- Reduce manual work: New Facebook leads can be transferred automatically.
- Save time: You don’t need to repeatedly export and import lead data.
- Keep subscribers organized: Leads can be added to the Sender group you select.
- Improve follow-up: New prospects can enter your existing Sender workflows sooner.
- Reduce data-entry errors: Facebook form fields can be mapped directly to Sender subscriber fields.
Frequently Asked Questions
Can I connect Facebook Lead Ads to Sender?
Yes. LeadsNotify allows you to connect Facebook Lead Ads with Sender and automatically send new leads from your selected Facebook Instant Forms to your Sender account.
Do I need a Sender API access token?
Yes. The Sender integration requires an API access token so LeadsNotify can connect to your Sender account and transfer your Facebook lead information.
Can I choose which Facebook lead form to connect to Sender?
Yes. During the setup process, you can select the Facebook Page and Instant Forms you want to connect. LeadsNotify will retrieve the available fields from the selected forms.
Can Facebook leads be sent to Sender automatically?
Yes. Once the integration is configured and tested, new leads submitted through your connected Facebook forms can be sent automatically to Sender.
Can I map Facebook lead fields to Sender custom fields?
Yes. LeadsNotify retrieves the available Sender fields and allows you to map them to the corresponding fields from your Facebook Instant Forms.
How do I test the Facebook Lead Ads and Sender integration?
After completing the configuration, click Save and use the test lead option provided by LeadsNotify. A successful response confirms that the integration is working correctly. You can also check your Sender subscriber list to verify that the test lead was created.
What should I do if my Facebook leads aren’t reaching Sender?
First, verify that the correct Facebook Page and Instant Form are selected. Then check your Sender API access token, selected Sender group, and field mapping. Send another test lead after checking the configuration. If the issue continues, contact LeadsNotify support for assistance.
Start Sending Facebook Leads to Sender
Connecting Facebook Lead Ads to Sender can help you automate the process of moving new prospects into your email marketing workflow. With LeadsNotify, you can connect your Facebook forms, authenticate your Sender account with an API access token, select a subscriber group, map your lead fields, and test the integration in a few simple steps.
If you want to automate your Facebook lead workflow and send new leads to Sender without manual exports and imports, get started with LeadsNotify.
If you face any issues with your integration, feel free to contact us at support@leadsnotify.com.
Set up a free notification in a few minutes.

Abdullah Khan
A Technical Lead and backend architect with 10+ years of experience building reliable, high-scale APIs and automation systems. At LeadsNotify, he helps build and maintain the integrations that route Facebook and LinkedIn leads to email, CRMs, and marketing tools in real time.
Connect on LinkedIn ↗