Missing Facebook leads because your team isn’t notified instantly?
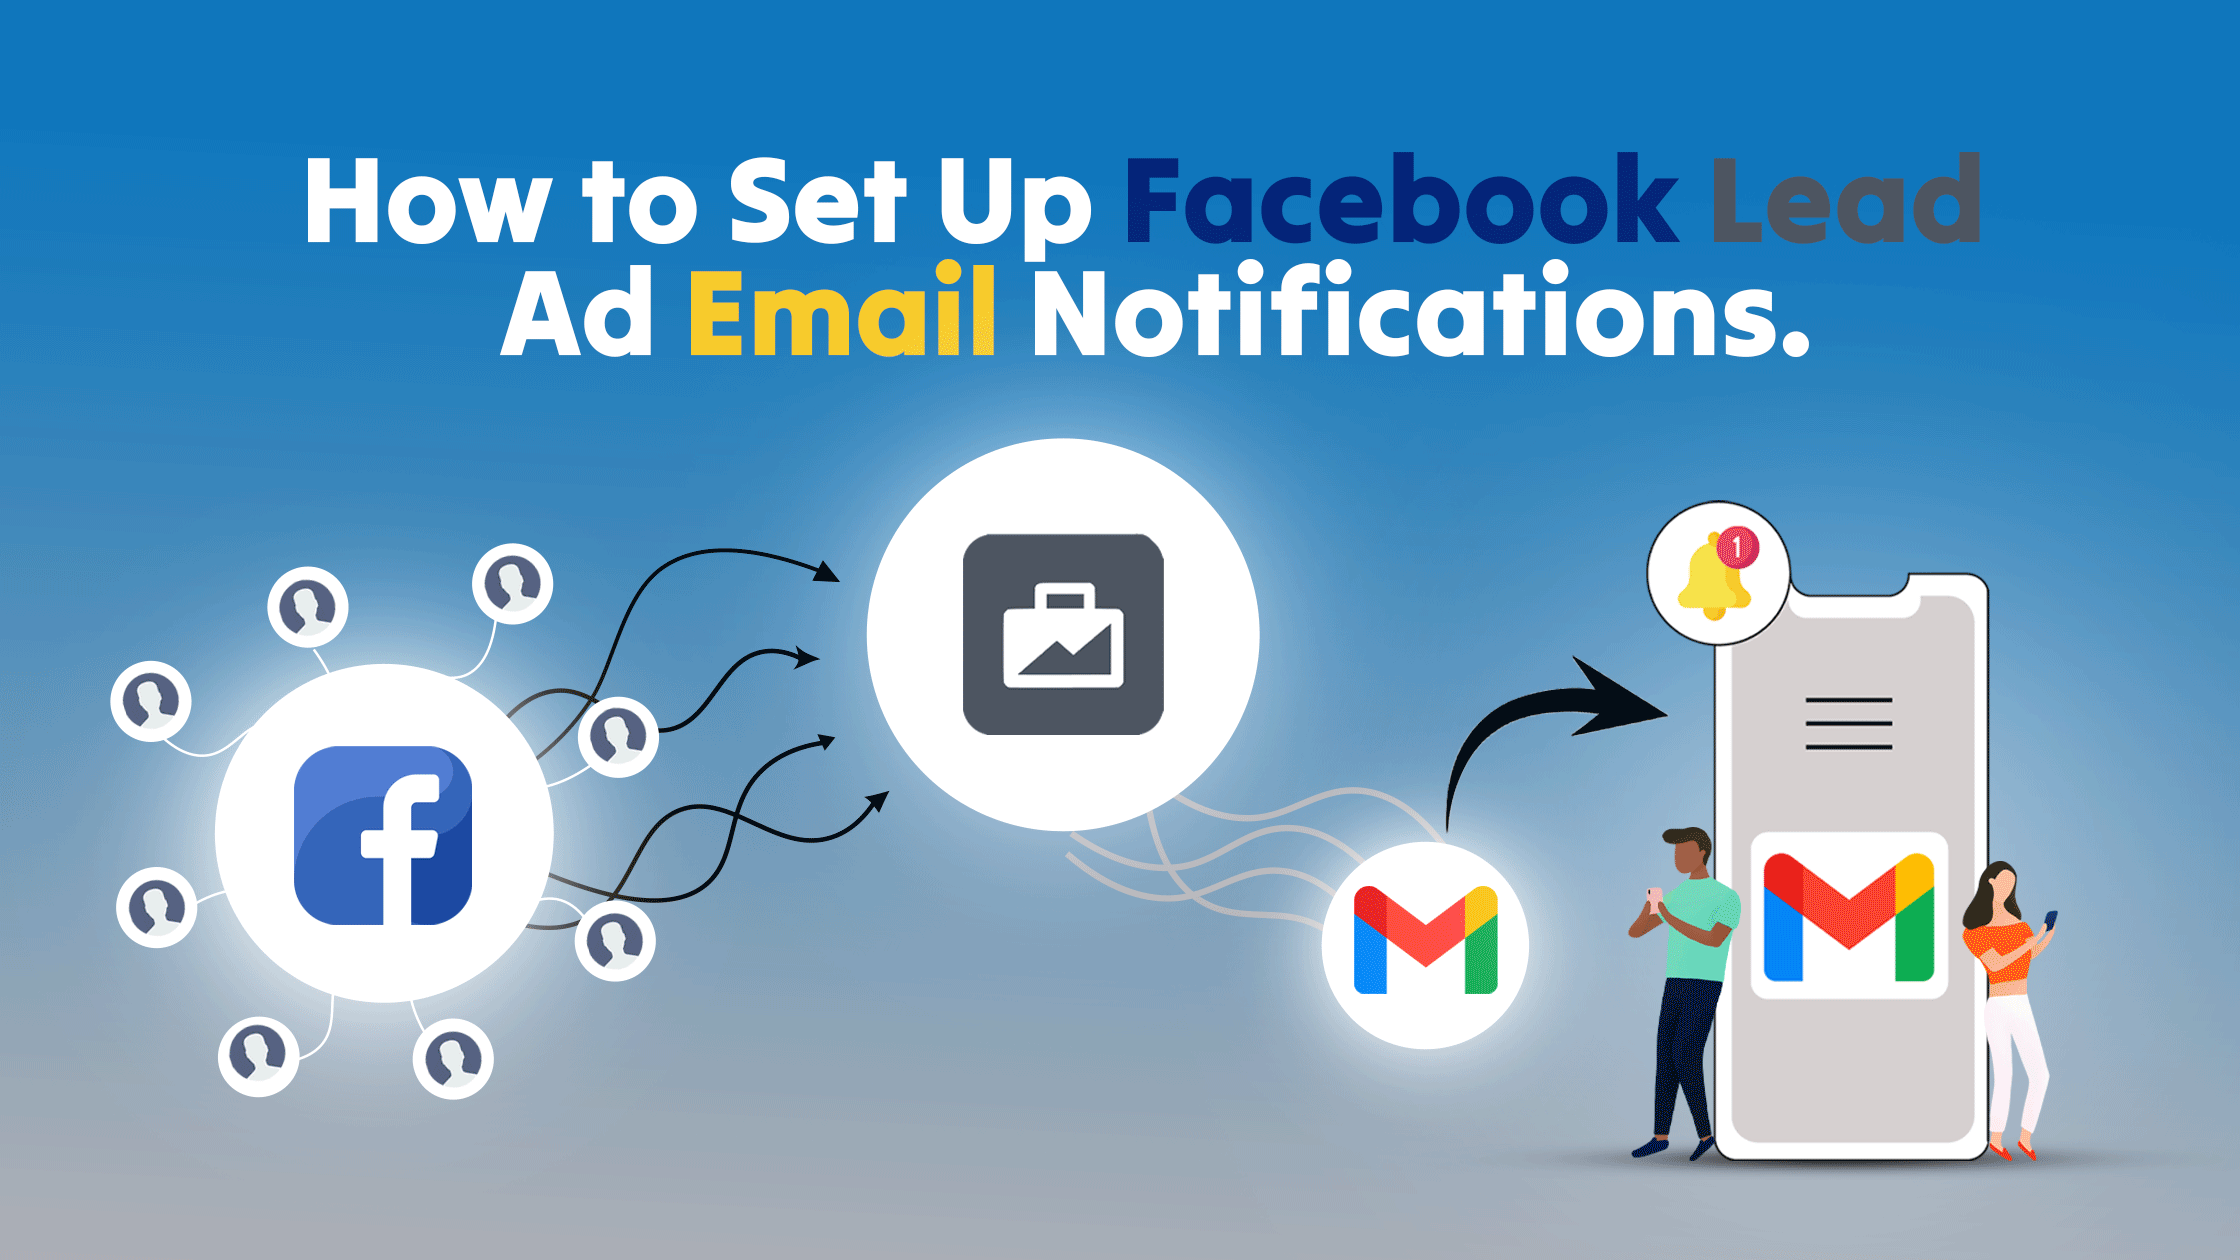
LeadsNotify helps you automatically send Facebook Lead Ads to your email, Gmail, CRM, or Google Sheets in real-time — without coding.
Instead of manually checking Facebook for new leads, you can receive instant email notifications whenever a lead submits your form.
In this guide, we’ll show you how to set up Facebook Lead Ads email notifications in just a few minutes using LeadsNotify.
LeadsNotify: Simple Solution for Facebook Lead Ad Email Notifications
With LeadsNotify, you can effortlessly set up a process to receive your Facebook leads as email notifications. It provides unlimited leads notification almost instantly to email and other CRM software. Don’t worry if you are looking for a free solution because it provides a basic plan that allow you to send leads with up to 1 Facebook page with unlimited forms and notifications.
Register you account with leadsnotify and follow the steps mentioned below.
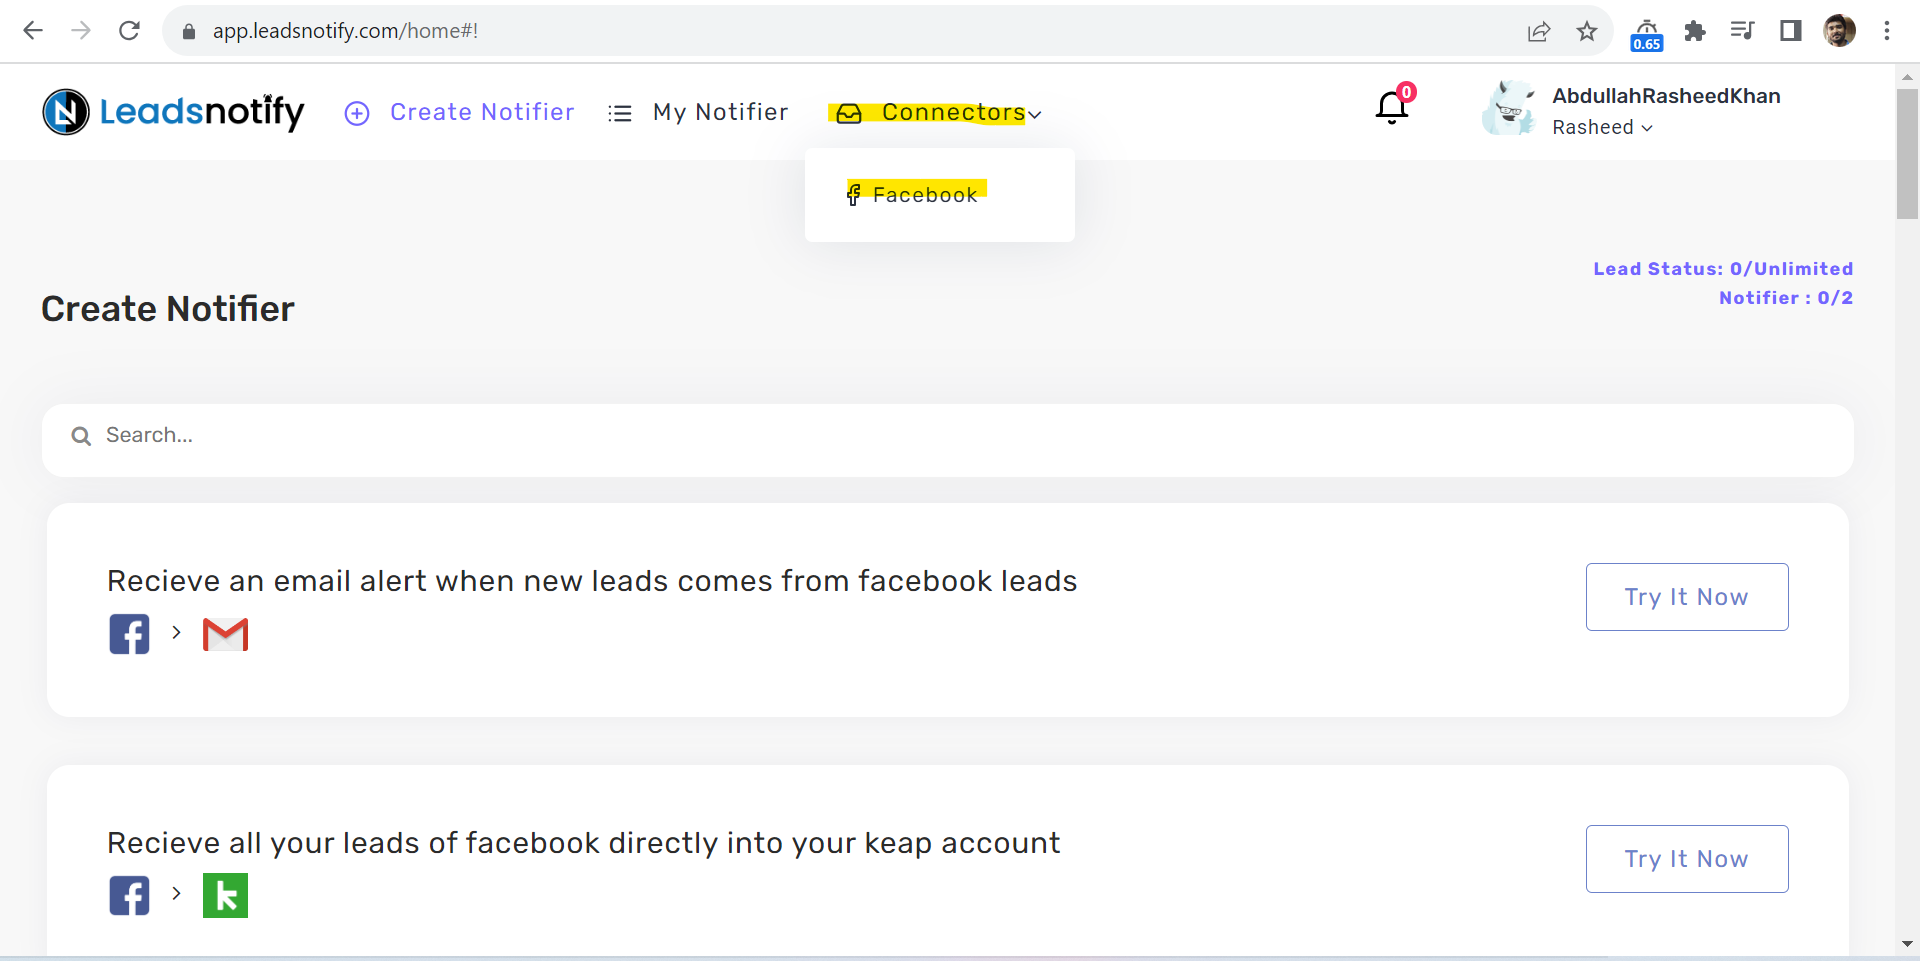
Step 1
Login into Leads Notify portal and after login you will see the page like below. You would need to click Connectors and inside that please click on Facebook
Step 2
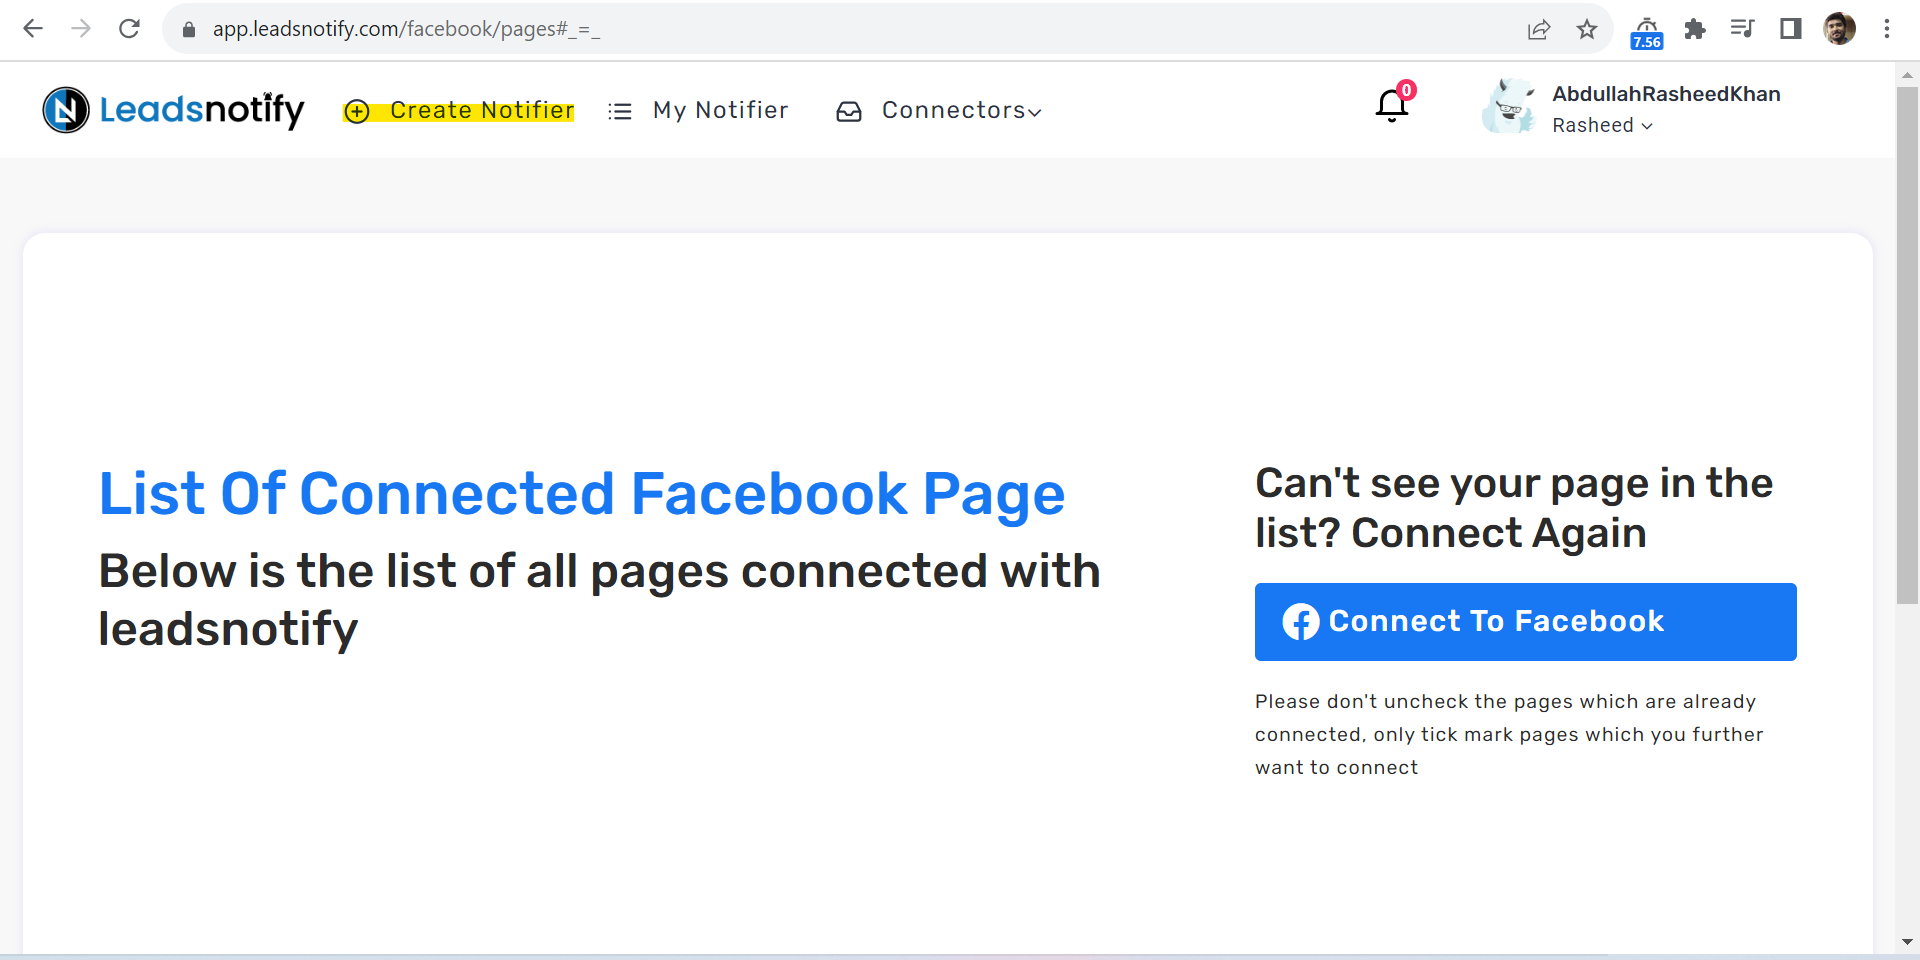
It will redirect you to the page where you will be asked to connect your Facebook. When you click on the Blue button “Connect To Facebook” it will redirect you to Facebook auth page.
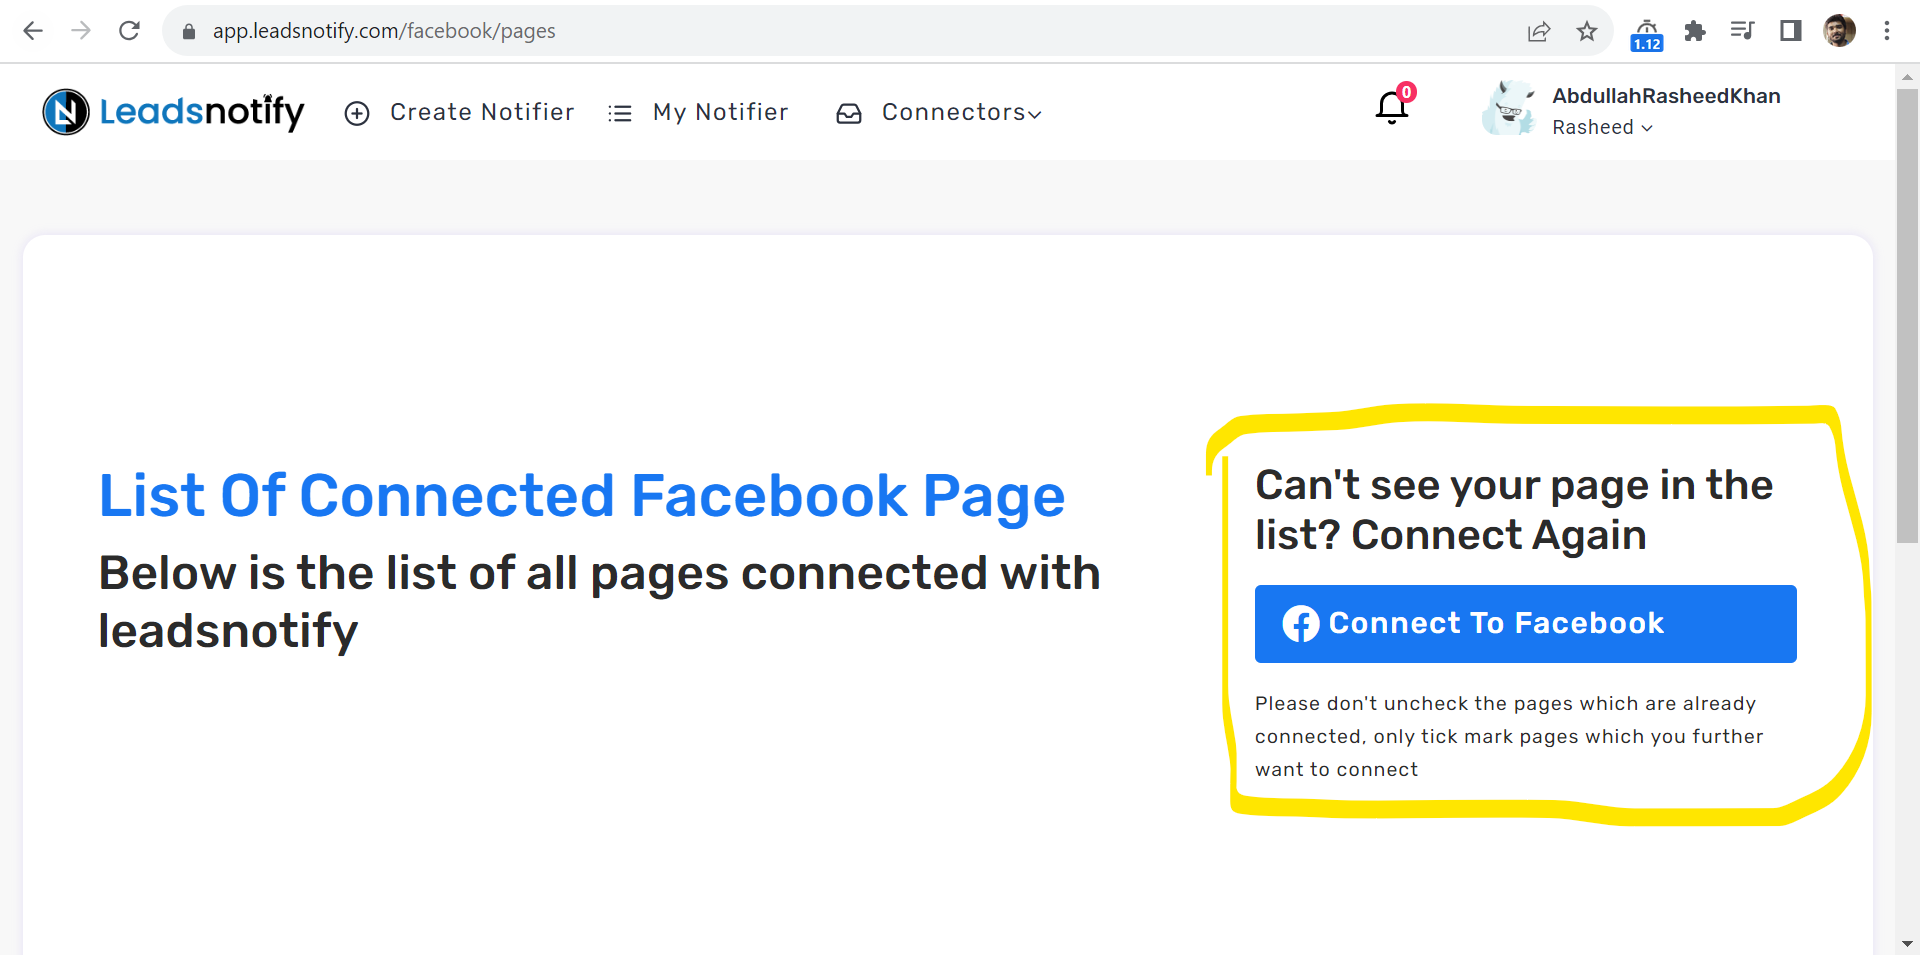
Facebook popup will show all of your Facebook pages in the box, You will be able to select the pages you want to connect with the app.
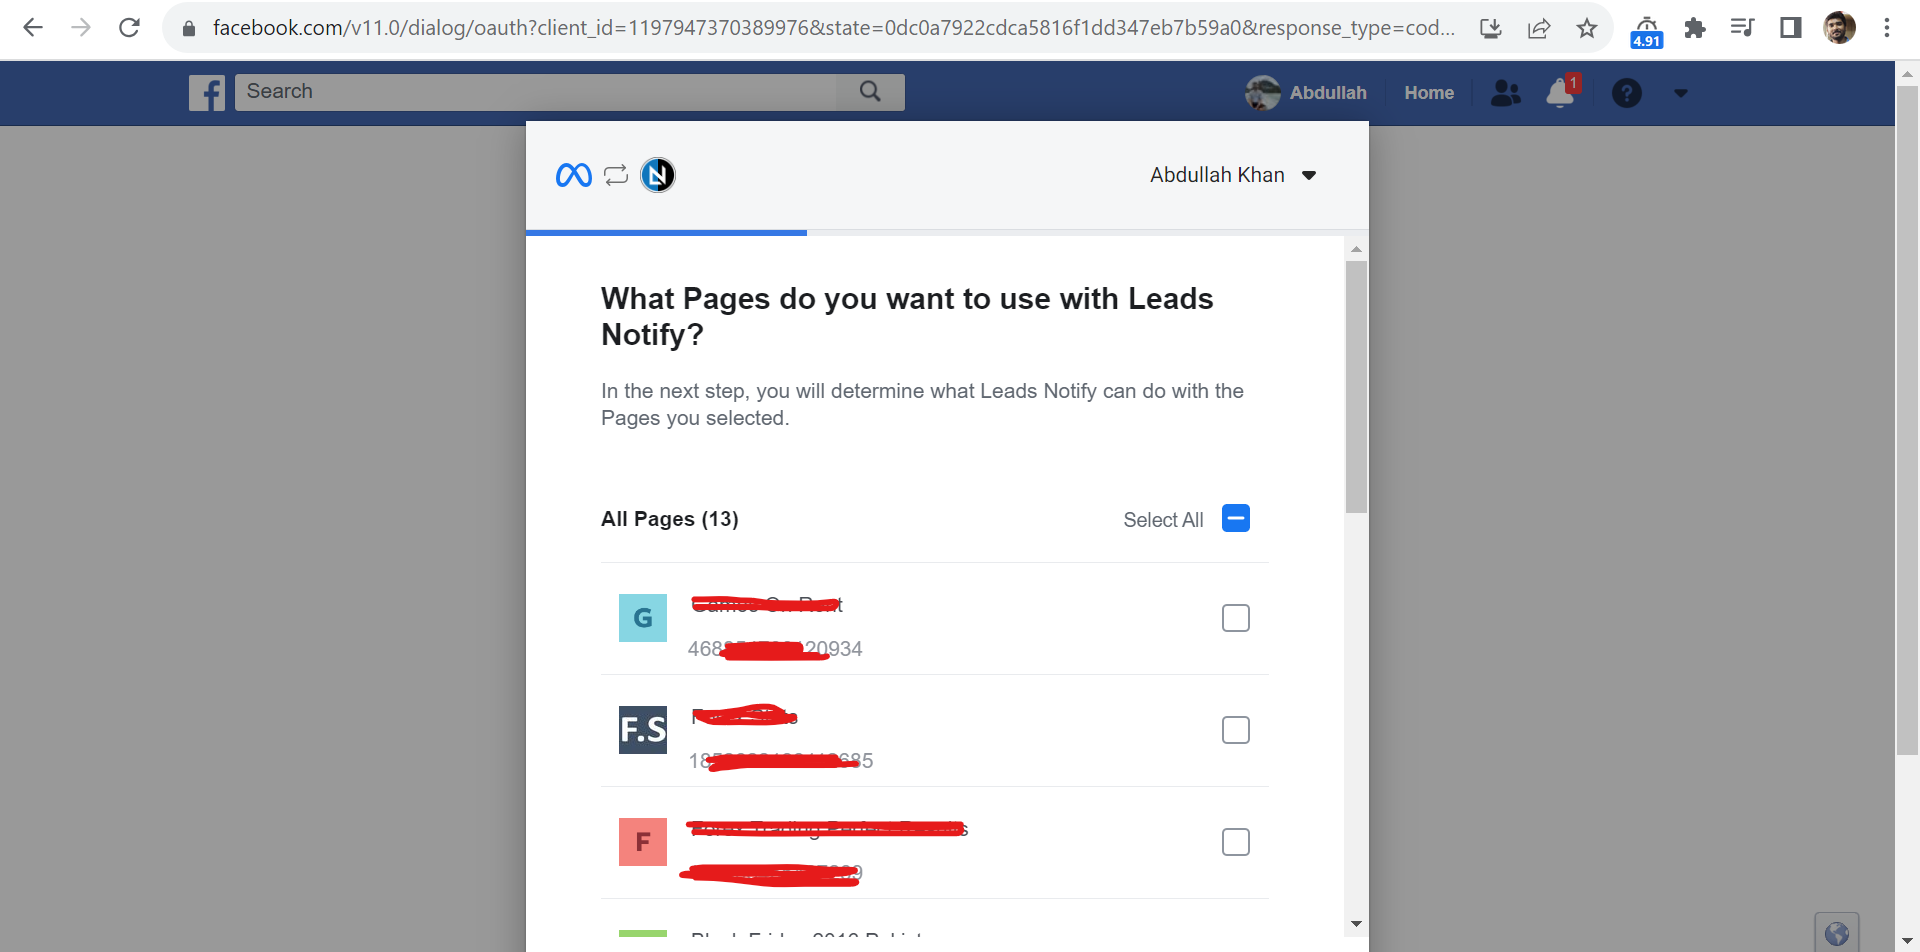
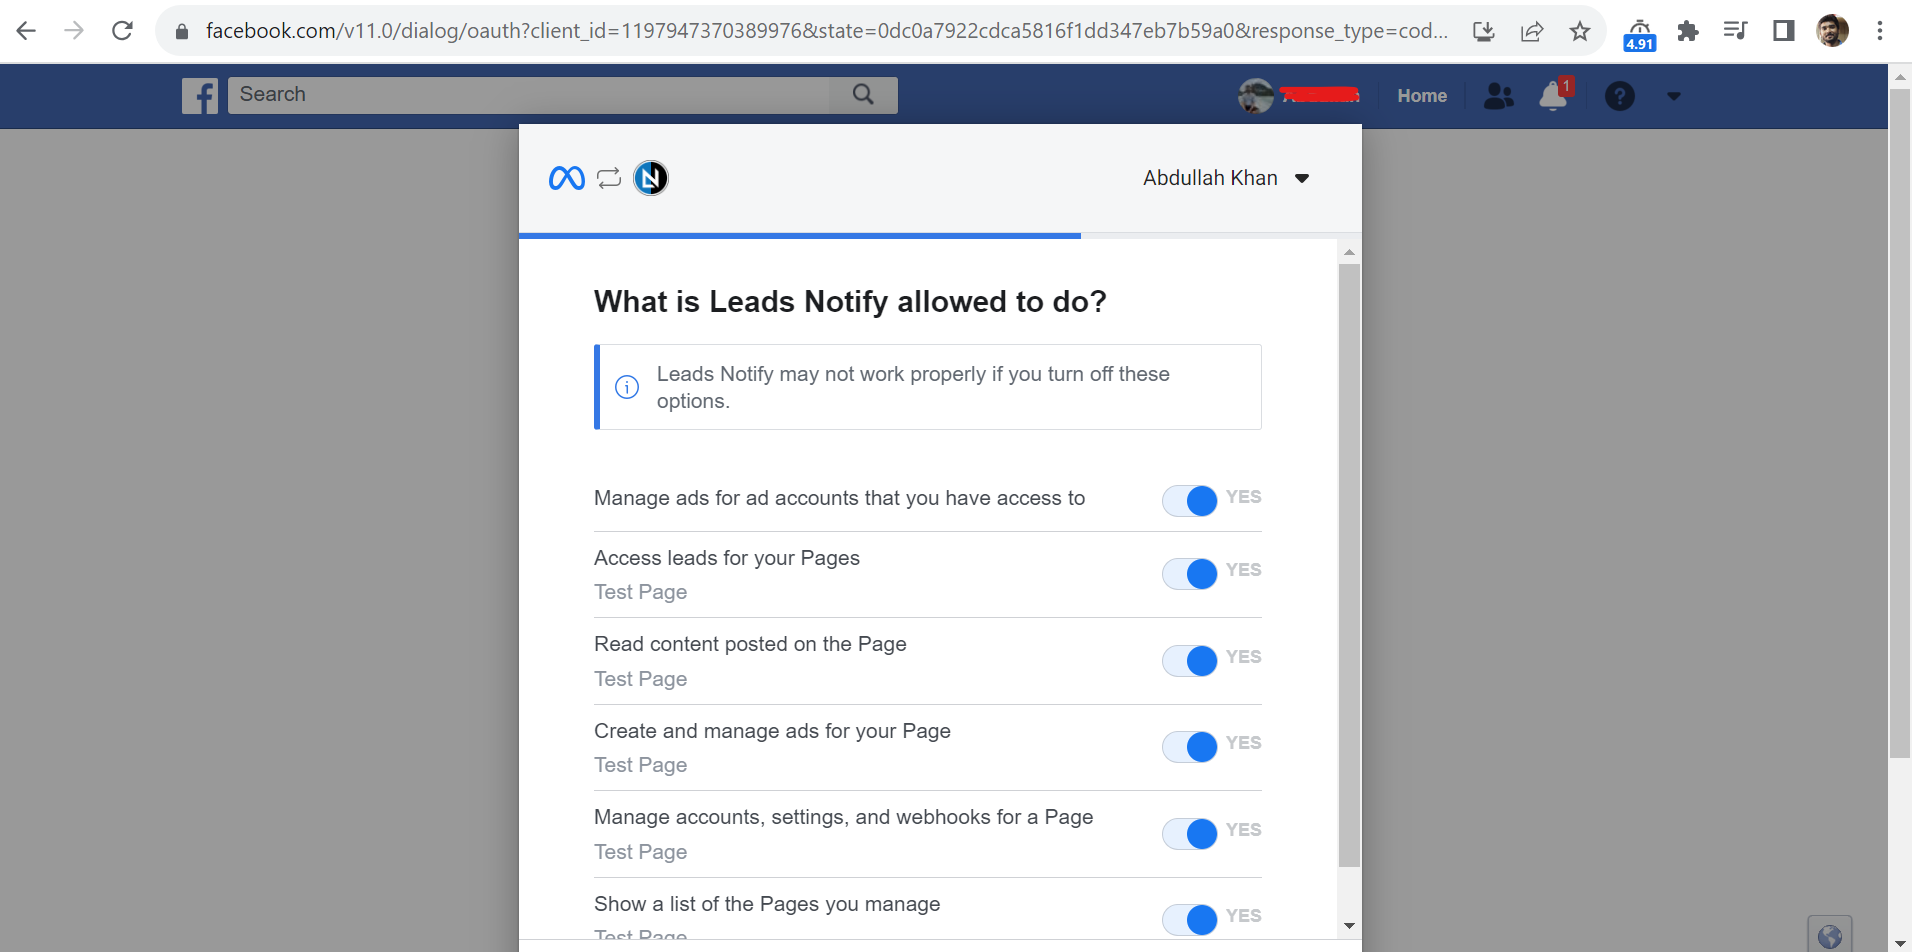
You have to give the right permissions to the app so it can send the leads as email alerts. Facebook will ask for your permission, like you can see in the picture below. Make sure you say “yes” to all the permissions, otherwise LeadsNotify won’t be able to send you new leads through email.
After you click on Done it will redirect back to LeadsNotify portal and it will show the Facebook page status as Connected like below
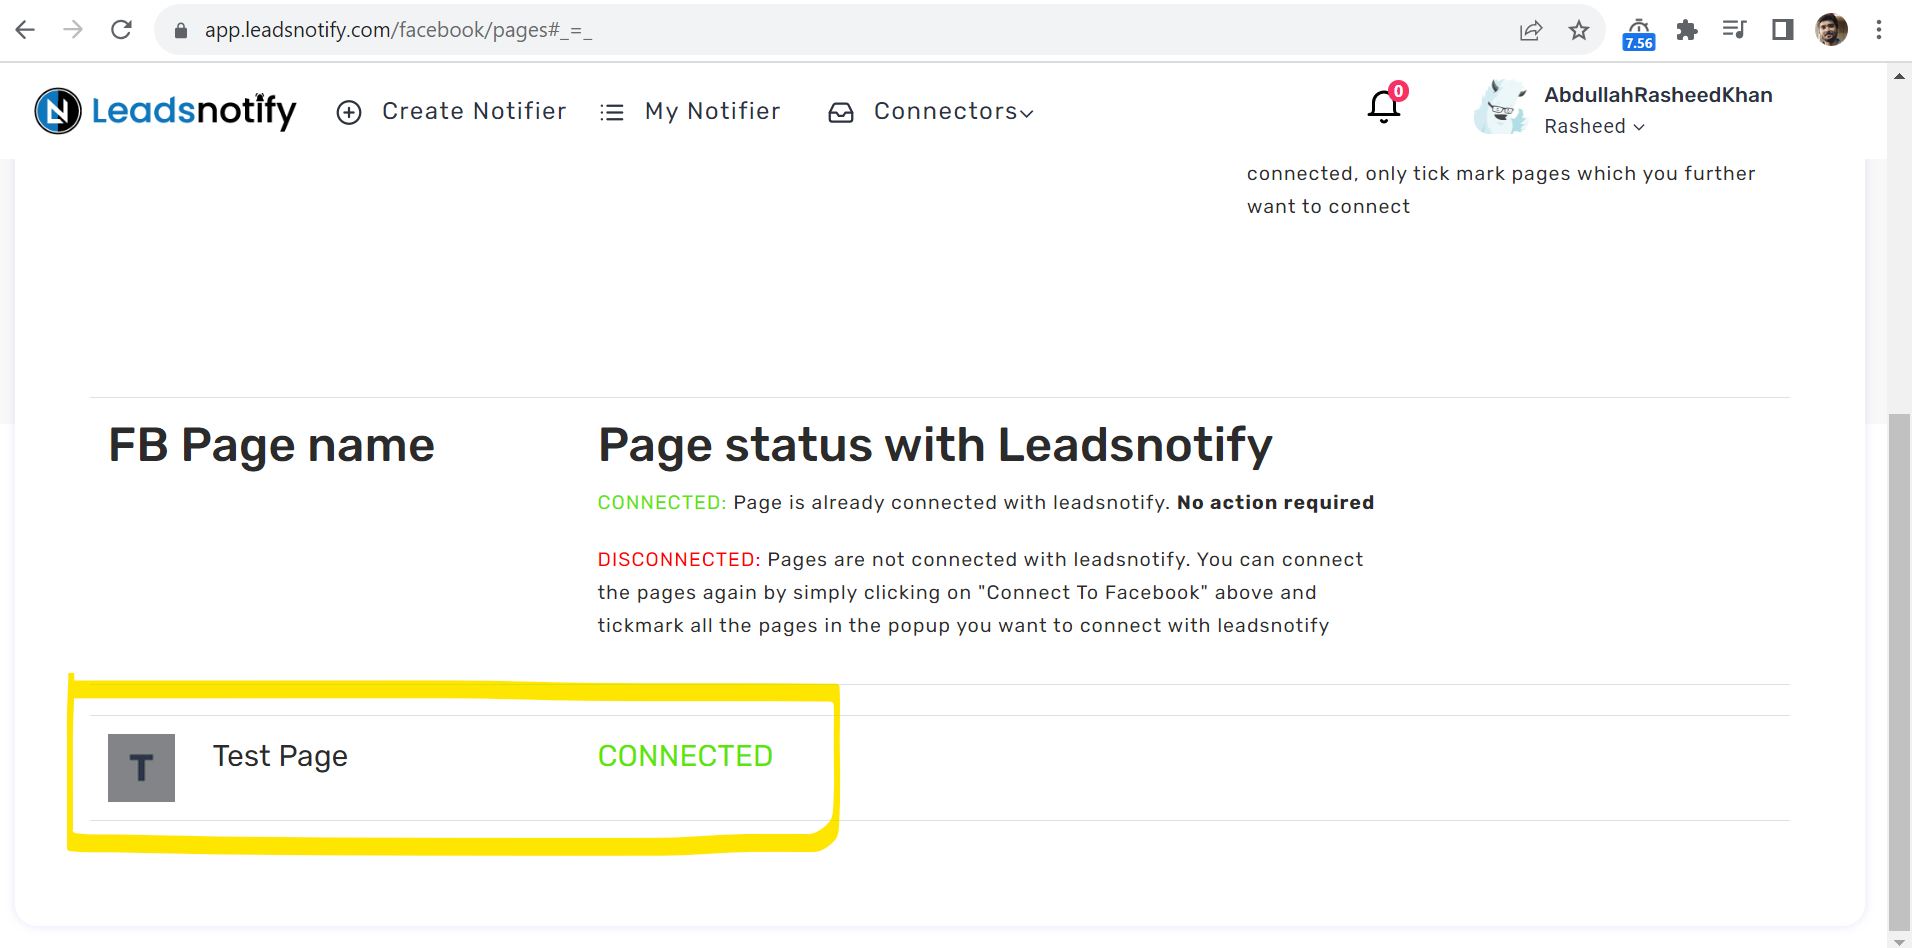
In my case it’s Test Page but in your case it will show your real Facebook page name.
Step 3
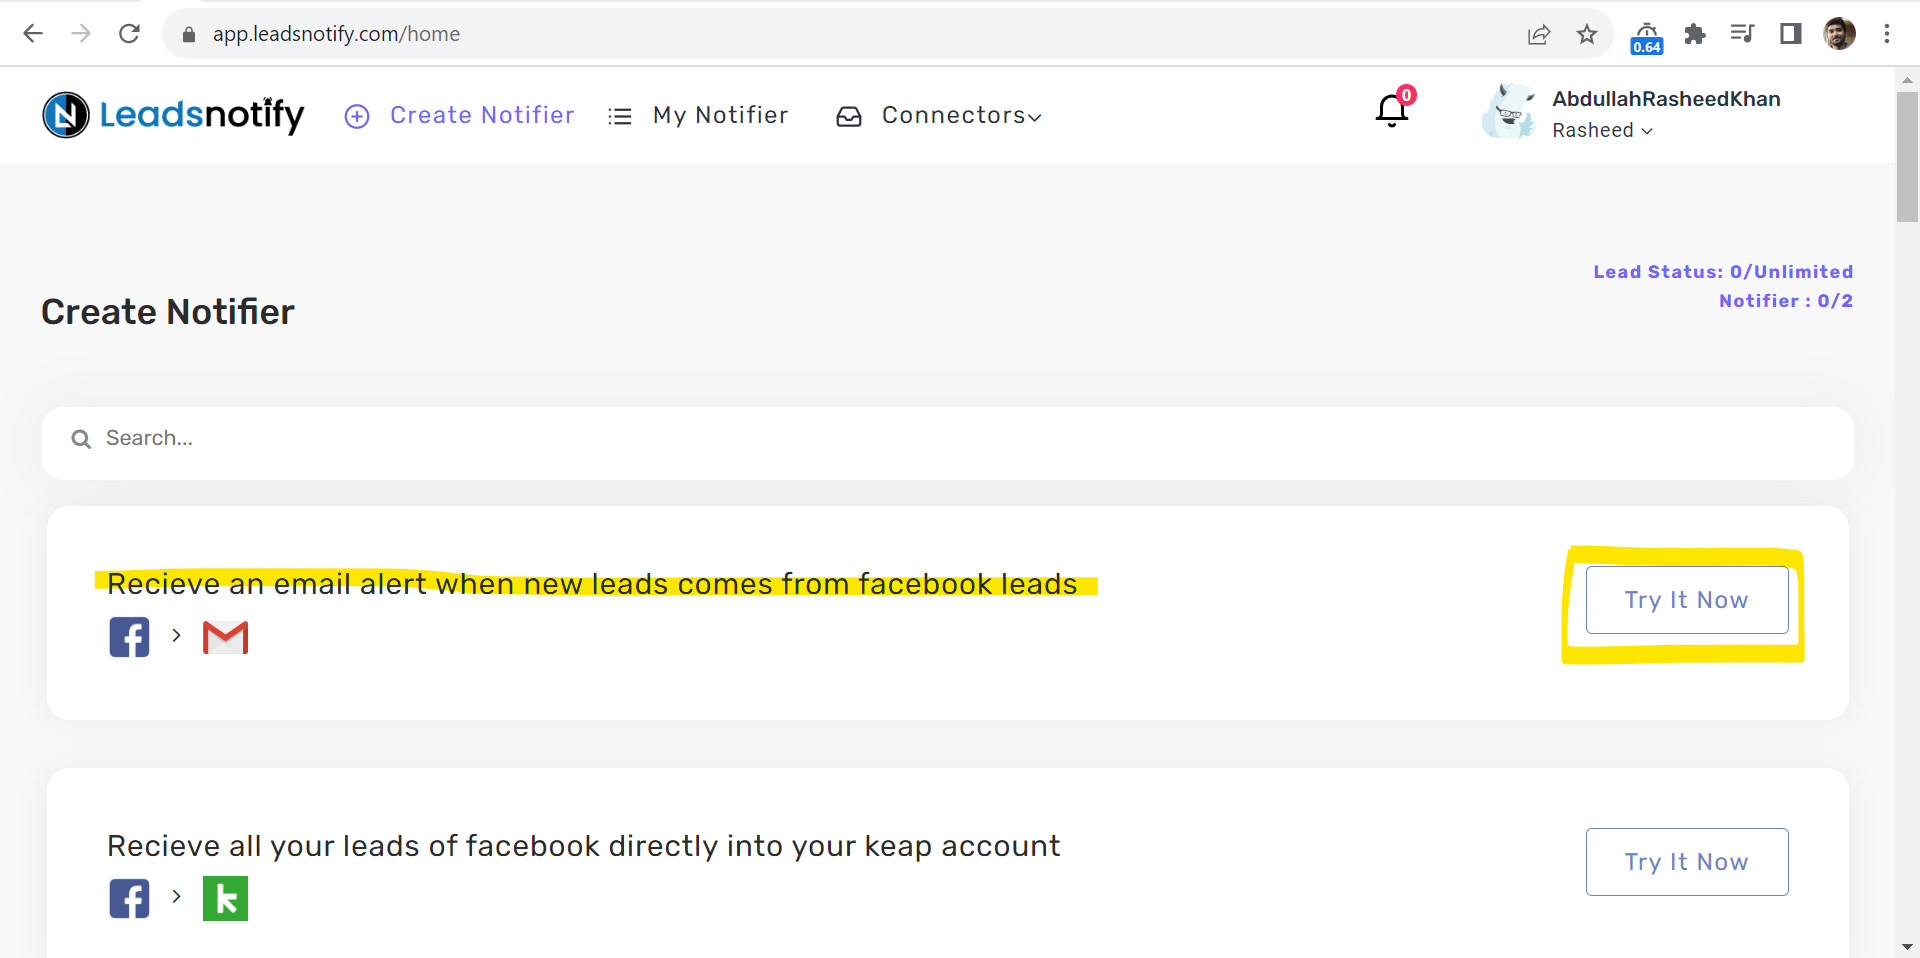
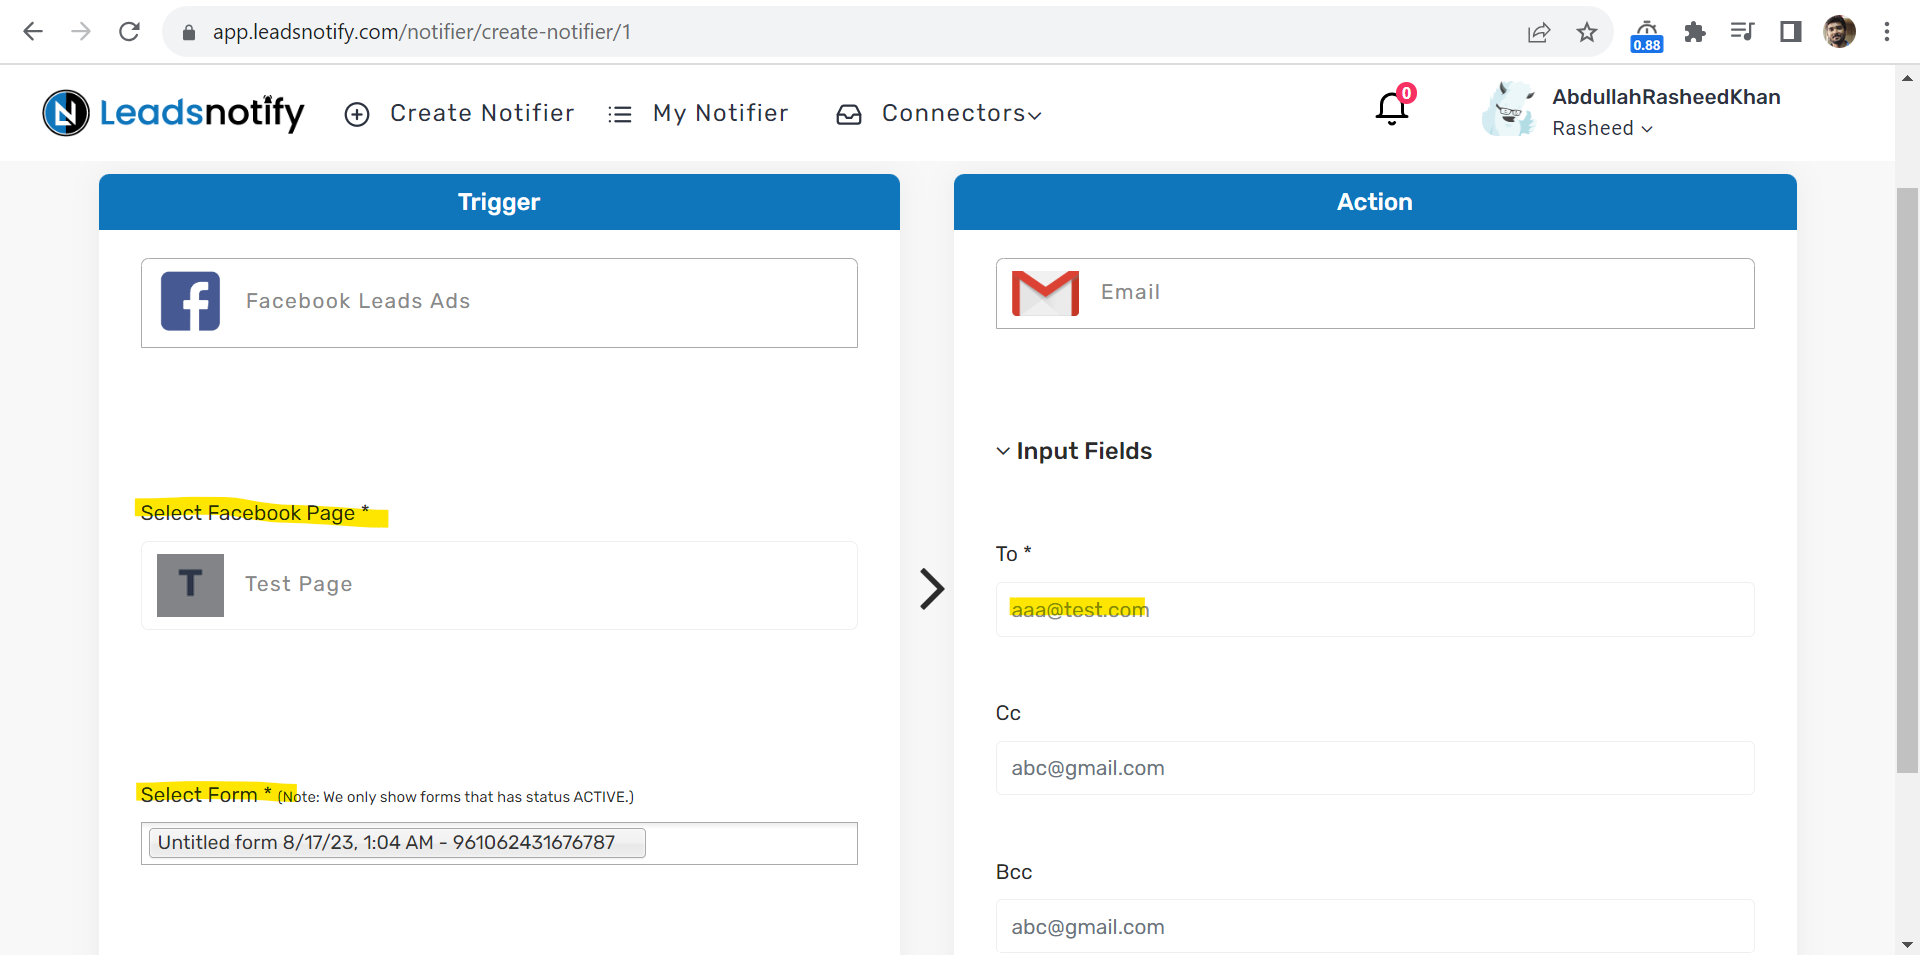
After successfully connecting your Facebook page now we need to create a notifier which will actually help you to get your leads on email real-time. In the header of the app you can see Create Notifier option.
After clicking it will start showing you many integration options but we need to select only the email integration.
Step 4
This is the main step which needs attention. Here are few different inputs which we need to set
- Select Facebook Page ( Required )
- Select Page Forms ( Required )
- Email To ( Required )
- Email CC ( Optional )
- Email BCC ( Optional )

Simply we will select and set all the relevant fields. There is one thing which is pretty good in the system that you can select multiple forms without any limit. So in just one connection/Notifier you will be able to get the leads from all instant forms related to that page.
Here is our Notifier with all the information.
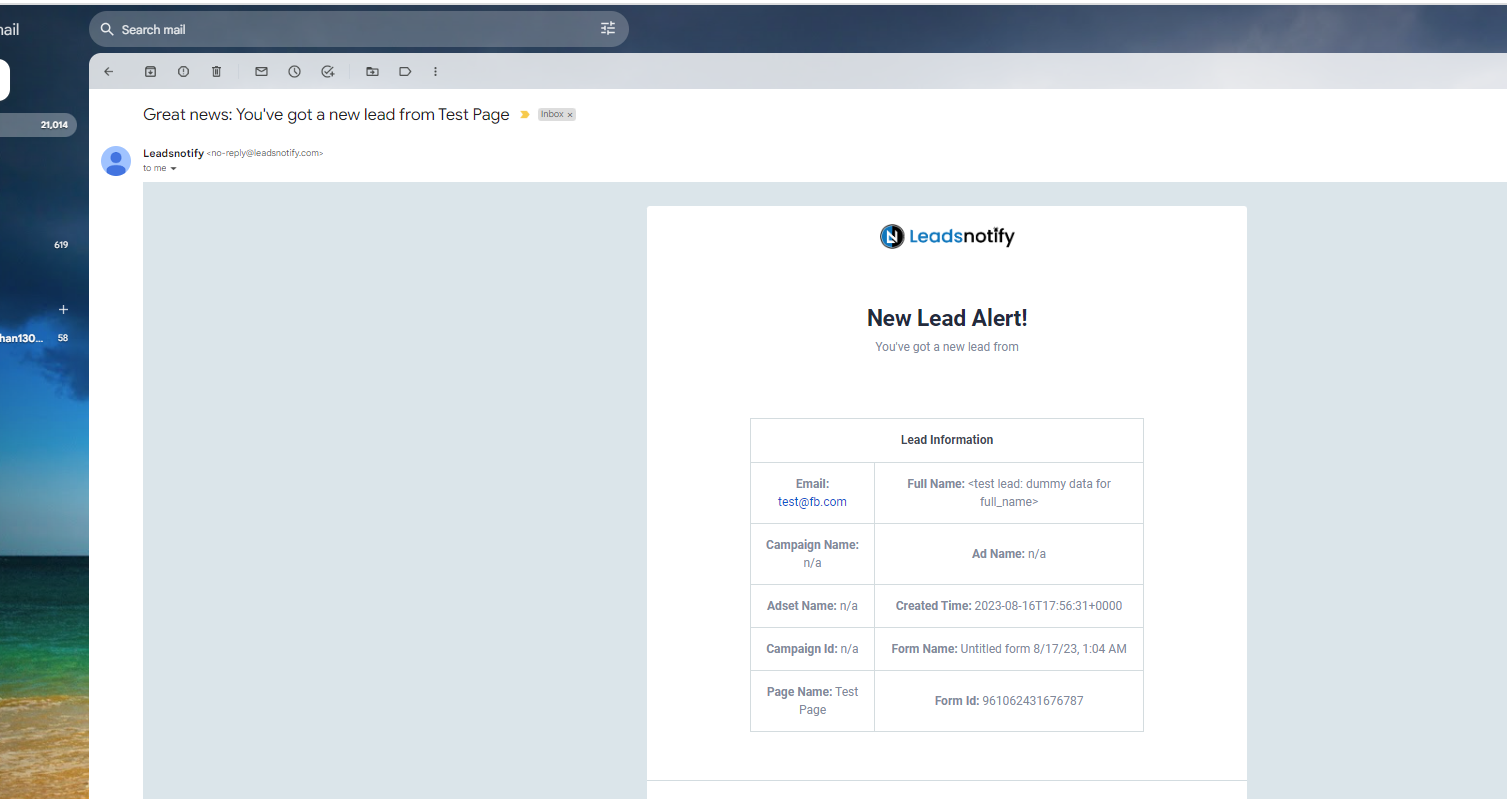
Everything looks perfect. Now we will finally create this Notifier. You will see a success message when it’s saved and ready to use. There is a small button called Test Notifier which will help you to send a test lead to make sure system is working fine.
In our case we got our dummy lead in the email address
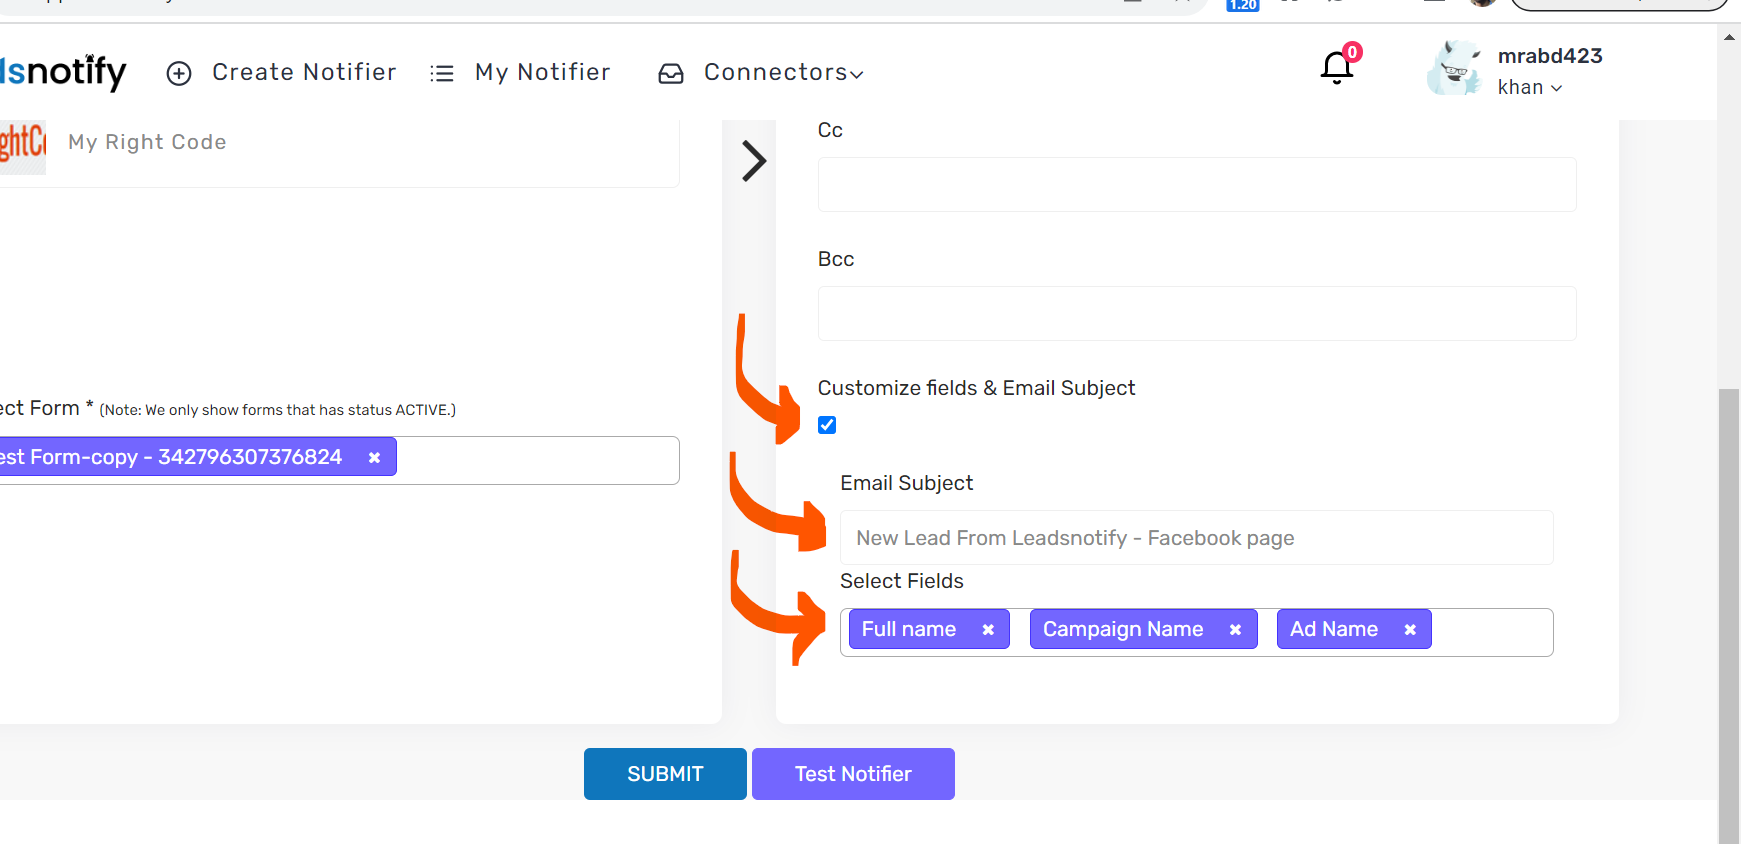
Additional Customized Params:
Following things can be customized
- Facebook Instant Form fields customize
- Customized Email Subject
You can set what exactly the fields you would like to get into the Email notification with Subject name. Following screen shot for your reference.
Last Updated on May 16, 2026 by ABD K