
How to Send Facebook Lead Ads to ActiveCampaign Automatically
Facebook Lead Ads make it easy for people to submit their details without leaving Facebook or Instagram. However, manually downloading lead files can delay follow-up and create repetitive work for your team. https://youtu.be/qUI-rWXm_oM LeadsNotify connects your Facebook Instant Forms to ActiveCampaign and…

Table of contents
Facebook Lead Ads make it easy for people to submit their details without leaving Facebook or Instagram. However, manually downloading lead files can delay follow-up and create repetitive work for your team.
LeadsNotify connects your Facebook Instant Forms to ActiveCampaign and synchronizes new leads automatically. When someone submits a selected form, LeadsNotify creates or updates the corresponding ActiveCampaign contact, adds the contact to your chosen list and sends the supported fields you mapped.
No custom code or manual CSV export is required.
What does the Facebook Lead Ads to ActiveCampaign integration do?
When a new Facebook lead is received, LeadsNotify can:
- Monitor one or more selected Facebook Instant Forms.
- Create a new ActiveCampaign contact using the lead’s email address.
- Update the matching contact when that email address already exists in ActiveCampaign.
- Send the contact’s first name, last name, email address and optional phone number.
- Add the contact to the ActiveCampaign list selected in the notifier.
- Map compatible Facebook form answers to ActiveCampaign custom fields.
This gives your sales and marketing team access to new lead information without waiting for someone to download and import a spreadsheet.
What you need before starting
- A LeadsNotify account.
- A Facebook Page with at least one published lead form.
- Permission to access the Facebook Page and its leads.
- An ActiveCampaign account with API access.
- At least one contact list in ActiveCampaign.
- An email field in the Facebook lead form.
The email address is required because it is used to create or update the corresponding contact in ActiveCampaign.
How to connect Facebook Lead Ads to ActiveCampaign
Step 1: Connect your Facebook Page
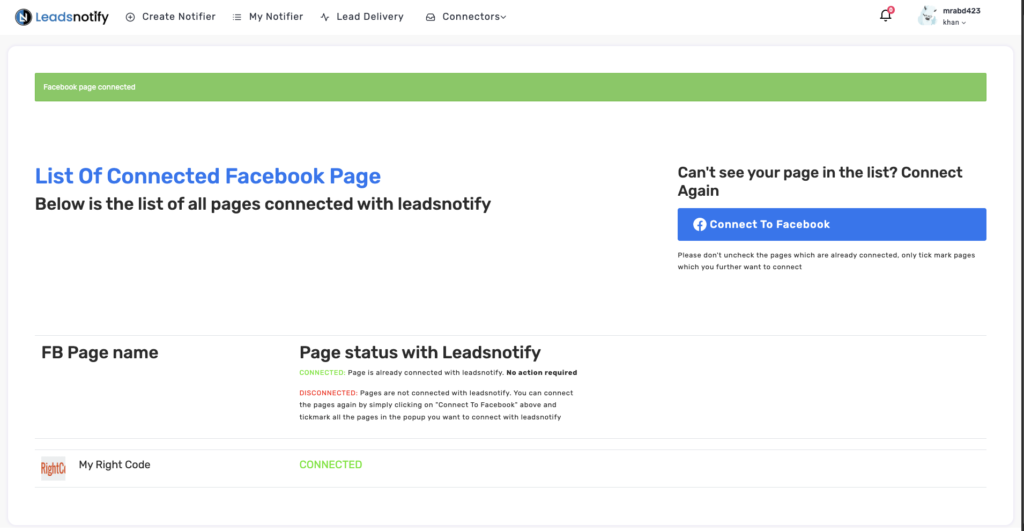
Sign in to LeadsNotify and connect the Facebook account that manages your Page. Select the Page whose leads you want to send to ActiveCampaign and approve the permissions required to access its forms and lead submissions.
If your Page is not connected yet, follow our guide to connecting and configuring Facebook Pages in LeadsNotify.
Step 2: Select your Facebook lead forms
Choose the Facebook Instant Forms you want the notifier to monitor. You can select multiple active forms when they should all send leads through the same notifier.
If a form is missing, confirm that it belongs to the selected Page, is active and is available to the Facebook account connected to LeadsNotify.
Step 3: Choose ActiveCampaign
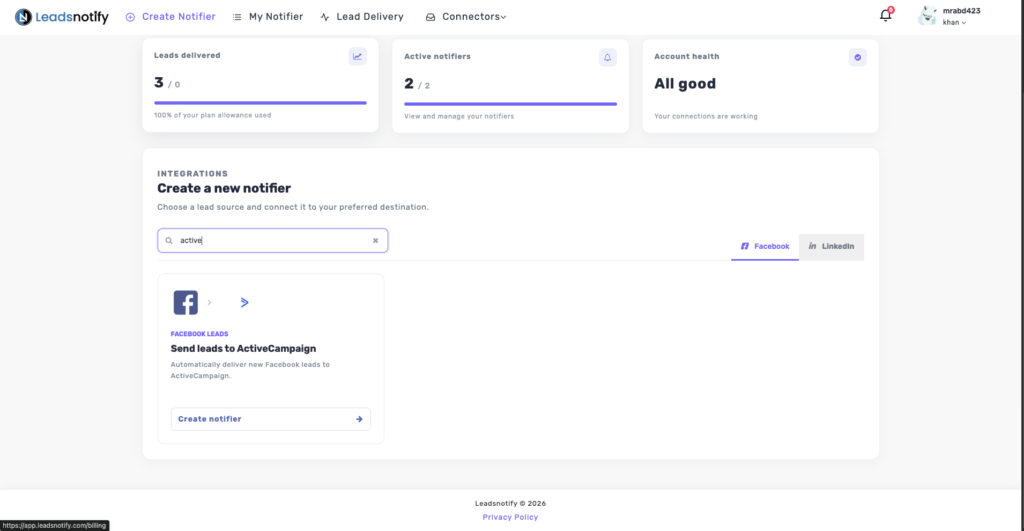
Open the notifier or integration list in LeadsNotify, locate ActiveCampaign and start its setup.
Step 4: Find your ActiveCampaign API URL and key
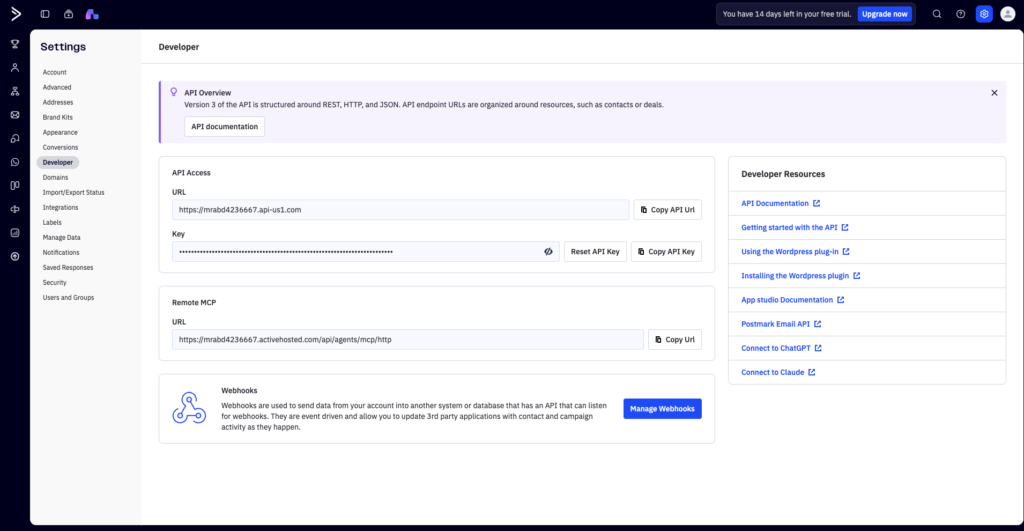
In ActiveCampaign, open Settings → Developer. Copy the API URL and API key displayed in your account. ActiveCampaign also explains this process in its official API setup guide.
Important: Treat the API key like a password. Do not publish it in screenshots, emails or support messages.
Step 5: Connect ActiveCampaign to LeadsNotify
Return to LeadsNotify and enter the ActiveCampaign API URL and API key. LeadsNotify verifies the credentials and retrieves the available ActiveCampaign lists and compatible contact fields.
If the credentials cannot be verified, copy both values again from ActiveCampaign and check that no spaces were added before or after them.
Step 6: Select the destination list
Select the ActiveCampaign list that should receive contacts from this notifier. Each notifier supports one destination list. If leads need to follow a separate Page, form or list workflow, create another notifier for that destination.
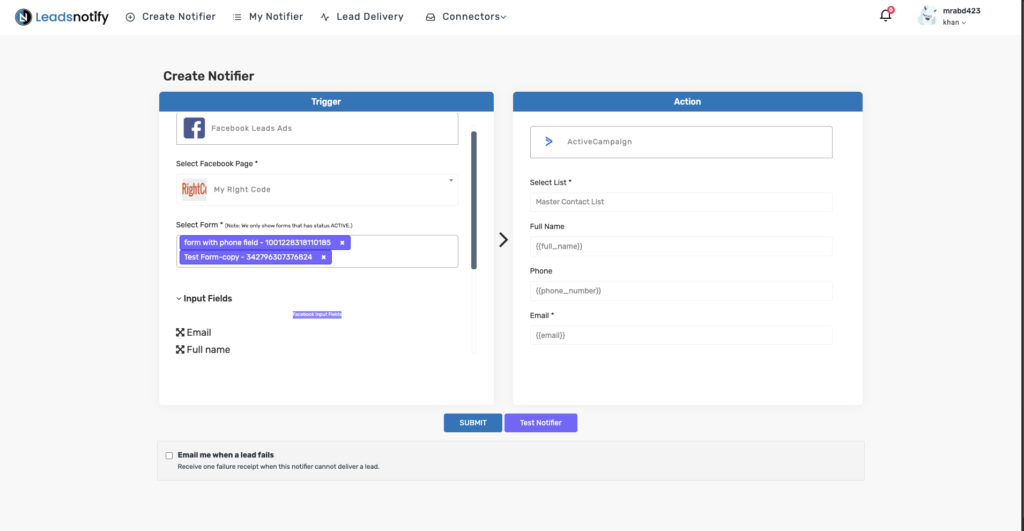
Step 7: Map the Facebook and ActiveCampaign fields
Map each Facebook form field to the appropriate ActiveCampaign contact field. Standard mappings normally include:
- First name and last name
- Email address
- Phone number
When the Facebook form provides a standard full-name value, LeadsNotify separates it into ActiveCampaign’s first-name and last-name fields. Phone is optional, but email is required.
You can also map Facebook answers to compatible ActiveCampaign custom fields. Supported custom field types currently include:
- Text input
- Text area
- Date
- Date and time
- Number
- Hidden field
Dropdown, radio-button, checkbox and multiselect custom fields are not supported by the current integration.
Step 8: Save and test the notifier
Review the selected Facebook Page, forms, ActiveCampaign list and field mappings, and then save the notifier.
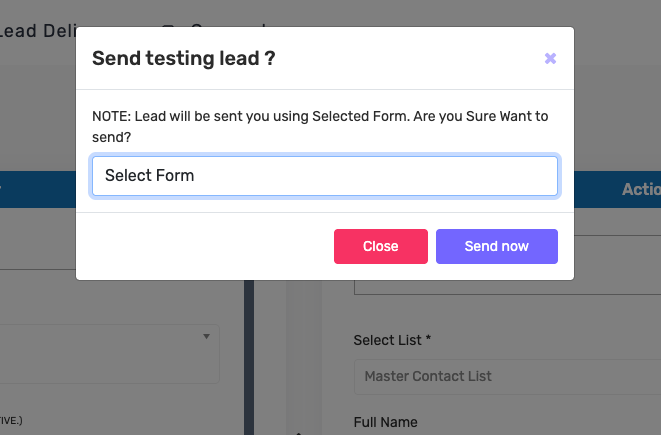
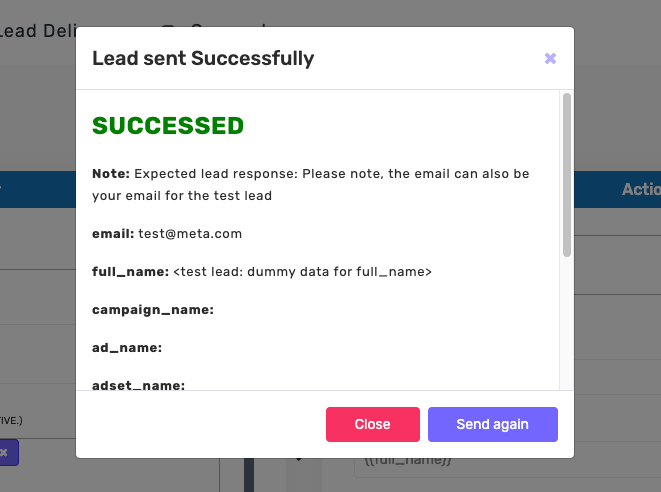
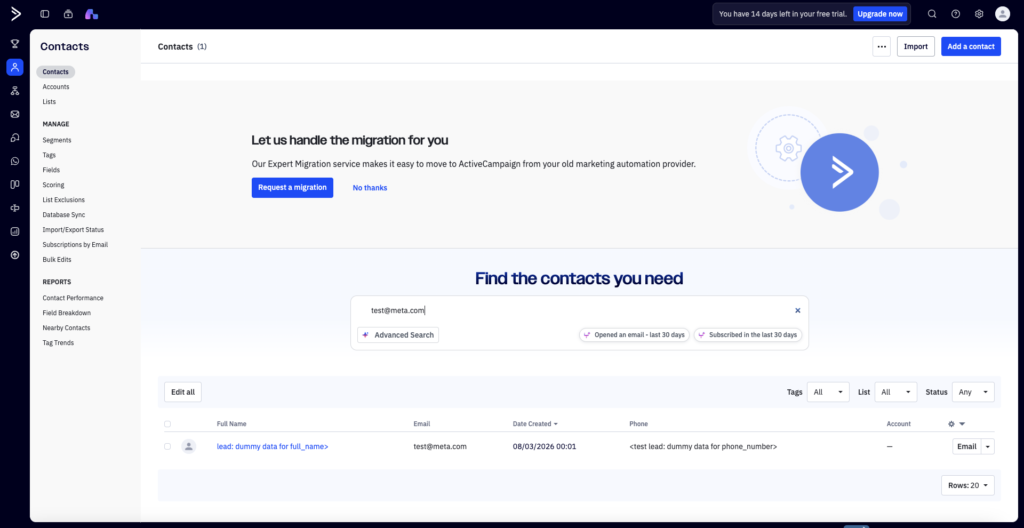
Open the saved notifier and use Test Notifier to send sample contact data. In ActiveCampaign, confirm that:
- The contact was created or updated.
- The contact appears in the selected list.
- The standard fields contain the expected values.
- Any mapped custom fields contain the expected values.
After the test succeeds, make sure the notifier is active. New submissions from the selected Facebook forms will then be synchronized with the selected ActiveCampaign list.
What happens when the email already exists?
LeadsNotify synchronizes contacts by email address. If the email address already belongs to an ActiveCampaign contact, that contact is updated with the submitted supported values. If no matching contact exists, ActiveCampaign creates a new one. Synchronizing by email helps prevent duplicate contacts.
Current integration scope
The integration creates or updates an ActiveCampaign contact, synchronizes supported mapped fields and adds the contact to one selected list. It does not currently add tags, create deals or enroll contacts directly in an automation.
If you want to start an automation, you can configure it inside ActiveCampaign with “contact joins a list” as the trigger. ActiveCampaign manages that automation; LeadsNotify supplies the contact and list subscription.
Troubleshooting
ActiveCampaign credentials cannot be verified
- Copy the API URL and API key again from Settings → Developer.
- Make sure there are no extra spaces before or after either value.
- Confirm that both credentials belong to the same ActiveCampaign account.
- If the API key was regenerated, update the notifier with the new key.
A Facebook Page or form is missing
- Confirm that the form belongs to the selected Page and is active.
- Confirm that your Facebook account has sufficient Page and lead-access permissions.
- Reconnect Facebook if Page access or permissions have changed.
No ActiveCampaign lists are displayed
- Confirm that at least one list exists in ActiveCampaign.
- Reconnect the integration to refresh the available lists.
- If the account contains many lists, allow the retrieval to finish before selecting one.
The lead does not appear in ActiveCampaign
- Confirm that the notifier is active.
- Confirm that the correct Facebook Page and form are selected.
- Make sure the submitted lead contains an email address.
- Search ActiveCampaign for the email address because an existing contact may have been updated.
- Confirm that the expected ActiveCampaign list is selected.
- Run Test Notifier and review its result.
A custom field is missing
- Confirm that the field uses a supported ActiveCampaign custom field type.
- Refresh or reconnect the integration after adding a new field in ActiveCampaign.
- Review the notifier and make sure the Facebook answer is mapped to the correct field.
Frequently asked questions
Can I connect multiple Facebook forms?
Yes. One notifier can monitor multiple selected active forms from the connected Facebook Page.
Can I send leads to more than one ActiveCampaign list?
Each notifier supports one selected ActiveCampaign destination list. Configure another notifier if you need a separate routing workflow.
Does the integration create duplicate contacts?
The integration synchronizes contacts by email address. A matching contact can be updated instead of creating another contact with the same email address.
Can LeadsNotify add tags, deals or automations?
Not directly in the current integration. LeadsNotify synchronizes the contact and adds it to the selected list. You can build an automation in ActiveCampaign that starts when a contact joins that list.
How quickly are new leads delivered?
LeadsNotify processes new Facebook lead events automatically in real time. Actual delivery time can also depend on Facebook, ActiveCampaign and network availability.
Start sending Facebook leads to ActiveCampaign
Once the notifier is active, LeadsNotify automatically processes new submissions from the selected Facebook forms. Each lead is created or updated in ActiveCampaign, added to the chosen list and populated with the supported fields you mapped.
Sign in to LeadsNotify to configure your Facebook Lead Ads to ActiveCampaign integration. If you need assistance, contact support@leadsnotify.com.
Last Updated on October 7, 2026 by Akash Mehra
Set up a free notification in a few minutes.

Abdullah Khan
A Technical Lead and backend architect with 10+ years of experience building reliable, high-scale APIs and automation systems. At LeadsNotify, he helps build and maintain the integrations that route Facebook and LinkedIn leads to email, CRMs, and marketing tools in real time.
Connect on LinkedIn ↗