How to Connect Facebook Lead Ads to Zoho Campaigns
Learn how to connect Facebook Lead Ads to Zoho Campaigns with Leadsnotify. Follow the step-by-step process to connect your Facebook pages, authorize Zoho Campaigns, map lead fields, and send test leads.

Table of contents
Zoho Campaigns is an email marketing platform that helps businesses manage contacts, create campaigns, and automate communication with subscribers. If you’re collecting leads through Facebook Lead Ads, connecting Facebook to Zoho Campaigns can help you move new leads into your email marketing workflow without manually copying contact information.
In this guide, we’ll show you how to connect Facebook Lead Ads to Zoho Campaigns using LeadsNotify. Once the integration is configured, your Facebook leads can be sent to Zoho Campaigns and mapped to the appropriate contact and custom fields.
How to Connect Facebook Lead Ads to Zoho Campaigns
The setup is straightforward. You’ll connect your Facebook account with LeadsNotify, select the Facebook Lead Ads forms you want to use, connect your Zoho Campaigns account, map your lead fields, and then test the integration.
Step 1: Log In and Connect Your Facebook Page
First, log in to LeadsNotify. Open Lead sources, click Continue with Facebook, choose the Pages that run your Lead Ads and approve the permissions. Each Page then shows as Connected.
For more detail, follow our guide: How to connect and configure Facebook Pages with LeadsNotify.
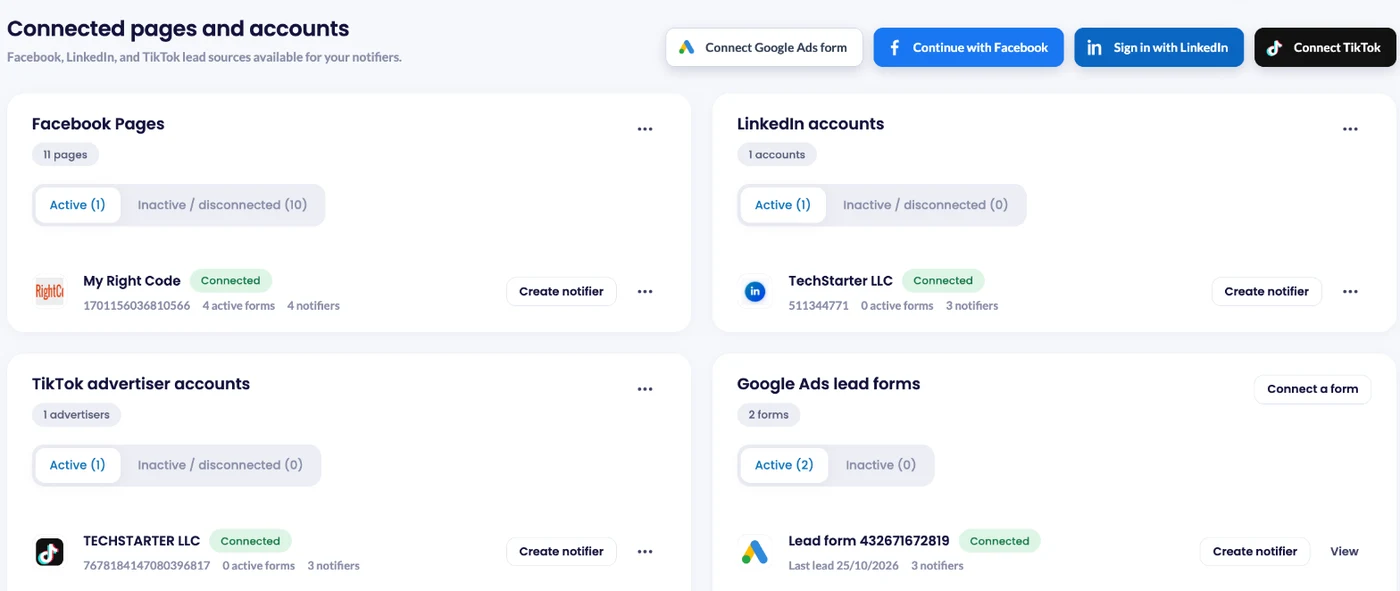
Step 2: Create a Notifier and Select Your Lead Forms
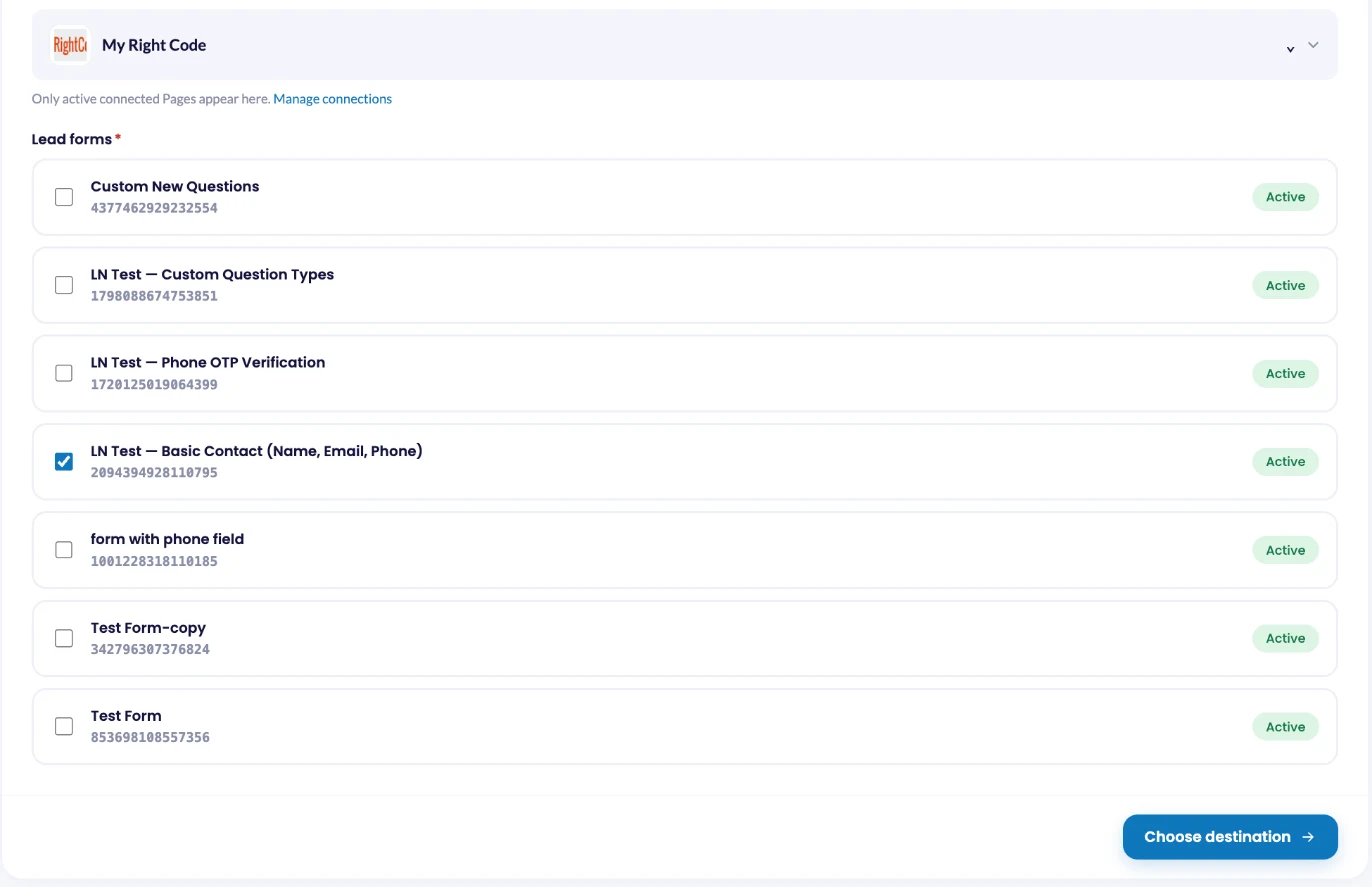
Click Create notifier. In the Source step, choose Facebook Lead Ads, select your Facebook Page and tick the lead forms you want to send to Zoho Campaigns.
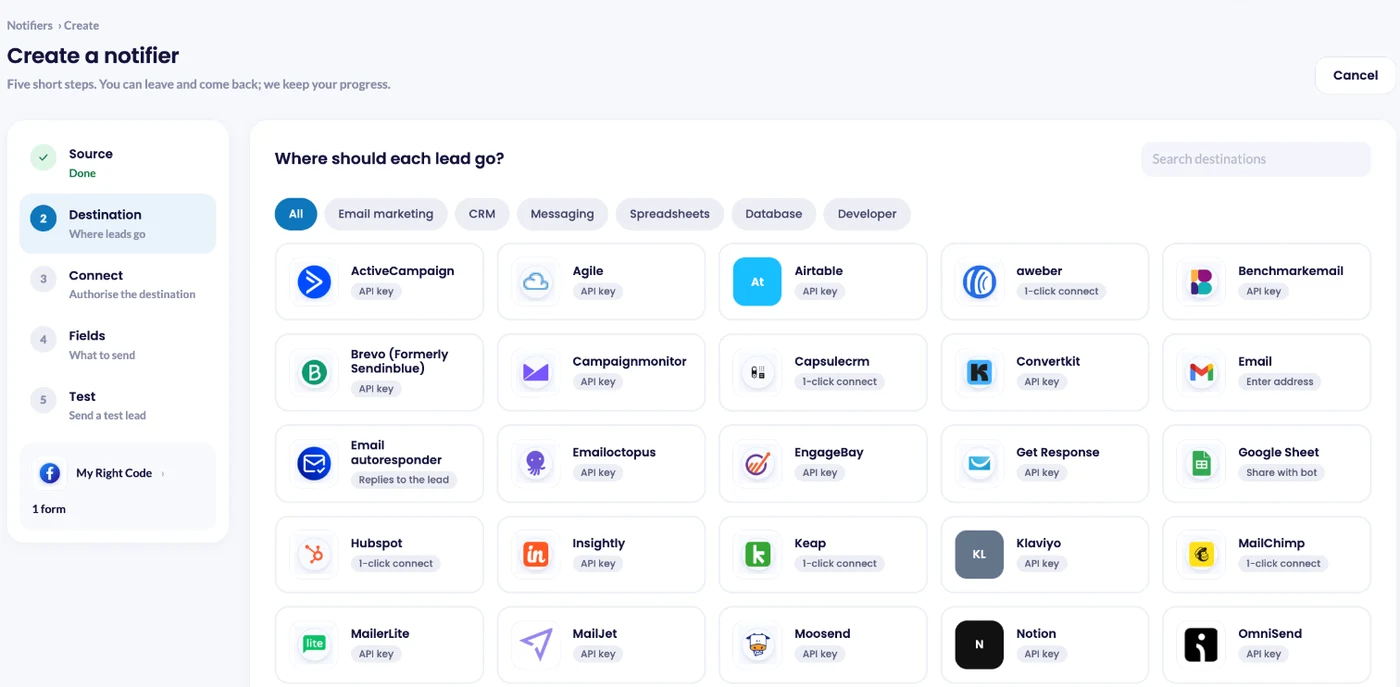
Step 3: Choose Zoho Campaigns as the Destination
Click Choose destination, select Zoho Campaigns and click Connect Zoho Campaigns.
Step 4: Connect Zoho Campaigns
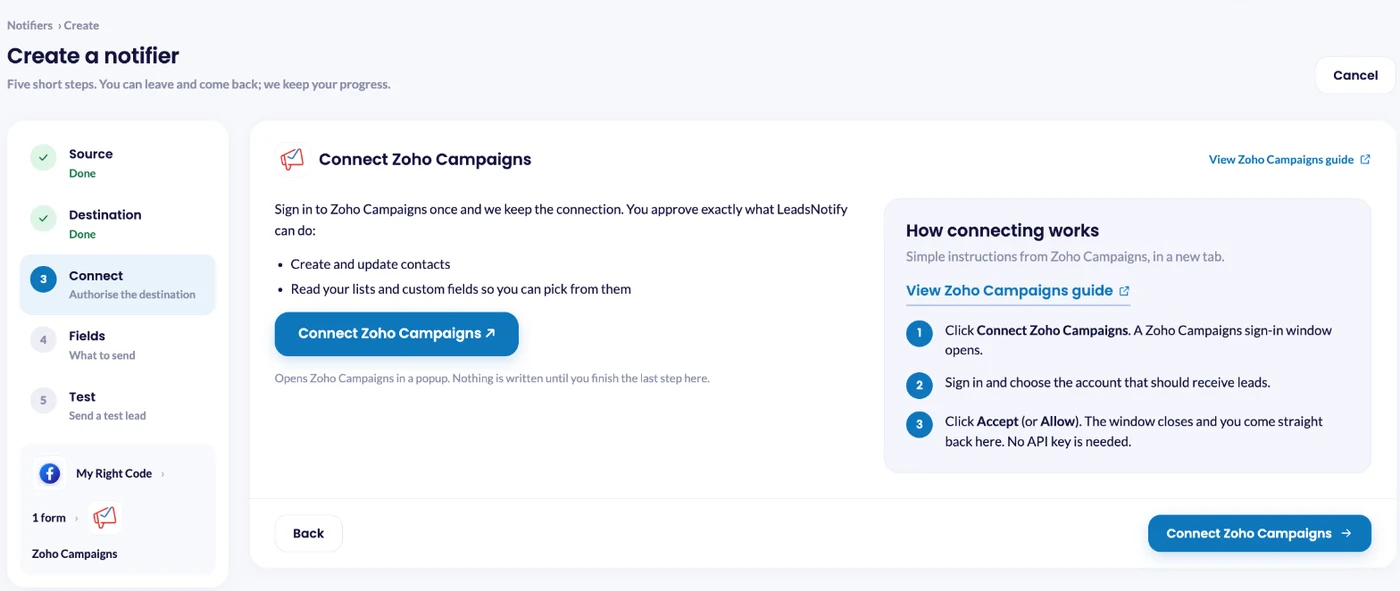
Click the Connect Zoho Campaigns button. A Zoho Campaigns sign-in window opens. Sign in, choose the account that should receive your leads, then click Accept (or Allow). LeadsNotify can then create and update contacts and read your lists and custom fields. No API key is needed, and nothing is written until you finish the last step.

Step 5: Choose Your Zoho Campaigns List and Map Fields
The window closes and you come straight back to LeadsNotify, which retrieves the lists and fields from your Zoho Campaigns account. In the Fields step, select the Zoho Campaigns list or group where you want your Facebook leads to be added.
Then match your Facebook form fields to the corresponding Zoho Campaigns fields, including custom fields. This makes sure information such as the lead’s name, email address, phone number and other form answers lands in the correct fields in Zoho Campaigns.
How to Test the Facebook Lead Ads to Zoho Campaigns Integration
Save the notifier. LeadsNotify switches it on and opens Review and test delivery. Click Send test lead: LeadsNotify asks Meta to create one sample lead on your form and shows the delivery result on the same screen. No real customer data is used.
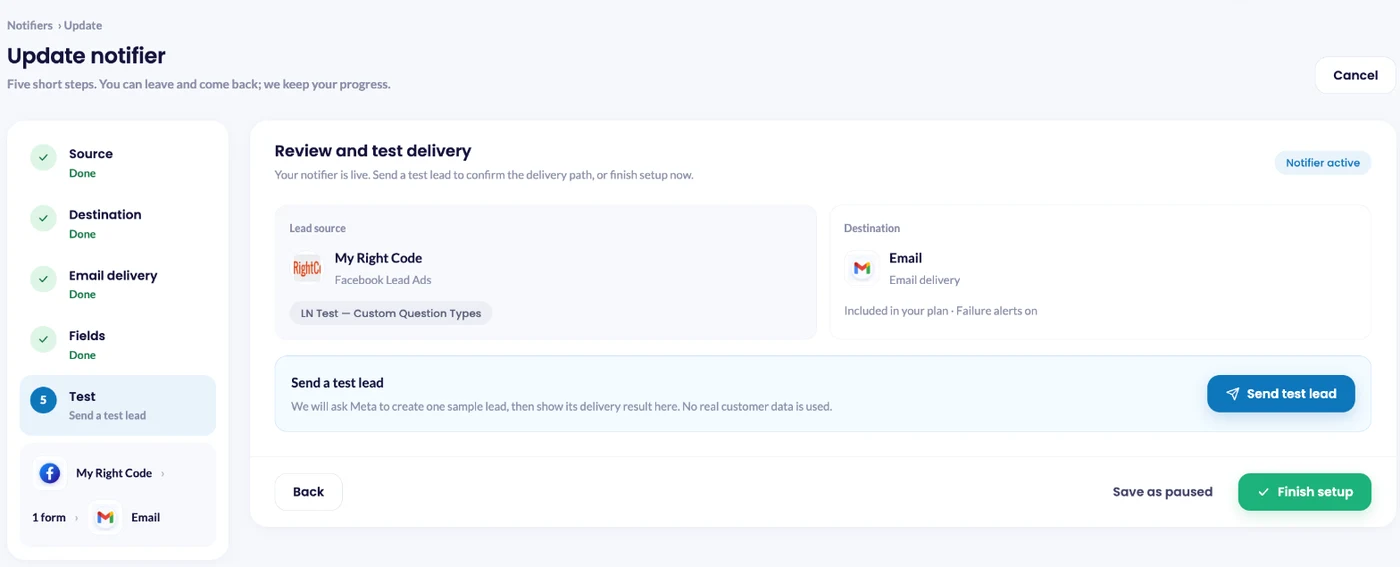
Check that the contact appears in Zoho Campaigns, and open Lead delivery in LeadsNotify to see the delivery status. Then click Finish setup.
Keep in mind that Zoho Campaigns may send a confirmation email to the contact. The contact may need to confirm the subscription before it becomes active in your Zoho Campaigns account.
Start Sending Facebook Leads to Zoho Campaigns
That’s it. Your Facebook Lead Ads to Zoho Campaigns integration is ready. LeadsNotify can automatically transfer new Facebook leads to your selected Zoho Campaigns group, helping you keep your email marketing contacts up to date without manually entering each lead.
By connecting Facebook Lead Ads with Zoho Campaigns, you can streamline your lead capture process and get new contacts into your email marketing workflow faster.
Understand the Lead Delivery and Consent Flow
When a user submits a Facebook Lead Ad form, LeadsNotify transfers the lead information to your connected Zoho Campaigns account according to the field mapping and group settings you’ve configured.
However, lead delivery and email subscription confirmation are separate steps. Sending the lead to Zoho Campaigns does not necessarily mean the contact is immediately subscribed to your email campaigns.
Depending on your Zoho Campaigns settings and consent requirements, the lead may receive a confirmation email. The contact must complete the required confirmation before becoming an active subscriber and receiving marketing emails.
This means the flow is:
- Facebook user submits the Lead Ad form.
- LeadsNotify receives the new lead and transfers the configured lead information.
- The lead is added to the selected Zoho Campaigns group according to your integration settings.
- If confirmation is required, Zoho Campaigns sends a confirmation email to the lead.
- The lead confirms their subscription.
- The contact becomes an active subscriber and can receive email campaigns according to your Zoho Campaigns settings.
Because of this consent step, don’t use the absence of an immediate marketing subscription as an indication that the Facebook-to-Zoho Campaigns integration failed. First check whether the lead was transferred successfully and whether the contact still needs to complete the confirmation process.
Test the Integration
After saving your configuration, send a test lead from the notifier’s Test step to verify the integration. Check that the lead information appears in the expected Zoho Campaigns group and that the mapped fields contain the correct data.
Set up a free notification in a few minutes.

Abdullah Khan
A Technical Lead and backend architect with 10+ years of experience building reliable, high-scale APIs and automation systems. At LeadsNotify, he helps build and maintain the integrations that route Facebook and LinkedIn leads to email, CRMs, and marketing tools in real time.
Connect on LinkedIn ↗