
How to Connect Facebook Lead Ads to Capsule CRM
Capsule CRM is a customer relationship management platform that helps businesses organize contacts, manage sales opportunities, and keep customer information in one place. If you're generating leads through Facebook Lead Ads, sending those leads directly to Capsule CRM can help you respond…

Table of contents
Capsule CRM is a customer relationship management platform that helps businesses organize contacts, manage sales opportunities, and keep customer information in one place. If you’re generating leads through Facebook Lead Ads, sending those leads directly to Capsule CRM can help you respond faster and avoid manually transferring lead information.
In this guide, we’ll show you how to connect Facebook Lead Ads to Capsule CRM using LeadsNotify. Once the integration is configured, your Facebook leads can be automatically sent to your Capsule CRM account.
How to Connect Facebook Lead Ads to Capsule CRM
The setup only requires a few steps. You’ll connect your Facebook account, select the Facebook Lead Ads forms you want to use, connect Capsule CRM, map your lead fields, and then send a test lead to confirm everything is working.
Step 1: Sign Up or Log In to LeadsNotify
First, sign up for LeadsNotify or log in if you already have an account.
Step 2: Connect Your Facebook Account
Next, connect your Facebook account with LeadsNotify. You’ll need to authorize the Facebook account that contains the pages and instant forms you want to use.
If you haven’t connected Facebook to LeadsNotify yet, follow the connection instructions in our guide: How to connect Facebook Lead Ads.
Step 3: Create the Capsule CRM Notifier
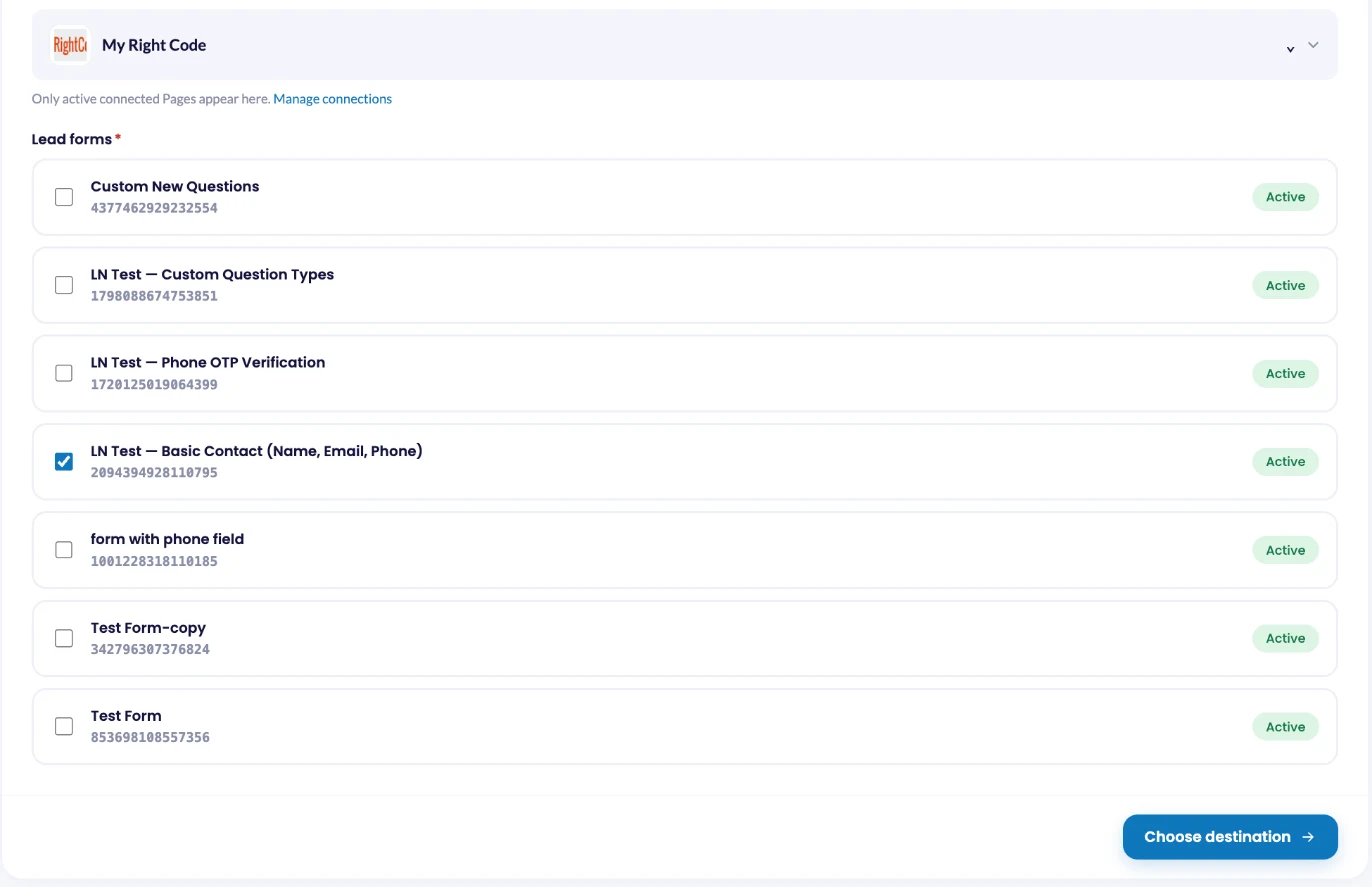
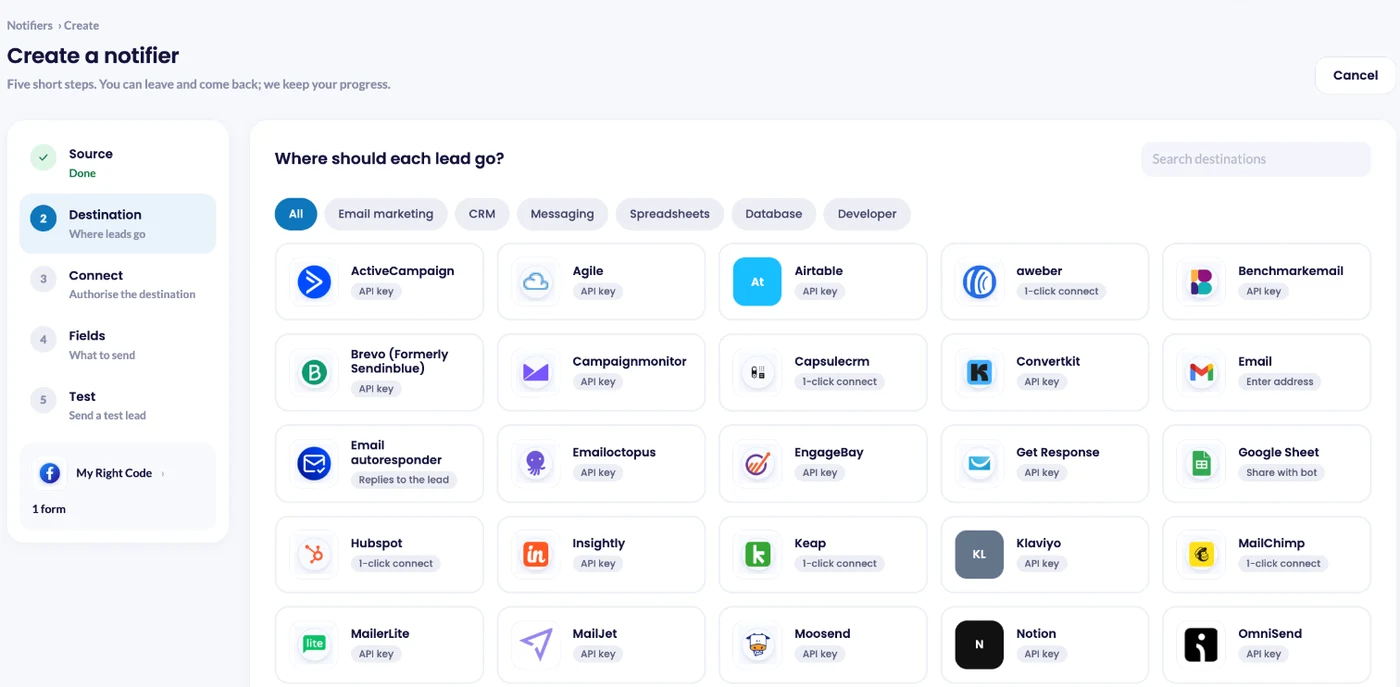
Click Create notifier. In the Source step, choose Facebook Lead Ads, then select your Facebook Page and the lead forms you want to connect. LeadsNotify loads the fields from those forms. Click Choose destination, select Capsulecrm and continue to connect it.
Step 4: Select Your Facebook Page and Lead Forms
Under the Facebook settings, select the Facebook Page you want to connect and choose the instant forms that should be included in the integration.
You can select multiple forms. Once your forms are selected, LeadsNotify will retrieve the available form fields so they can be mapped to the appropriate Capsule CRM fields.
Step 5: Connect Your Capsule CRM Account
On the Capsule CRM side of the integration, click the Connect button. LeadsNotify will open the Capsule CRM authorization process and ask you to connect your Capsule CRM account.
You’ll then see the Capsule CRM connection screen.

Enter your Capsule CRM Site Address. For example, if your Capsule CRM site address uses leadsnotify, enter that value in the required field and continue.
After you complete the Capsule CRM login and authorization, you’ll be redirected back to LeadsNotify. The integration will then retrieve the available Capsule CRM fields so you can map them to your Facebook Lead Ads fields.
Step 6: Map Facebook Lead Fields to Capsule CRM
Once your Facebook forms and Capsule CRM account are connected, map the fields from your Facebook instant forms to the corresponding fields in Capsule CRM.
This ensures that information such as a lead’s name, email address, phone number, and other form responses are sent to the correct fields in your CRM.
After you’ve finished mapping the fields and configuring the notifier, click Choose fields and save the notifier.
How to Test the Facebook Lead Ads to Capsule CRM Integration
Saving the notifier opens Review and test delivery. Click Send test lead: LeadsNotify asks Meta to create one sample lead on your form and shows the delivery result right there. You can also check it on the Lead delivery page.
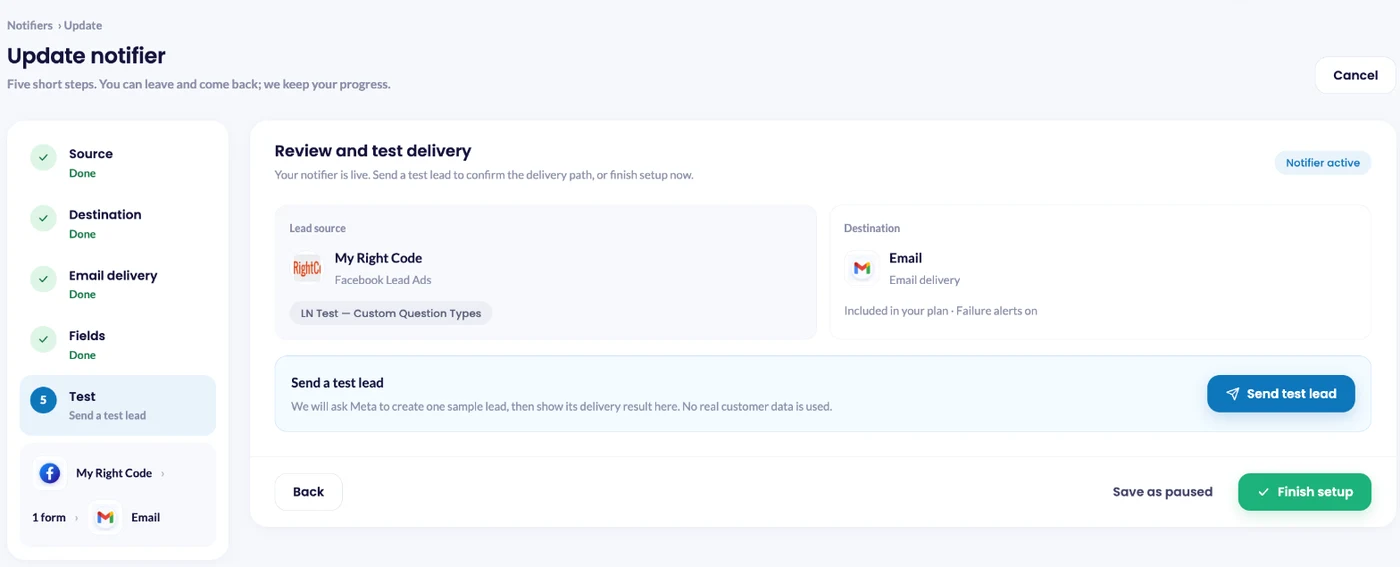
Select the Facebook form you want to use for testing and click Send Now.
Once the test is successful, open your Capsule CRM contacts and check for the newly created contact.

Start Sending Facebook Leads to Capsule CRM Automatically
That’s it. Your Facebook Lead Ads to Capsule CRM integration is ready. Once the notifier is active, new leads from your selected Facebook instant forms can be sent automatically to Capsule CRM without manually copying lead information between platforms.
With LeadsNotify handling the connection, you can spend less time transferring leads and more time following up with your leads.
Set up a free notification in a few minutes.

Abdullah Khan
A Technical Lead and backend architect with 10+ years of experience building reliable, high-scale APIs and automation systems. At LeadsNotify, he helps build and maintain the integrations that route Facebook and LinkedIn leads to email, CRMs, and marketing tools in real time.
Connect on LinkedIn ↗