EmailOctopus is an email marketing platform designed to help businesses create, send, and track email campaigns efficiently. It offers user-friendly features such as customizable templates, automation, and comprehensive analytics. EmailOctopus is known for its affordability and ease of use, making it a popular choice for startups and small businesses.
We can create a quick Automation to get leads into Emailoctopus from Facebook lead ad campaigns by following only a few simple steps.
Step 1:
Signup & Login into Leadsnotify
Step 2:
Link your Facebook account with Leadsnotify. I’ve outlined the connection process in a separate article please check out the instructions provided in Steps 1 and 2 in this article. (How to connect Facebook).
Step 3:
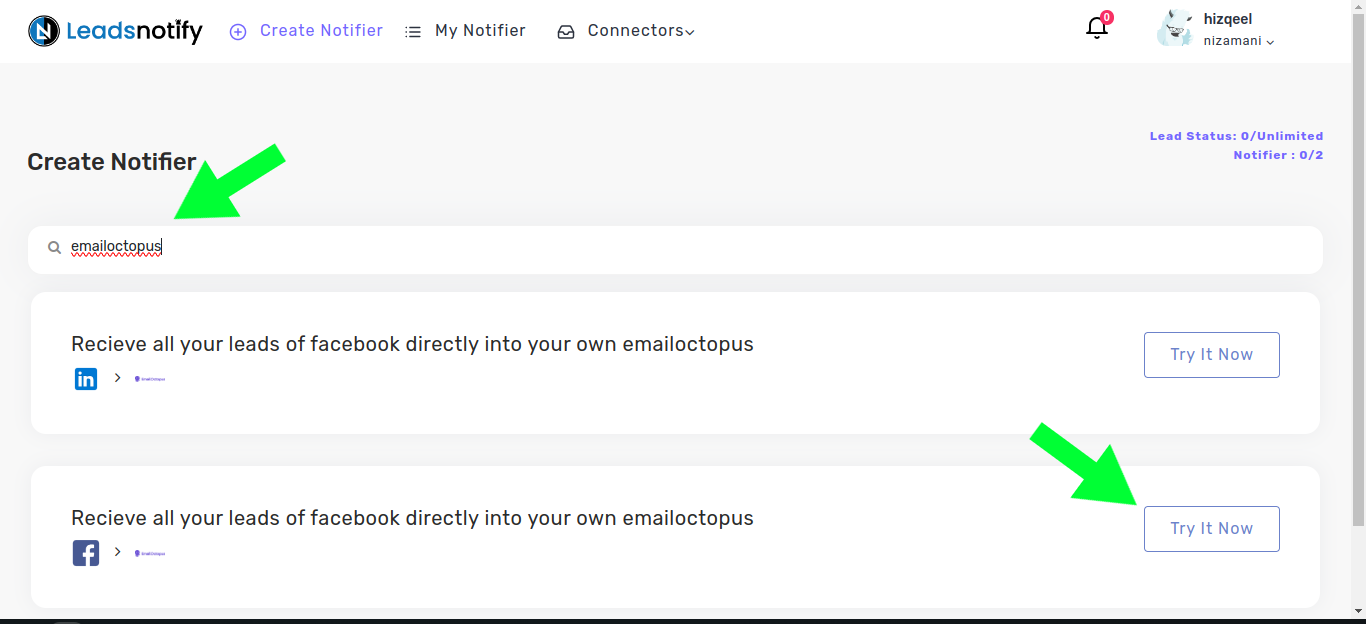
Navigate to the ‘Create Notifier‘ option, which is the first one you’ll see after logging into the app. Then, search for EmailOctopus integration and click on ‘Try Now,’ following the instructions provided in the screenshot.
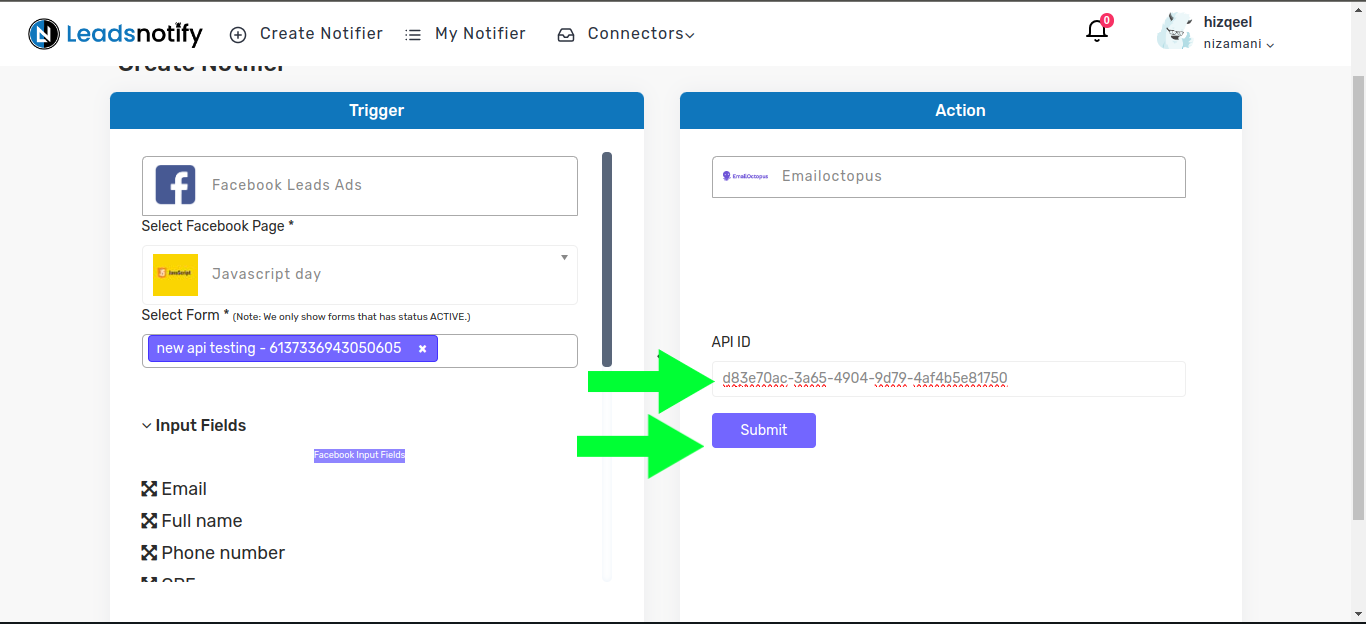
After clicking ‘Try now,’ you’ll be presented with two boxes. The first box allows you to select your Facebook page and the forms you wish to link. Once you choose instant forms, it will display the available fields within the selected forms.
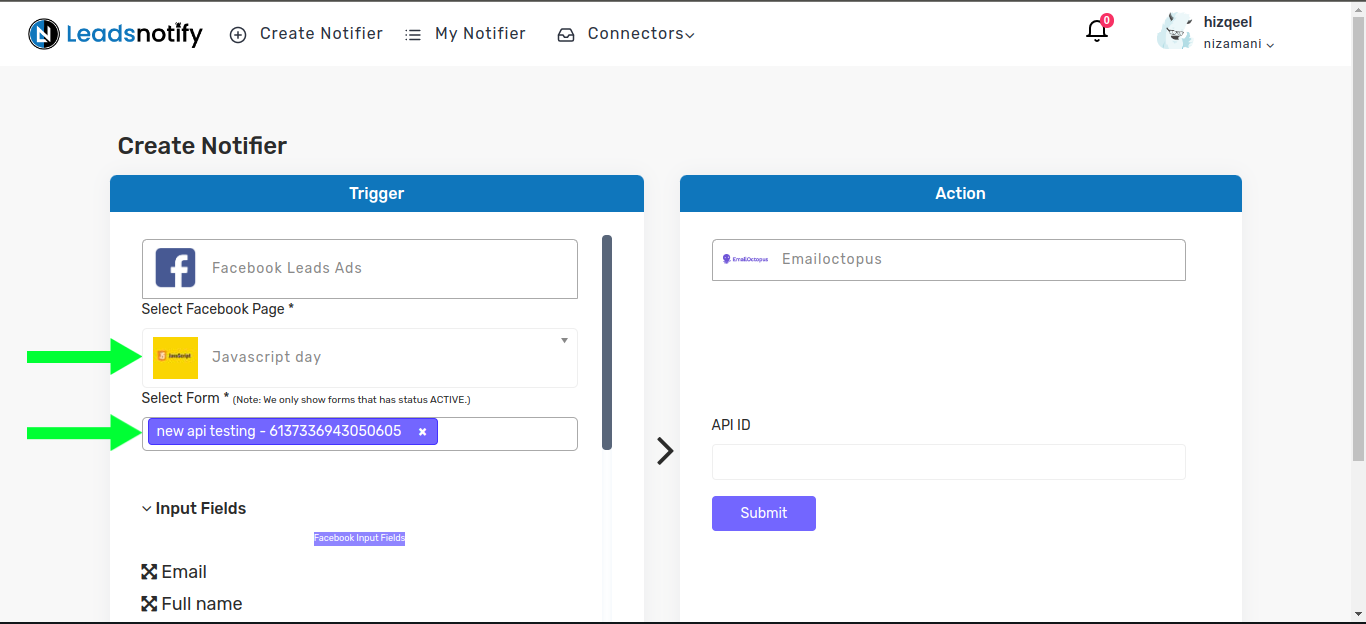
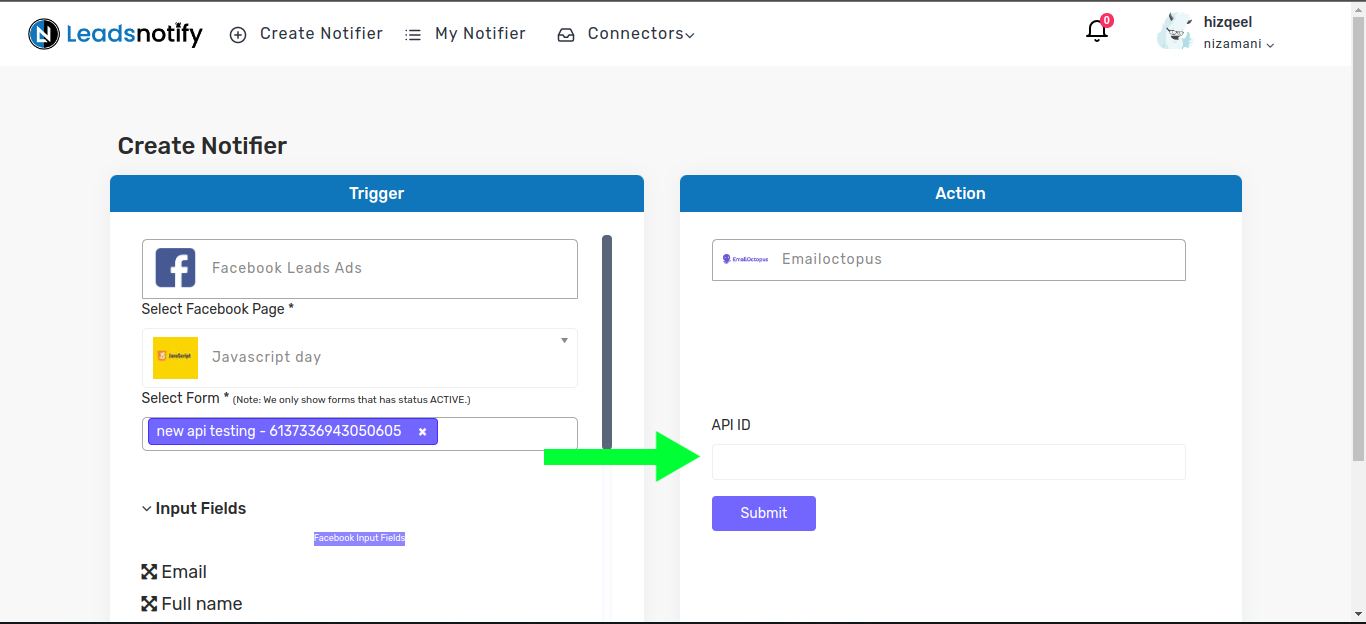
In the right box, you’ll need to input your EmailOctopus API ID which you can locate by logging into your EmailOctopus account.
Login to your EmailOctopus account, then click on your profile picture and click on Integrations & API
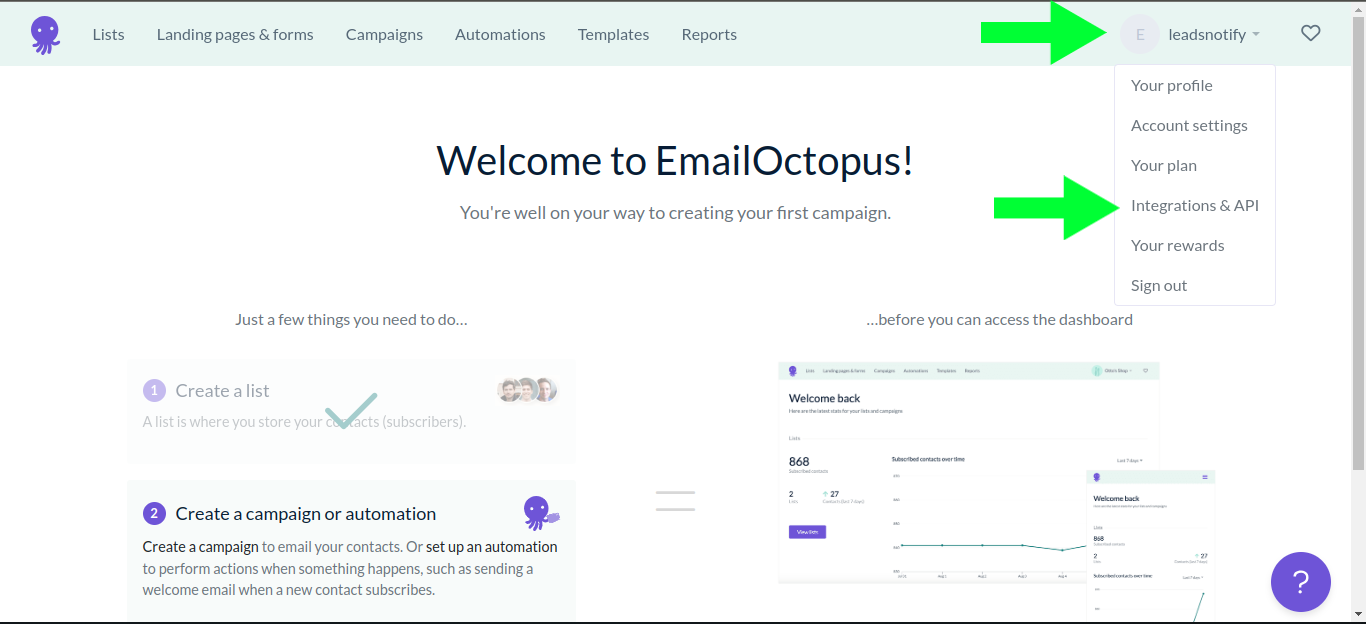
then you will be presented with this screen make sure you are on Integrations & API. and Click on the Manage

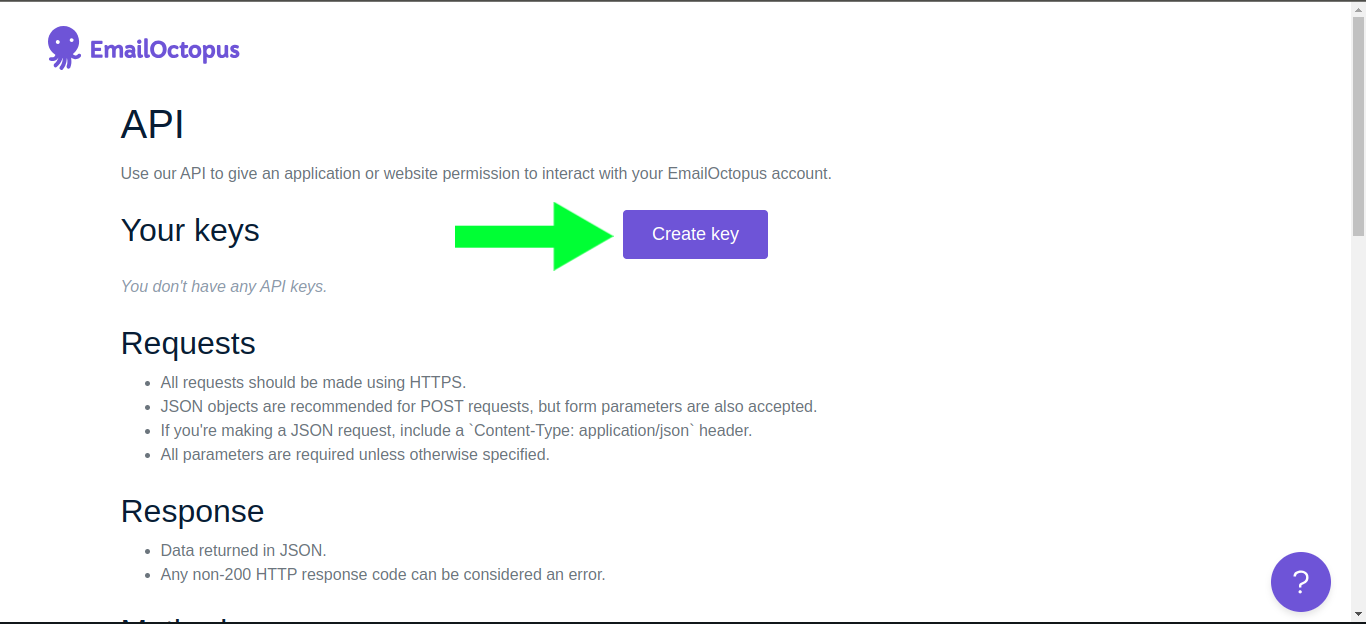
After clicking on manage you will be presented with this screen Click on Create Key
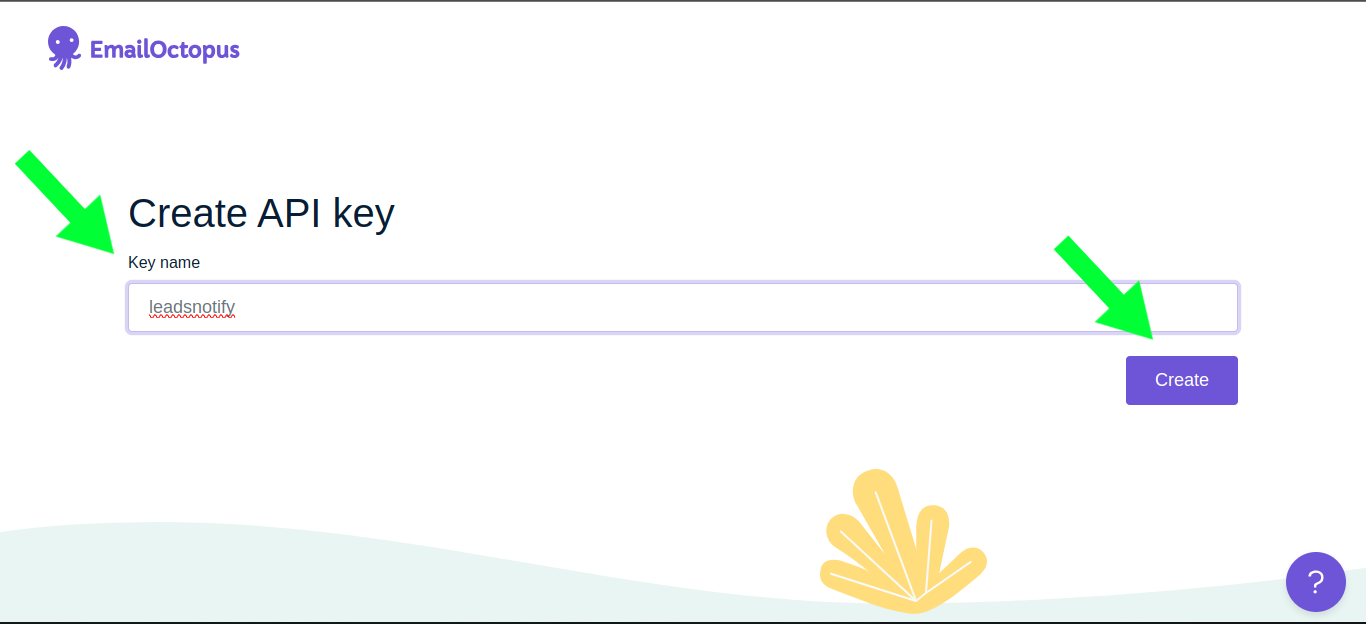
Now Type the key name. You name it anything you like and click on create I have called it Leadsnotify
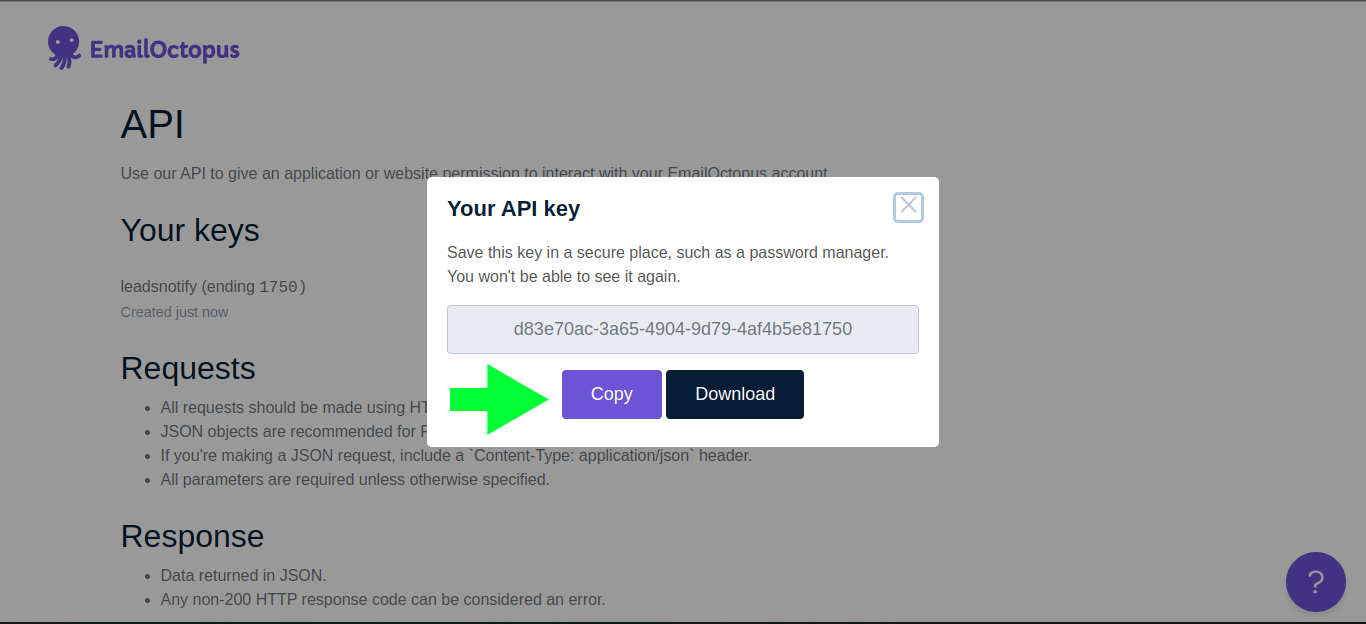
After clicking on ‘Create’, you will see this screen. Copy the API key
and paste it into the API ID field. Then, click on ‘Submit’.
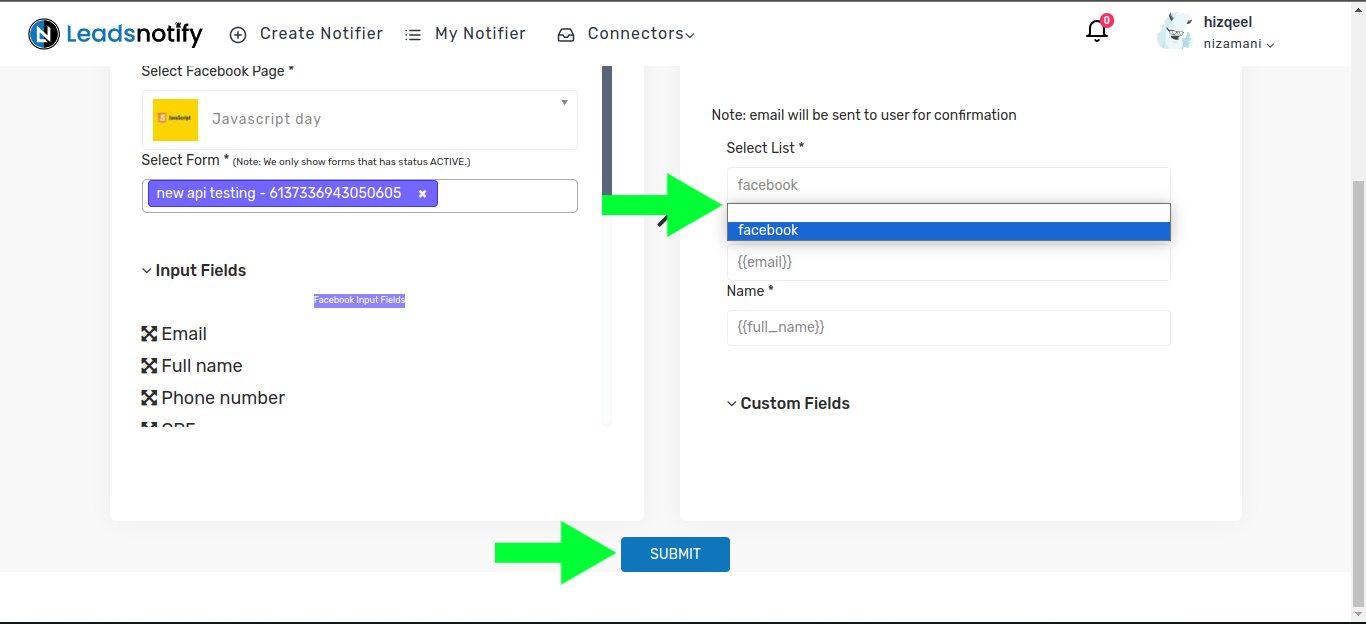
You will then be presented with this form in the right box. Now, select a list in which you would like to receive leads and click on the ‘Submit’ button located at the bottom of the page.
Step 4:
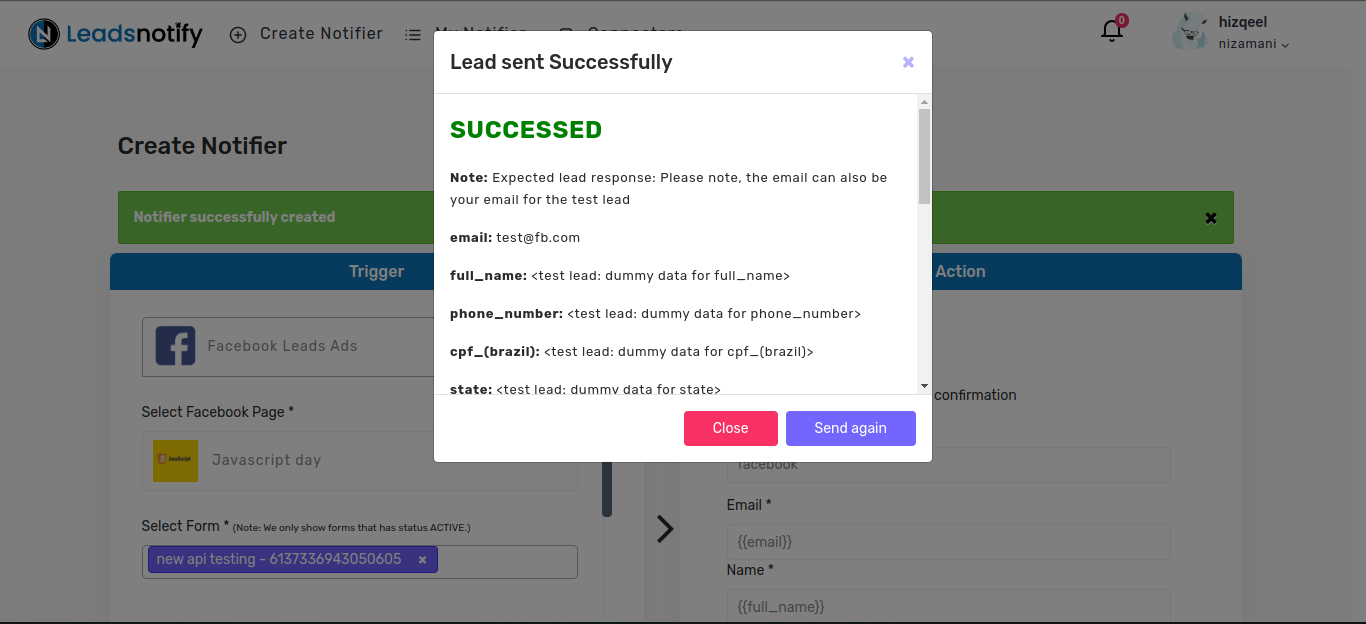
Once submitted, a popup will appear prompting you to send a test lead. After sending the test lead, it will load and display the response as ‘Success.’ That’s it, your integration is complete.
Feel free to contact us at support@leadsnotify.com if you face any issues with your integration.
Thank you for reading this article.
Last Updated on March 2, 2024 by ABD K