How to Connect Facebook Lead Ads to SendPulse
SendPulse is a marketing automation platform that offers email marketing, SMS marketing, web push notifications, and SMTP services. If you use Facebook Lead Ads to collect prospects, you can connect Facebook leads to SendPulse and automatically add them to a selected list…

Table of contents
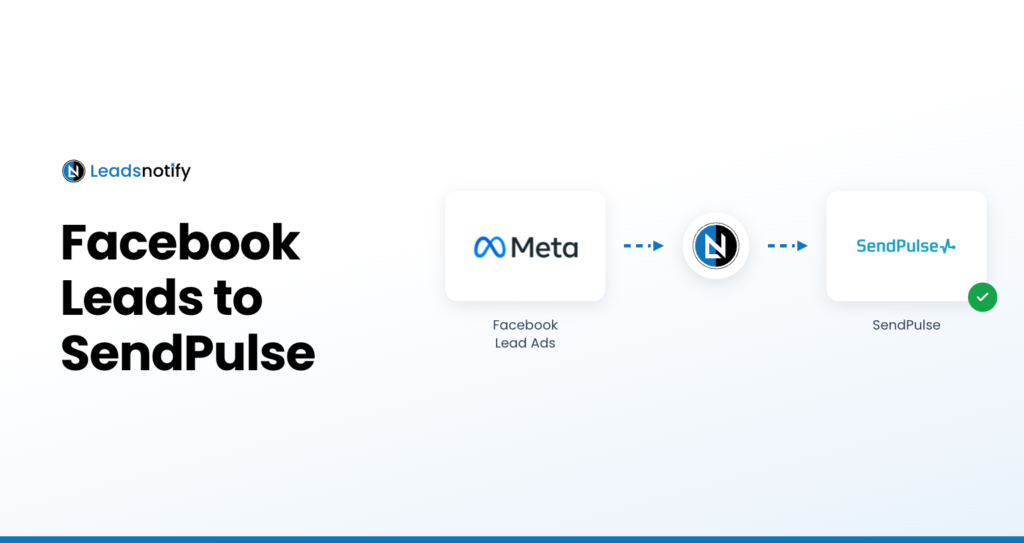
SendPulse is a marketing automation platform that offers email marketing, SMS marketing, web push notifications, and SMTP services. If you use Facebook Lead Ads to collect prospects, you can connect Facebook leads to SendPulse and automatically add them to a selected list using LeadsNotify.
In this guide, we’ll show you how to connect Facebook Lead Ads to SendPulse and automatically send new leads to your SendPulse list. The setup only takes a few steps.
How to Connect Facebook Lead Ads to SendPulse
The integration connects your Facebook Lead Ads forms with SendPulse through LeadsNotify. Once the setup is complete, new leads submitted through your Facebook forms can be sent automatically to the SendPulse list you select.
Step 1: Sign Up and Log In to LeadsNotify
First, sign up for LeadsNotify or log in to your existing account.
Step 2: Connect Your Facebook Account
Connect your Facebook account with LeadsNotify. If you haven’t connected Facebook before, follow Steps 1 and 2 in our guide to connecting Facebook Lead Ads.
Step 3: Create a SendPulse Notifier
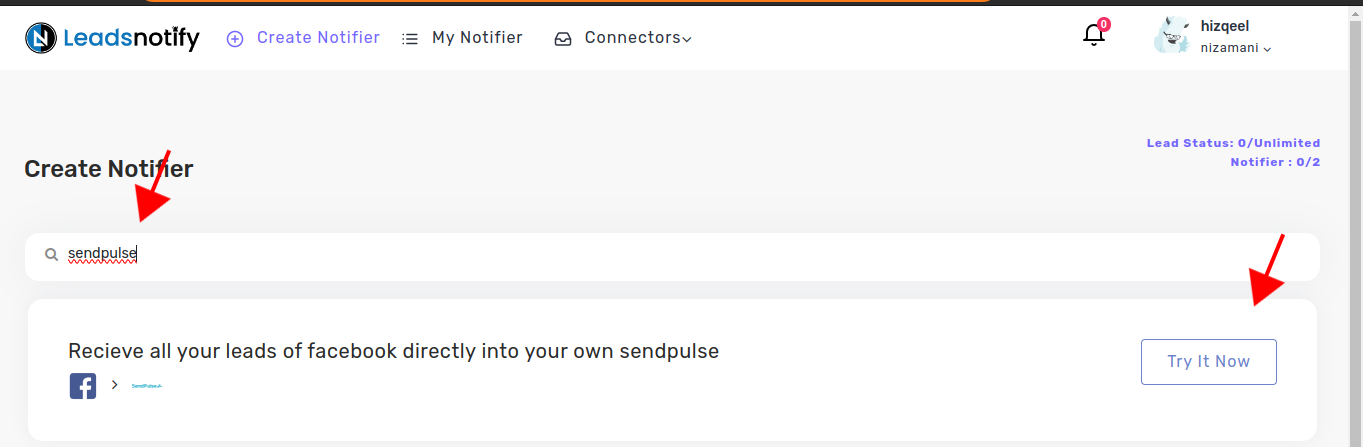
After logging in, open the Create Notifier option. Search for the SendPulse integration and click Try Now.
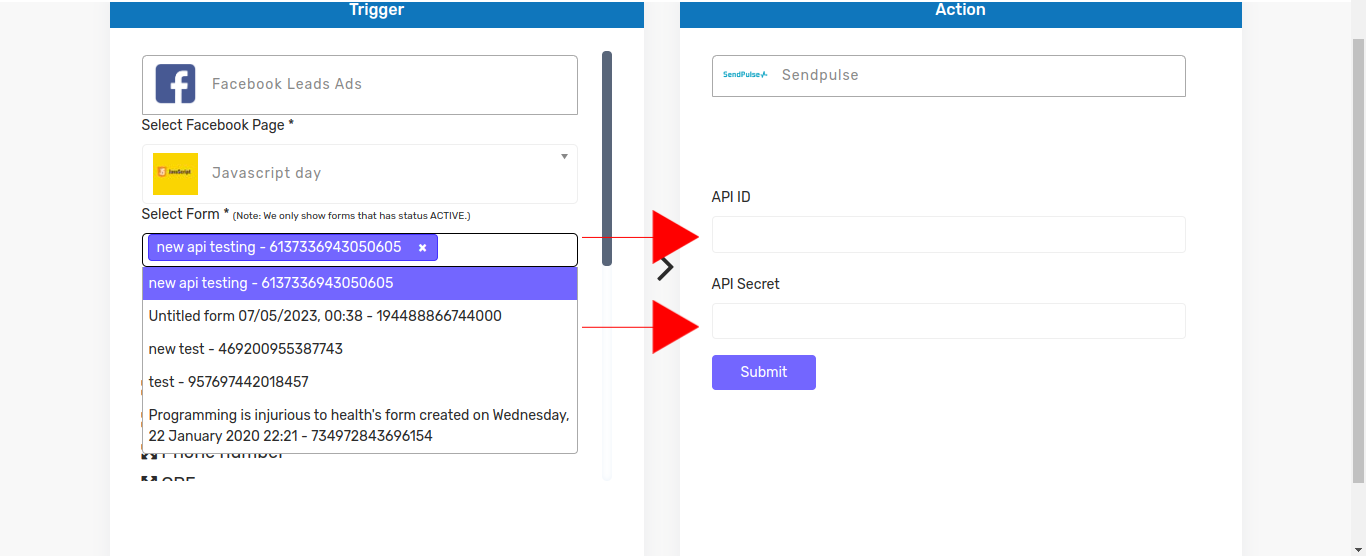
After clicking Try Now, you’ll see two boxes. In the first box, select the Facebook Page and lead forms you want to connect. After selecting an Instant Form, LeadsNotify will display the fields available in that form.
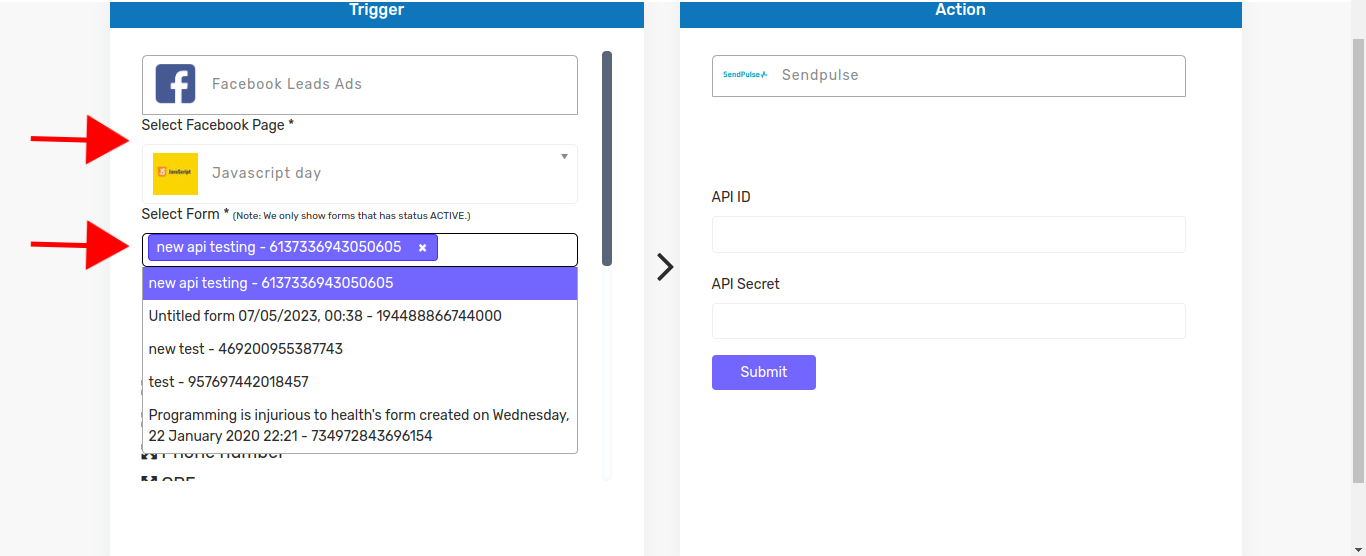
In the right-hand box, you’ll need to enter your SendPulse API ID and API Secret. These credentials allow LeadsNotify to connect to your SendPulse account.
Find Your SendPulse API ID and API Secret
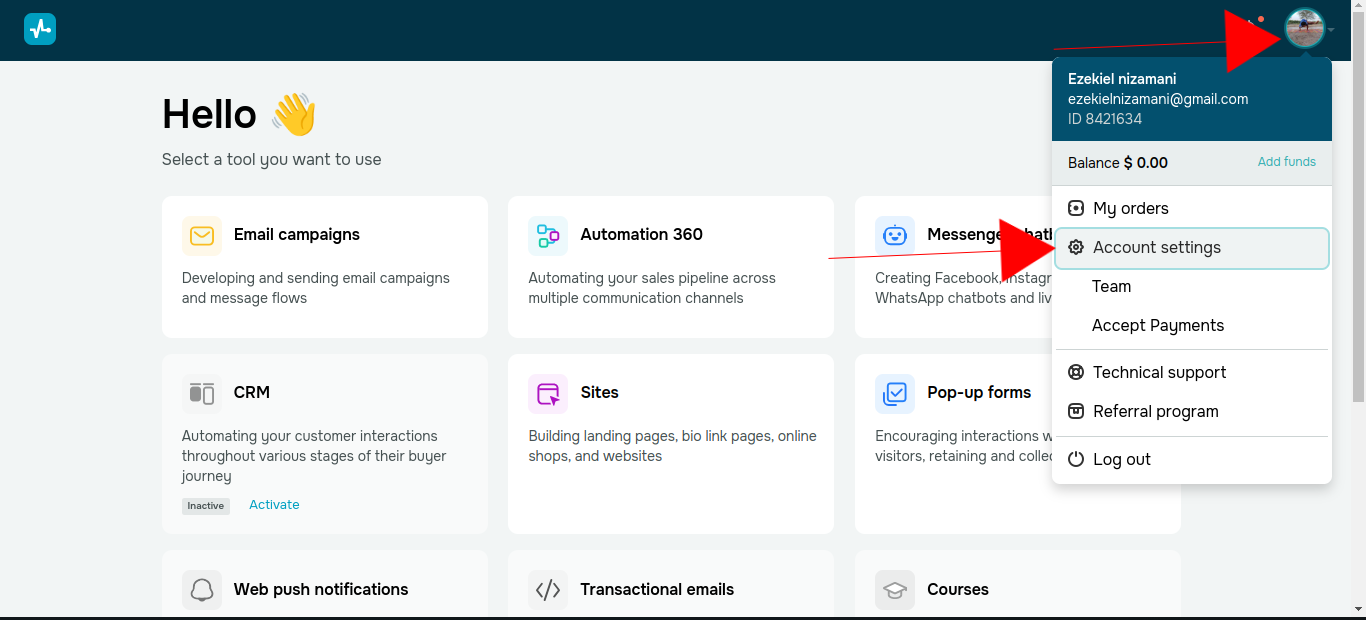
Log in to your SendPulse account, click your profile picture, and navigate to Account Settings.
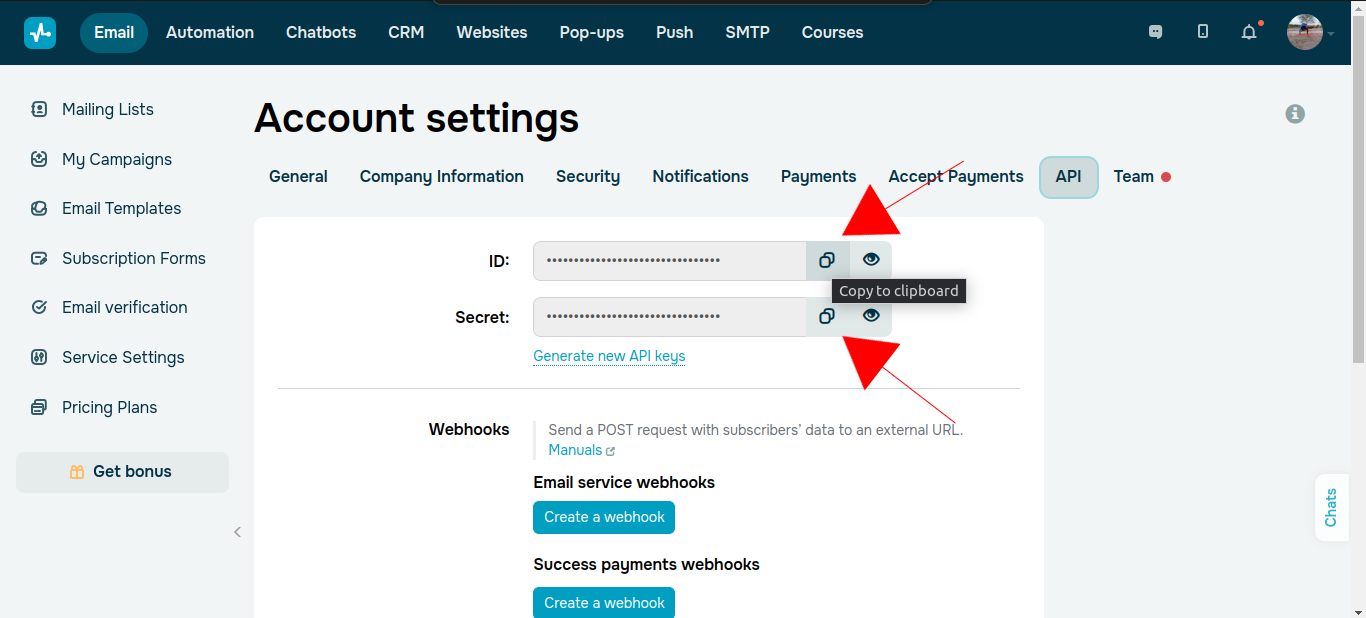
Inside Account Settings, find the API option and open it.

You’ll see your API ID and API Secret. Copy the API ID and paste it into the API ID field in LeadsNotify. Then copy the API Secret into the API Secret field.
After entering both credentials, click Submit.
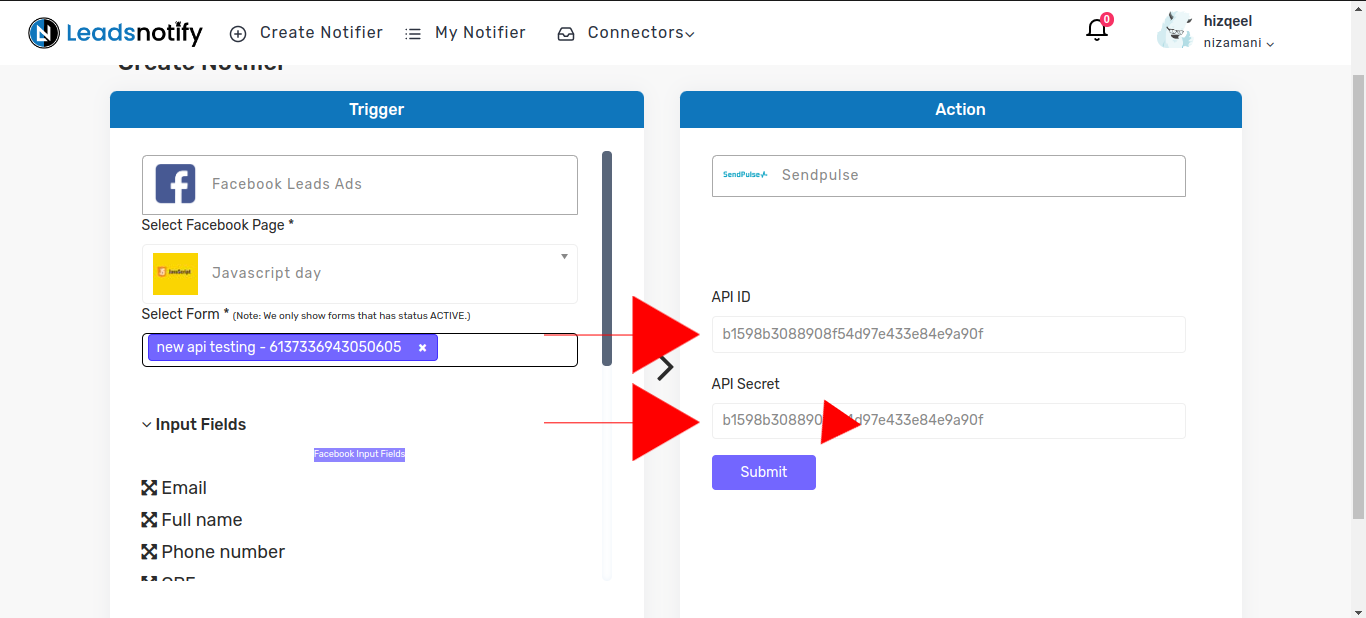
LeadsNotify will then display the available SendPulse lists. Select the list where you want to receive your Facebook leads.
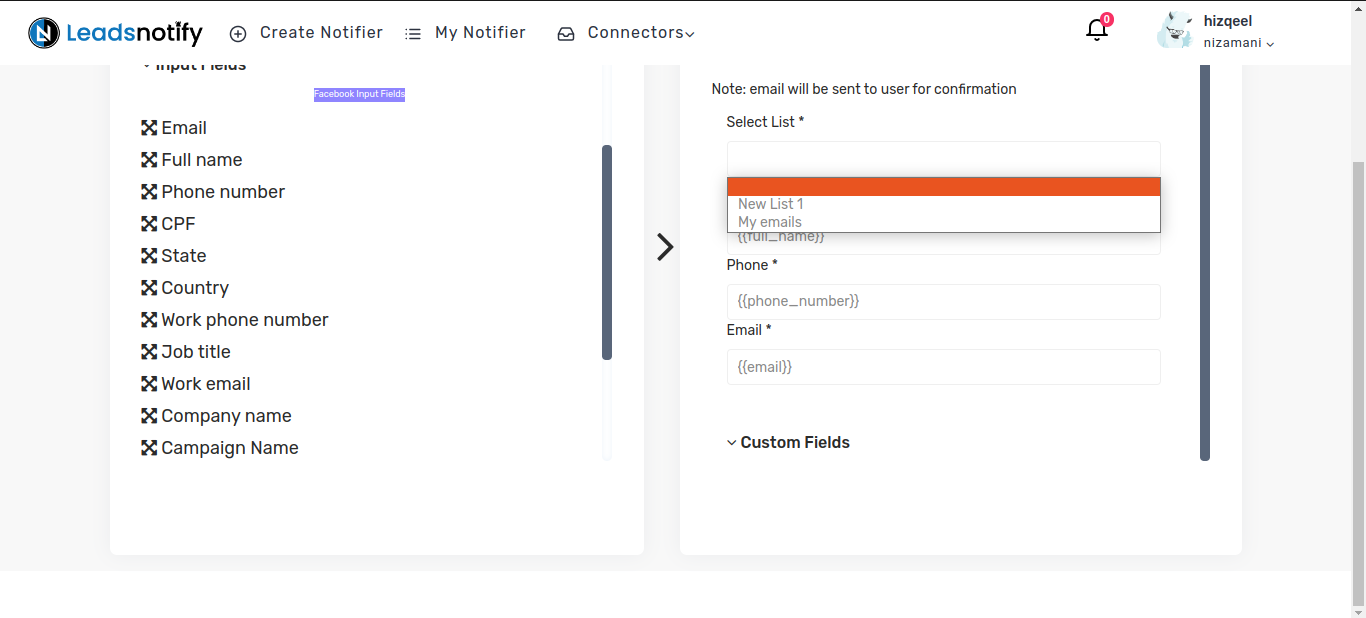
Step 4: Submit and Test the Integration
Scroll to the bottom of the page and click Submit. Once the notifier is submitted, a popup will appear asking you to send a test lead.
Send a test lead through your Facebook Lead Ad form. LeadsNotify will process the lead and display a Success response when the integration is working correctly.
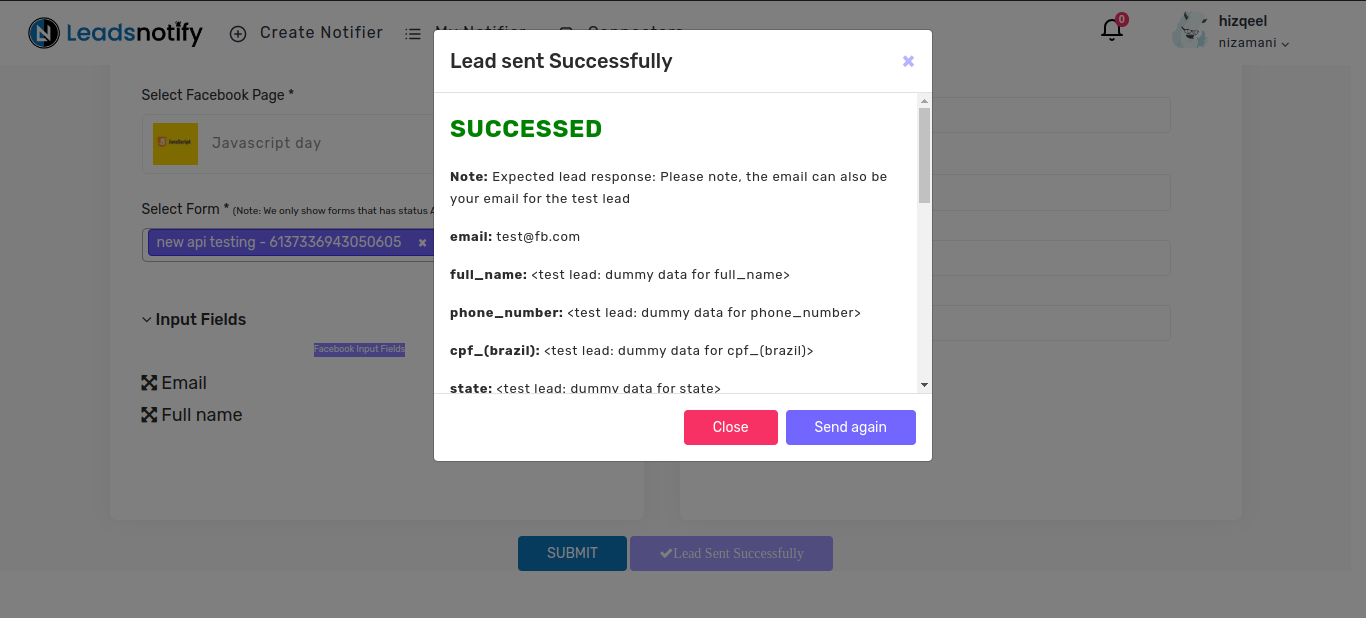
How the Facebook Lead Ads to SendPulse Integration Works
Once the notifier is active, the workflow is straightforward:
- A prospect submits your Facebook Lead Ad form.
- LeadsNotify receives the new Facebook lead.
- LeadsNotify sends the lead information to your connected SendPulse account.
- The lead is added to the SendPulse list you selected during setup.
This means you don’t have to manually export Facebook leads and import them into your email marketing platform every time you receive a new lead.
Frequently Asked Questions
Can I send Facebook leads to SendPulse automatically?
Yes. By connecting Facebook Lead Ads to SendPulse through LeadsNotify, new leads can be sent automatically to the SendPulse list you select.
Do I need a SendPulse API key?
Yes. The SendPulse integration in LeadsNotify requires your SendPulse API ID and API Secret to connect your account.
Can I choose which Facebook lead form to connect?
Yes. During setup, you can select your Facebook Page and the Instant Forms you want to connect. LeadsNotify then displays the available fields from the selected form.
How do I test the SendPulse integration?
After submitting the notifier, use the test lead option provided by LeadsNotify. A successful response confirms that the integration is working.
What should I do if my Facebook lead isn’t reaching SendPulse?
First, verify that the correct Facebook Page and Instant Form are selected, your SendPulse API credentials are correct, and the intended SendPulse list is selected. You can also contact LeadsNotify support if you continue to experience problems.
Start Sending Facebook Leads to SendPulse
Connecting Facebook Lead Ads to SendPulse can help you move new leads into your email marketing workflow without manually transferring them. With LeadsNotify, you can connect your Facebook form, authenticate your SendPulse account, select a list, and test the integration in just a few steps.
If you face any issues with your integration, feel free to contact us at support@leadsnotify.com.
Set up a free notification in a few minutes.

Hizqeel Nizamani
Hizqeel Nizamani is a software engineer and backend developer working on CRM integrations, automation, APIs, and lead management systems. At LeadsNotify, he helps build and improve technology that enables businesses to capture, manage, and respond to leads more effectively.
Connect on LinkedIn ↗