How to Send Facebook Lead Ads to Email Instantly
Want to receive every new Facebook Lead Ad submission by email as soon as it arrives? LeadsNotify automatically sends your Facebook leads to your inbox in real time, so your team can respond quickly without repeatedly checking Meta Business Suite or downloading…

Table of contents
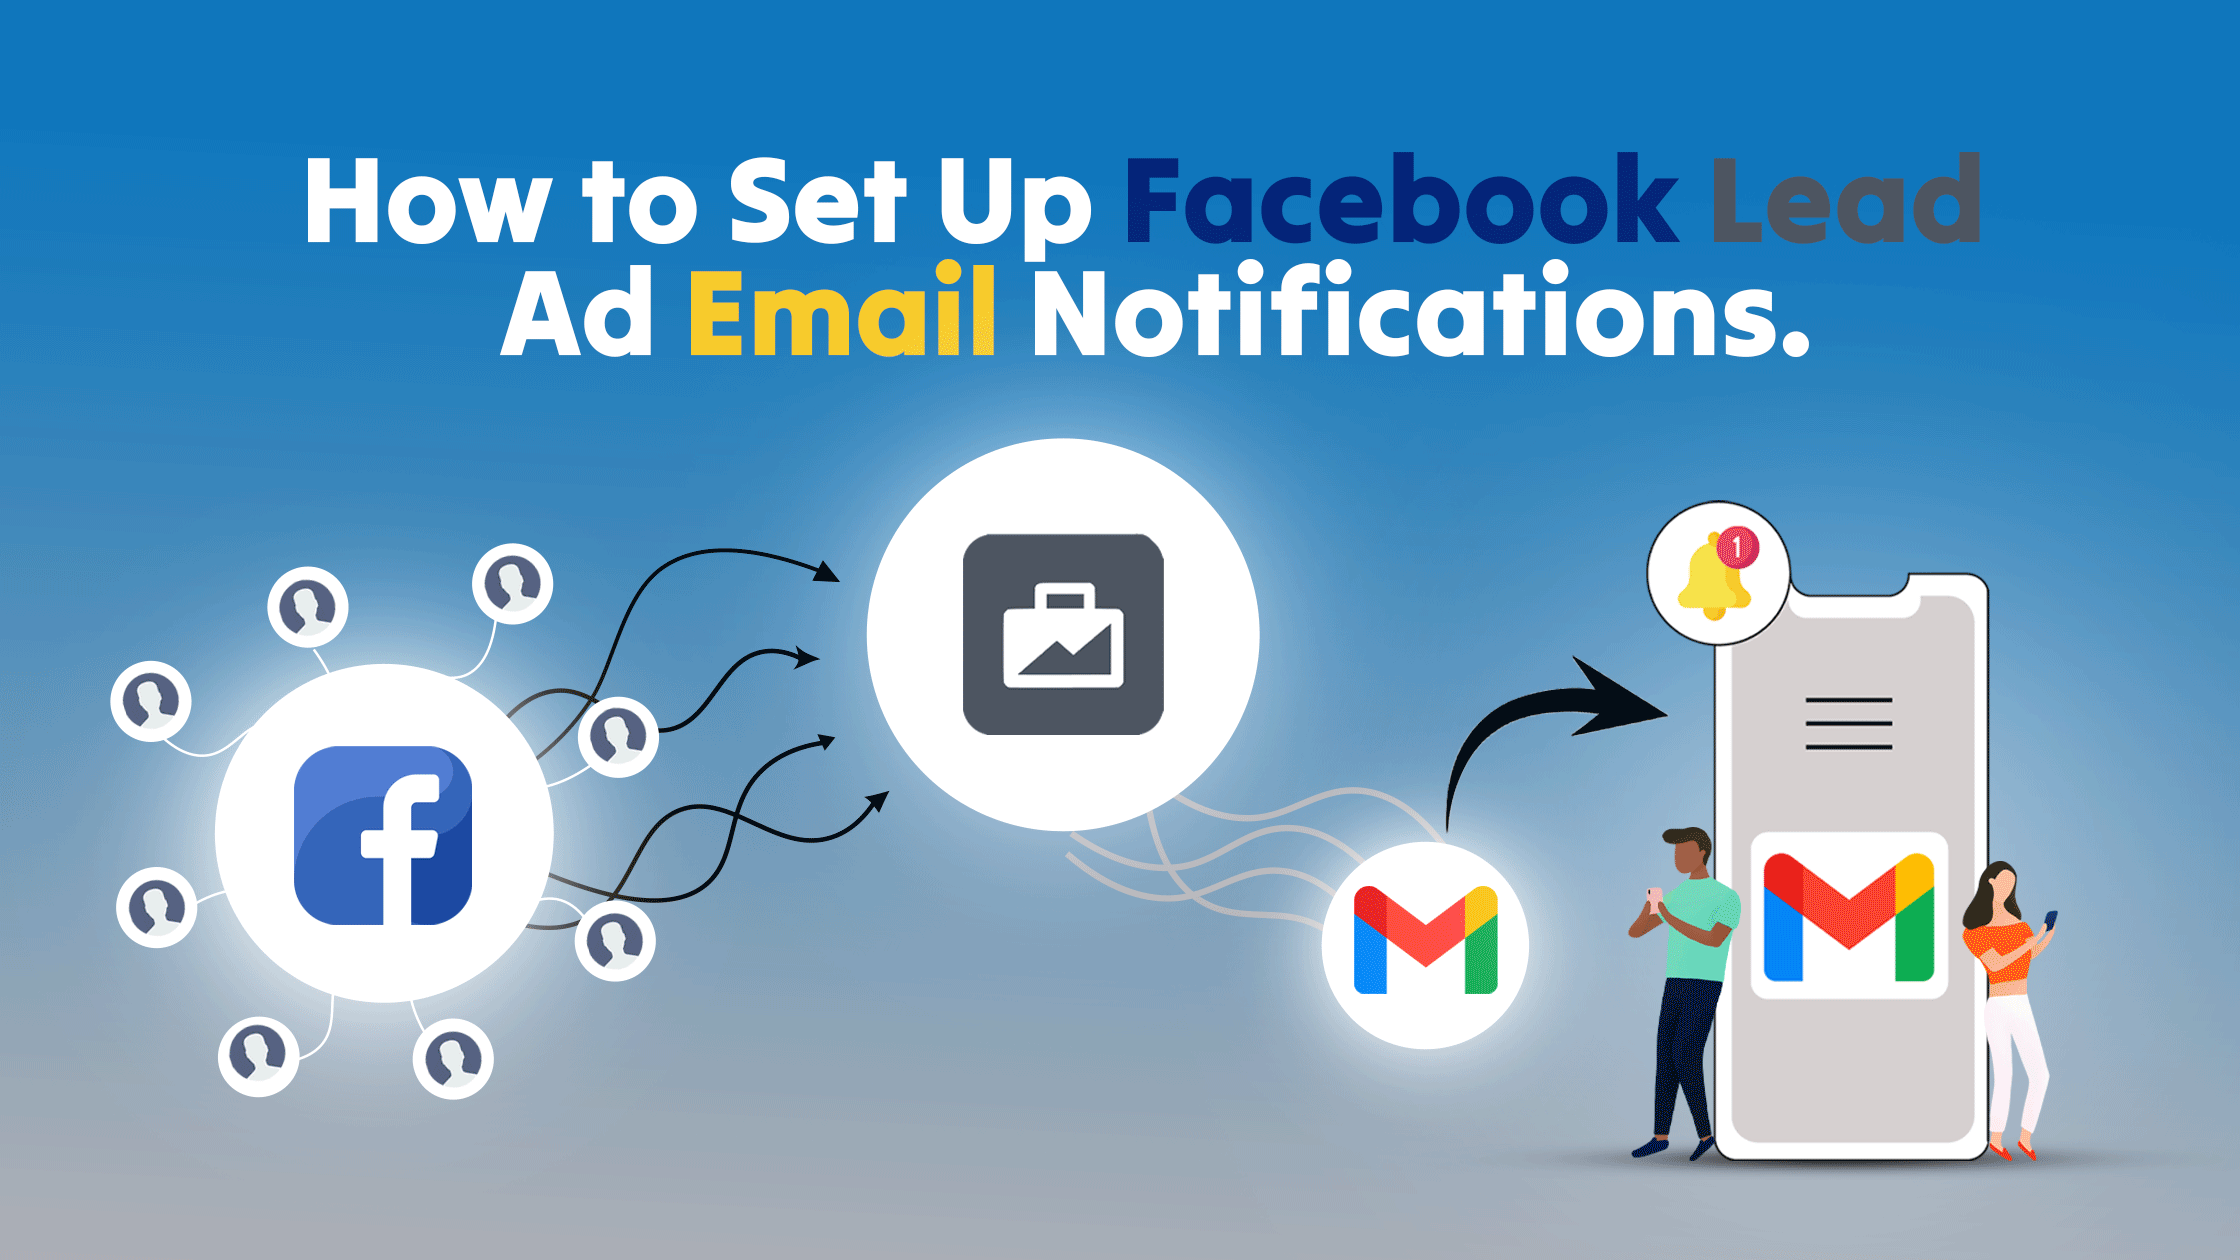
Want to receive every new Facebook Lead Ad submission by email as soon as it arrives? LeadsNotify automatically sends your Facebook leads to your inbox in real time, so your team can respond quickly without repeatedly checking Meta Business Suite or downloading Facebook leads manually.
With LeadsNotify, you can connect your Facebook Page, select one or more Instant Forms, choose the email recipients, and customize which lead fields appear in each notification. No coding or complicated integration is required.
In this step-by-step guide, you will learn how to set up Facebook Lead Ads email notifications, send a test lead, customize the email subject and fields, and confirm that your notifier is working correctly.
Why Send Facebook Lead Ads to Email?
Facebook Instant Forms make it easy for prospects to submit their details, but those leads still need a quick response. Email notifications make new submissions visible to your team without requiring someone to continuously monitor Meta Business Suite.
- Respond faster: Notify your sales team as soon as a new lead submits a form.
- Reduce missed opportunities: Avoid leaving valuable leads unnoticed inside Facebook.
- Notify multiple team members: Use the To, CC and BCC fields to send each lead to the appropriate recipients.
- Provide useful context: Include contact details, custom answers, form names and campaign information in the email.
- Eliminate manual exports: Receive new submissions without repeatedly downloading CSV files from Facebook.
Faster visibility helps your team contact prospects while their interest is still fresh.
How to Set Up Facebook Lead Ads Email Notifications with LeadsNotify
LeadsNotify connects your Facebook Lead Ads with email and automatically delivers new form submissions to your selected recipients. This eliminates the need to repeatedly check Meta Business Suite or manually download lead files.
Before you begin, create a LeadsNotify account. You should also have access to the Facebook Page and Instant Forms you want to connect.
Step 1: Connect Your Facebook Page to LeadsNotify
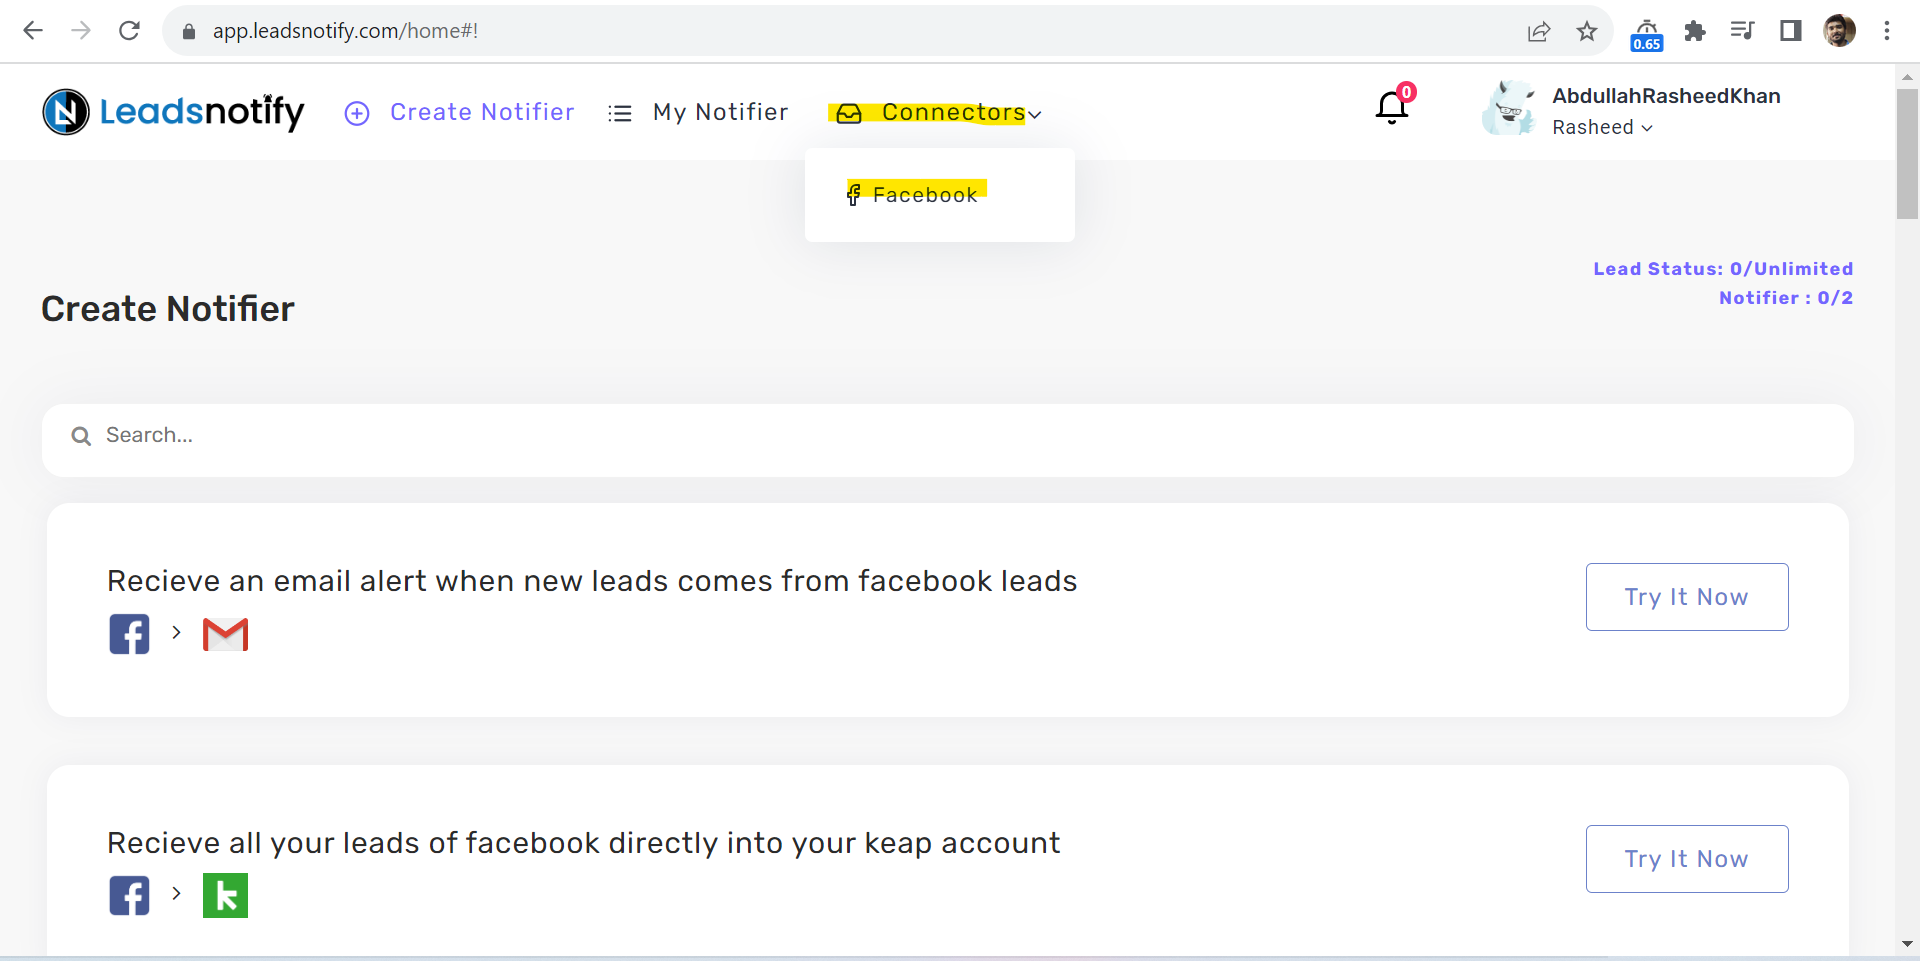
Sign in to the LeadsNotify dashboard. Open Connectors from the navigation menu, and then select Facebook. This section allows you to connect the Facebook Page that collects your Lead Ad submissions.
Step 2: Select Your Facebook Pages and Grant Permissions
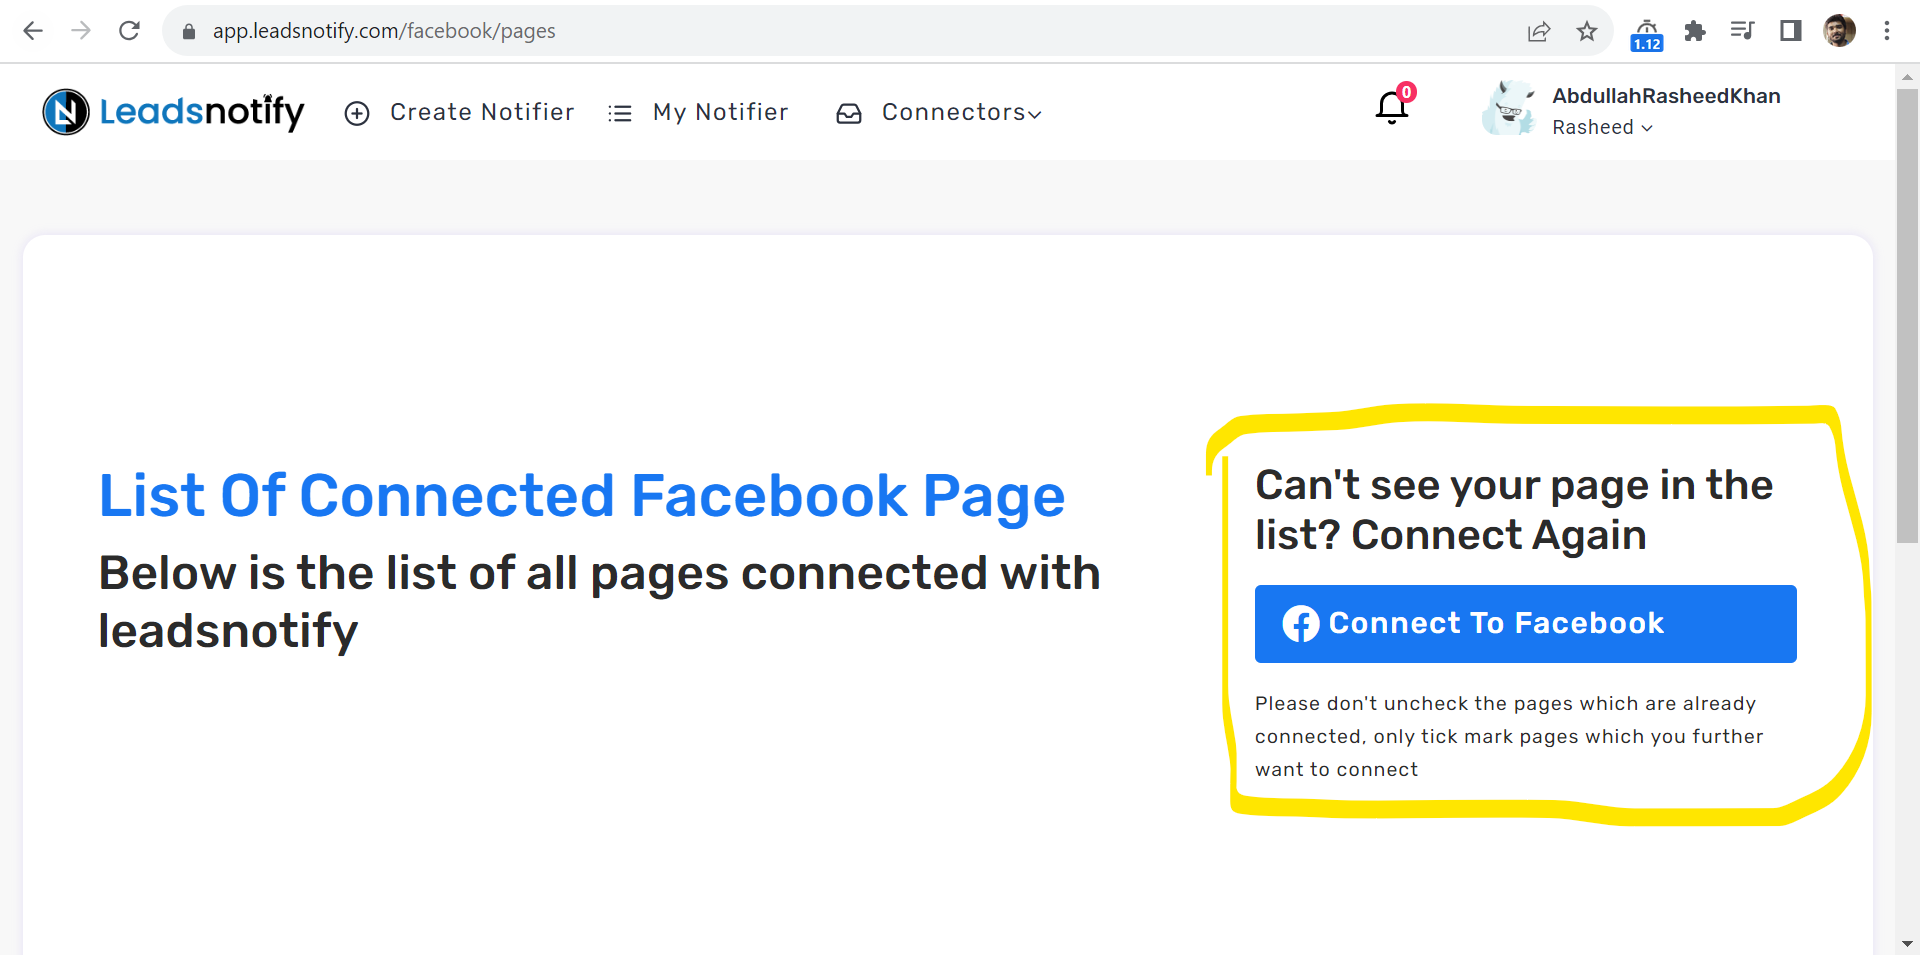
Click Connect to Facebook. You will be redirected to Facebook to authorize the connection between your account and LeadsNotify.
Facebook will display the Pages available to your account. Select the Facebook Page or Pages that contain the Instant Forms you want to connect.
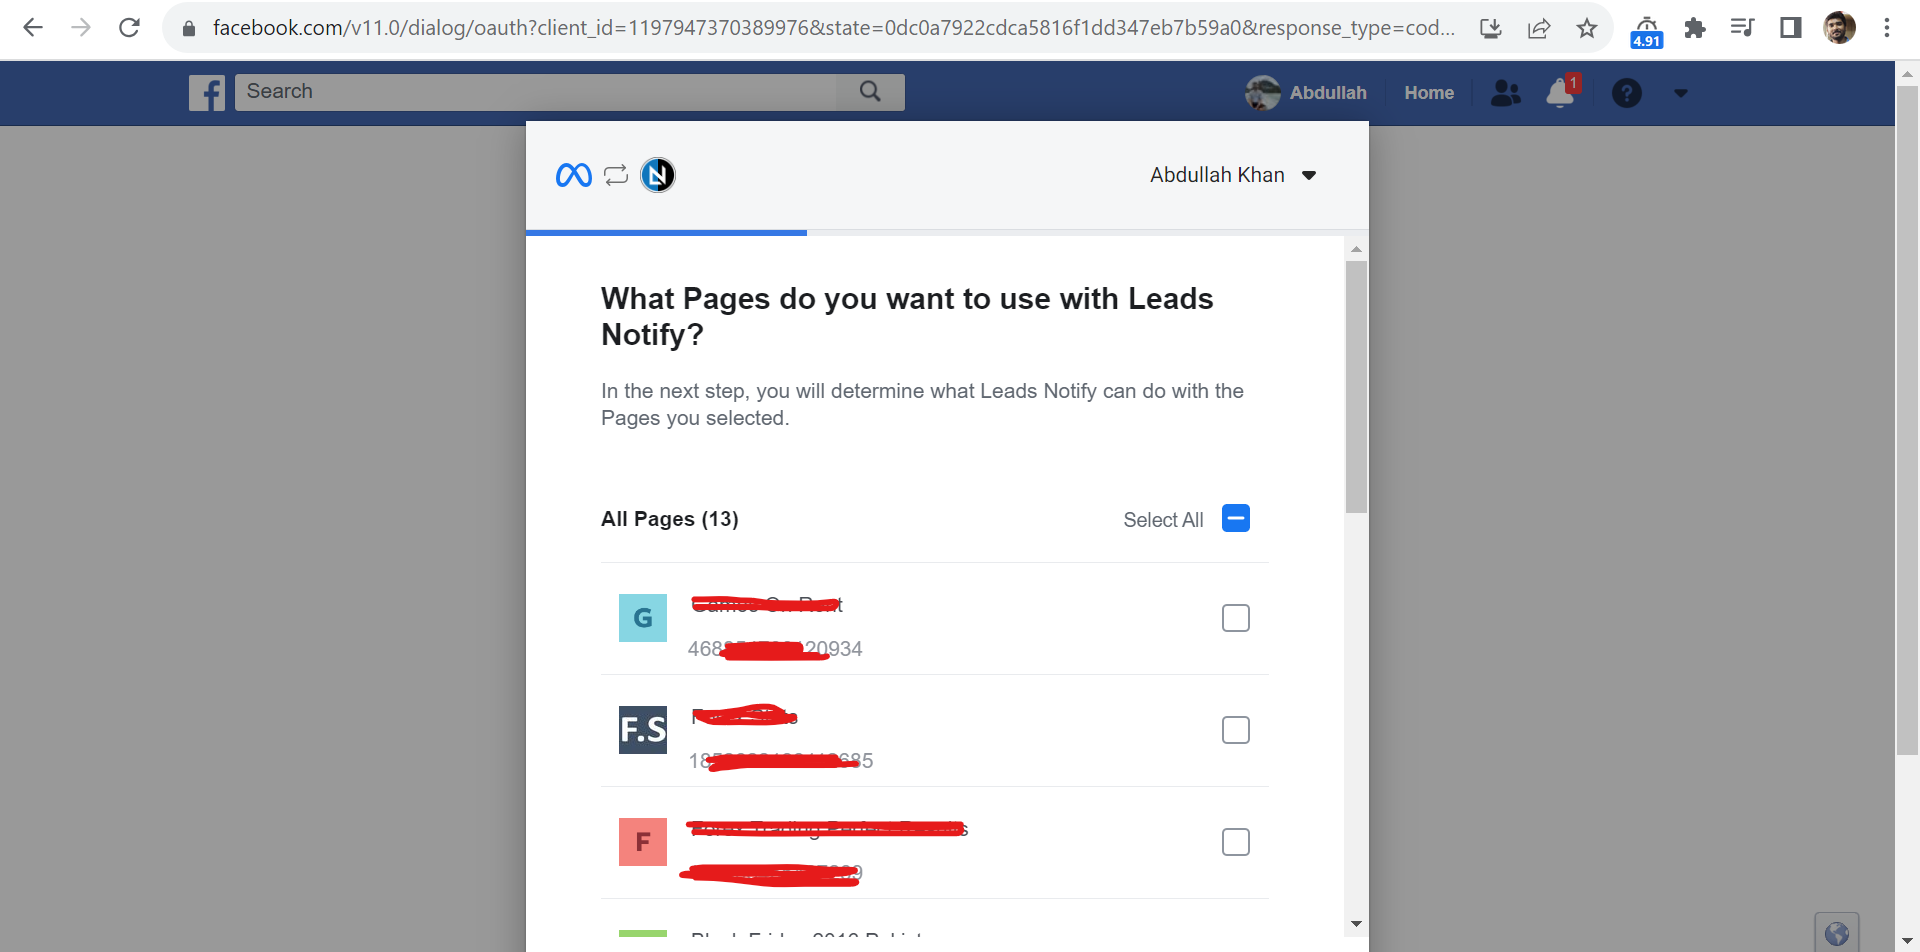
Approve the requested Facebook permissions so LeadsNotify can access your Instant Forms and receive new lead submissions. Missing permissions may prevent leads from being delivered to your email.
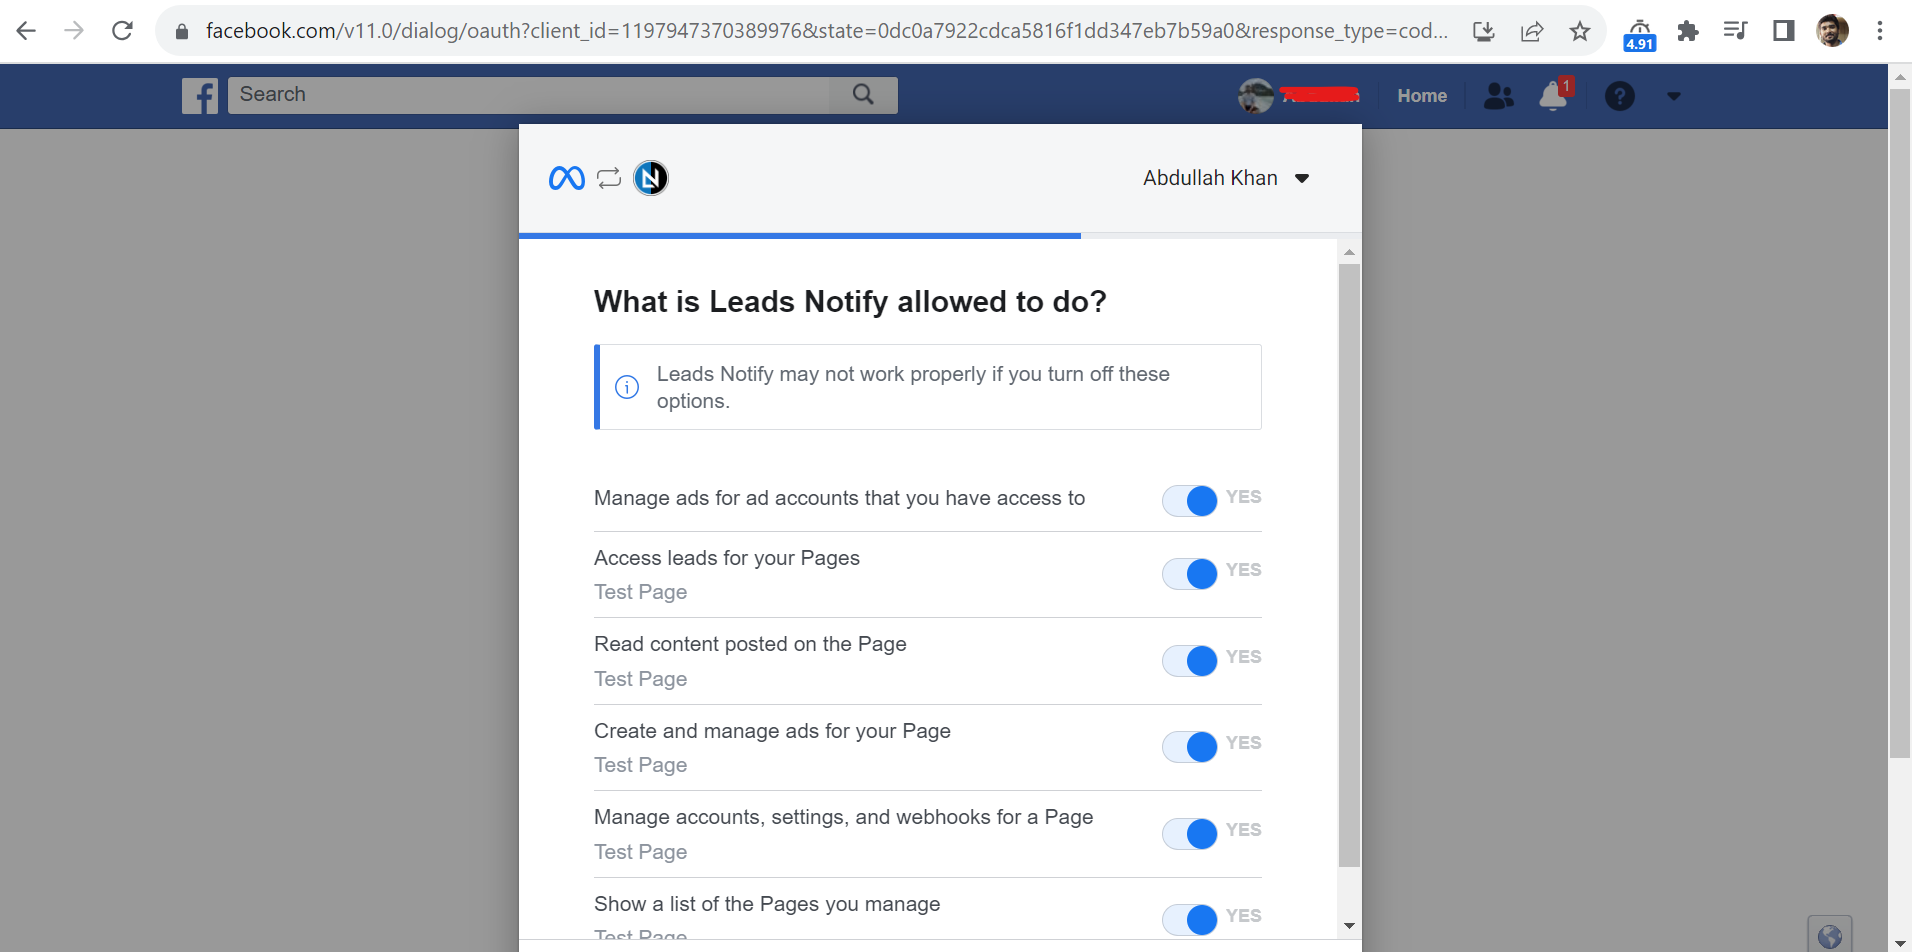
Click Done after reviewing the permissions. Facebook will redirect you to LeadsNotify, where the selected Page should display a Connected status.
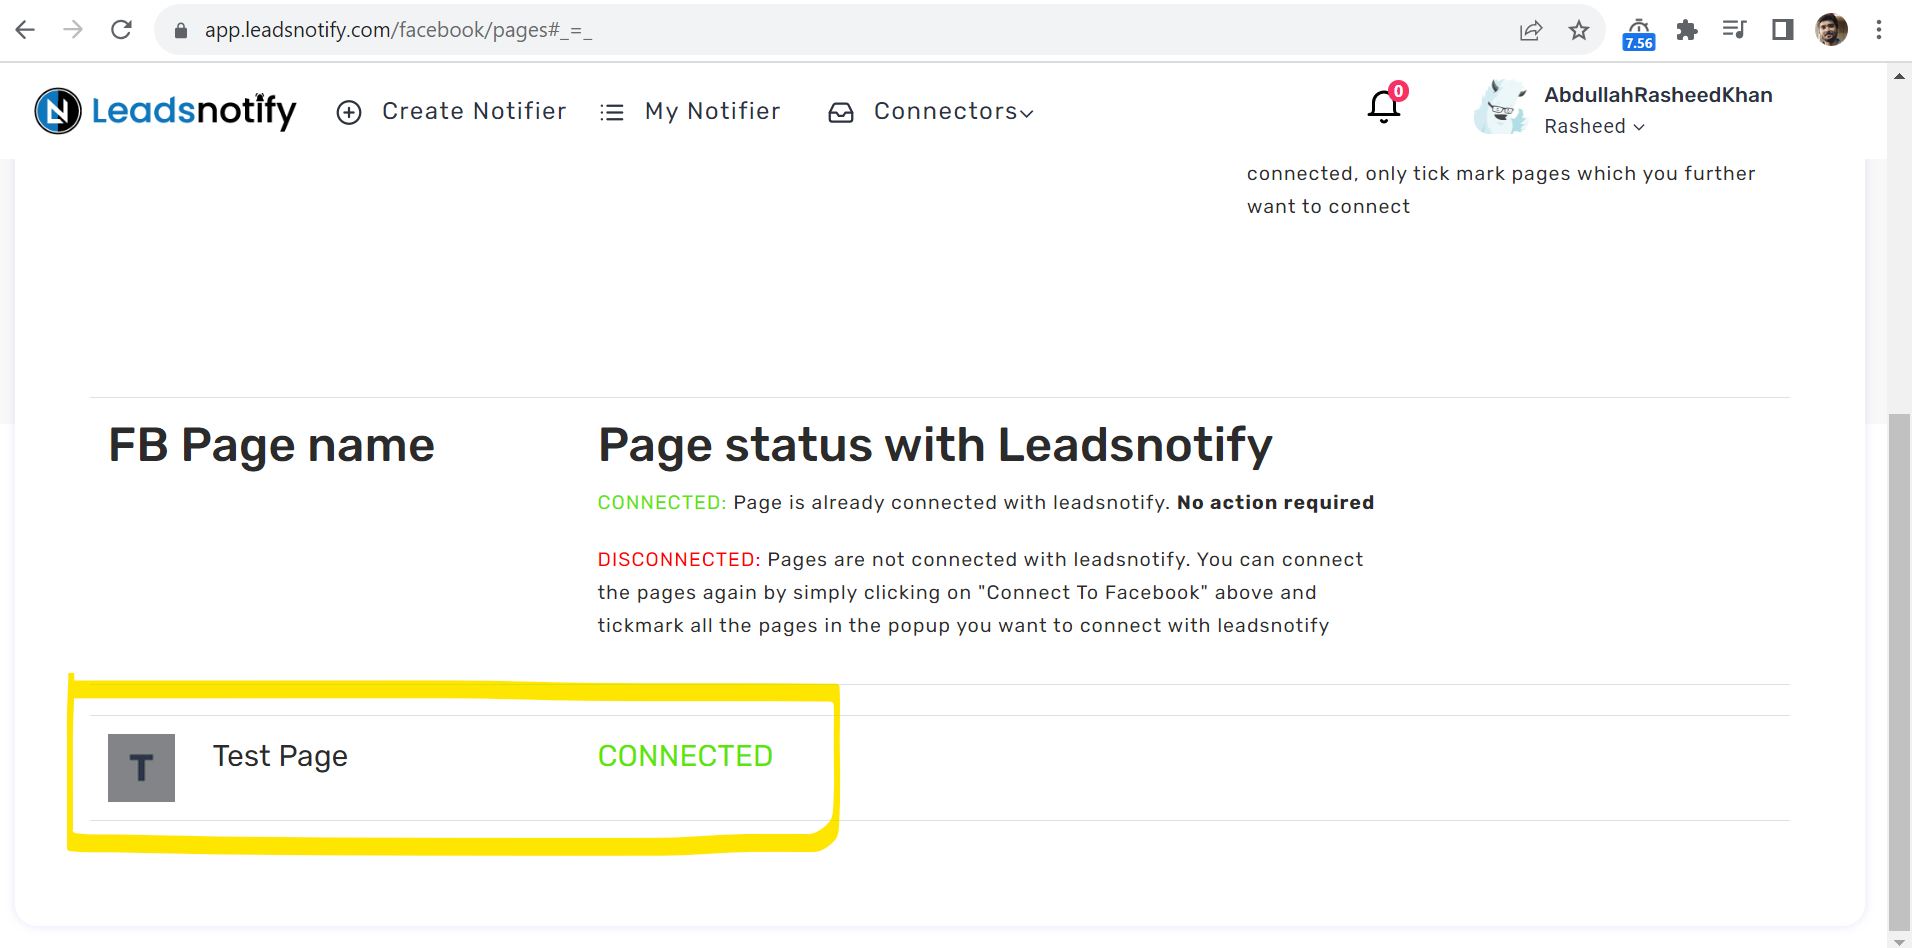
The example above uses a test Page. Your dashboard will display the actual name of the Facebook Page you connected.
Step 3: Create a New Email Notifier
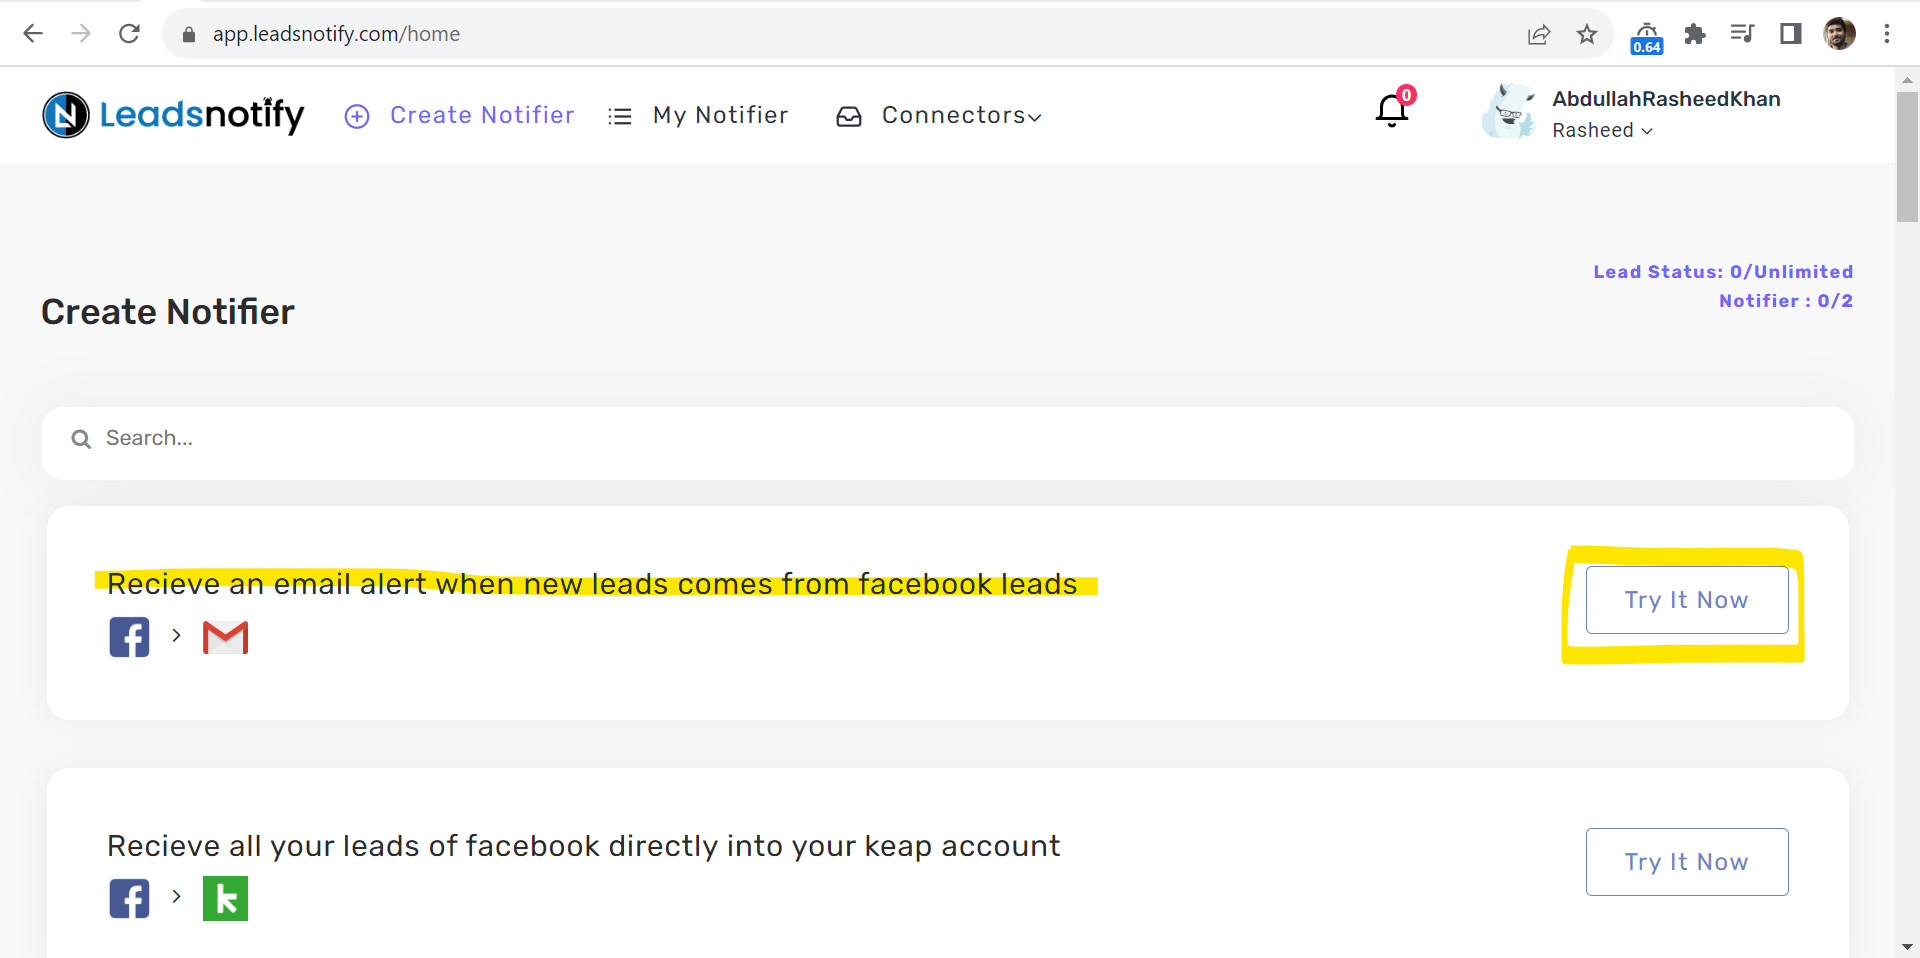
After connecting your Facebook Page, click Create Notifier in the LeadsNotify navigation menu. A notifier controls where new Facebook leads are delivered.
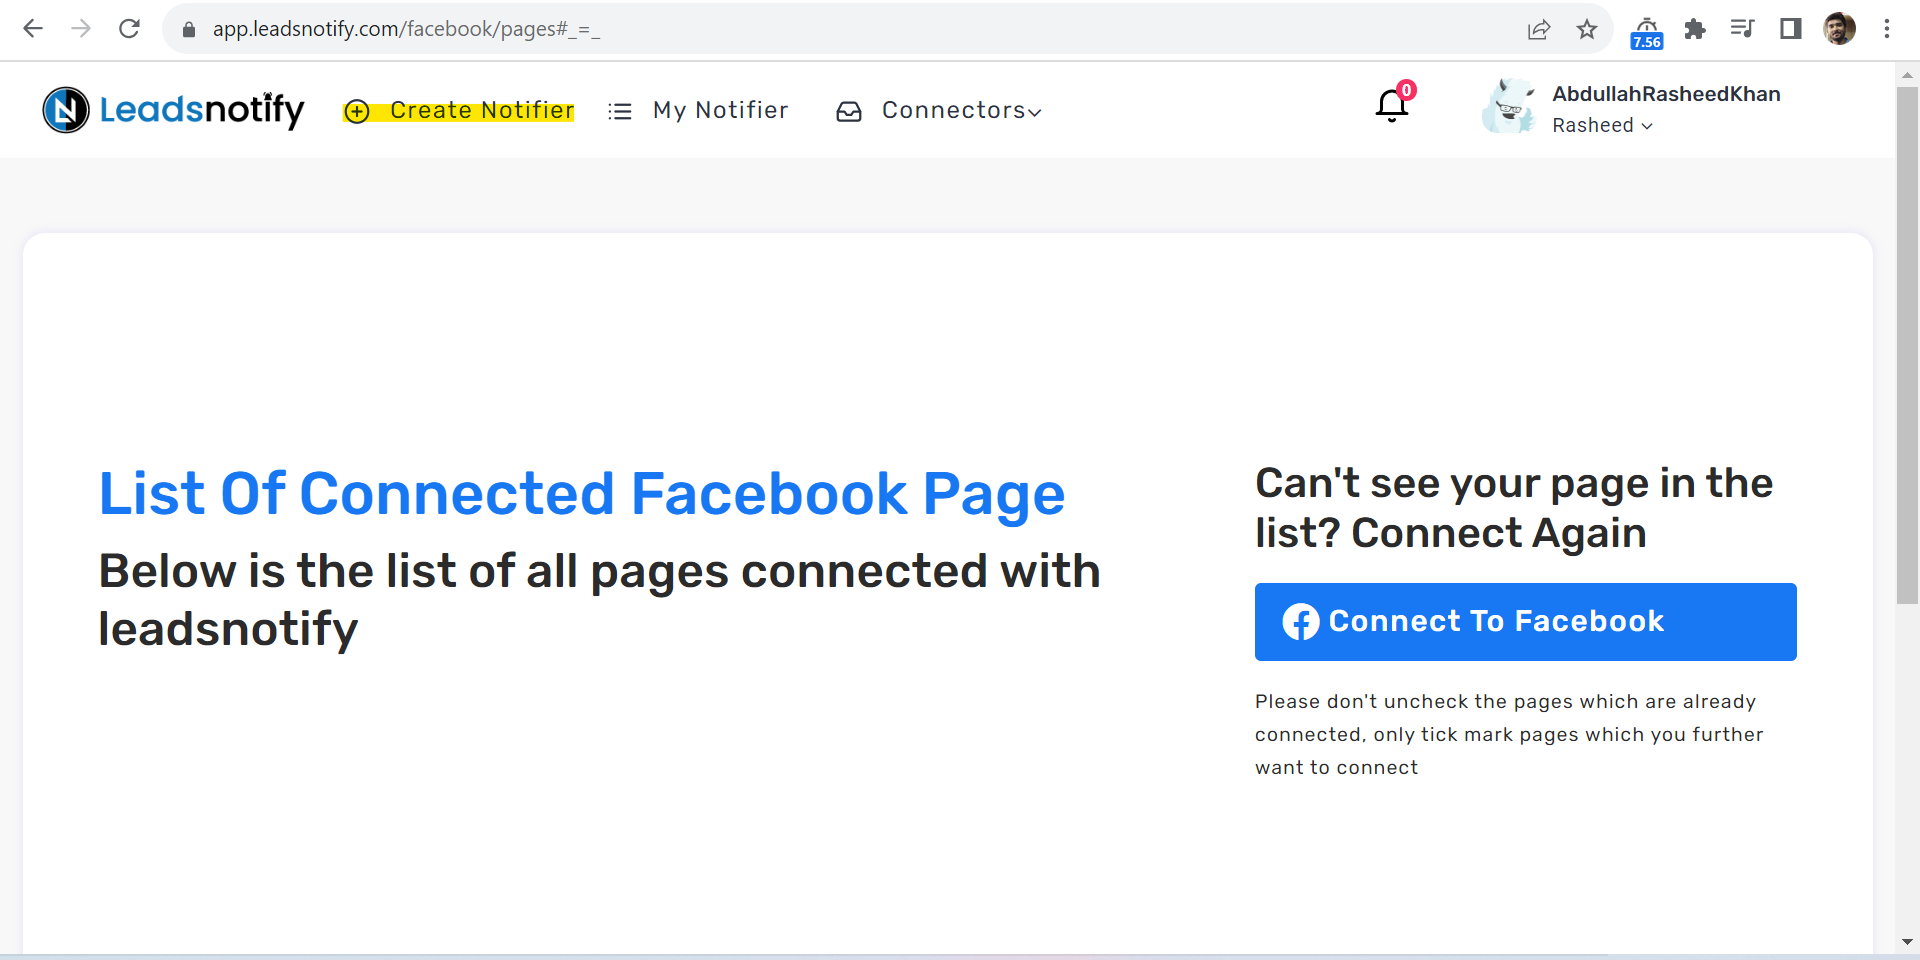
LeadsNotify will display the available integration options. Select Email to receive new Facebook Lead Ad submissions directly in your inbox.
Step 4: Choose Your Forms and Email Recipients
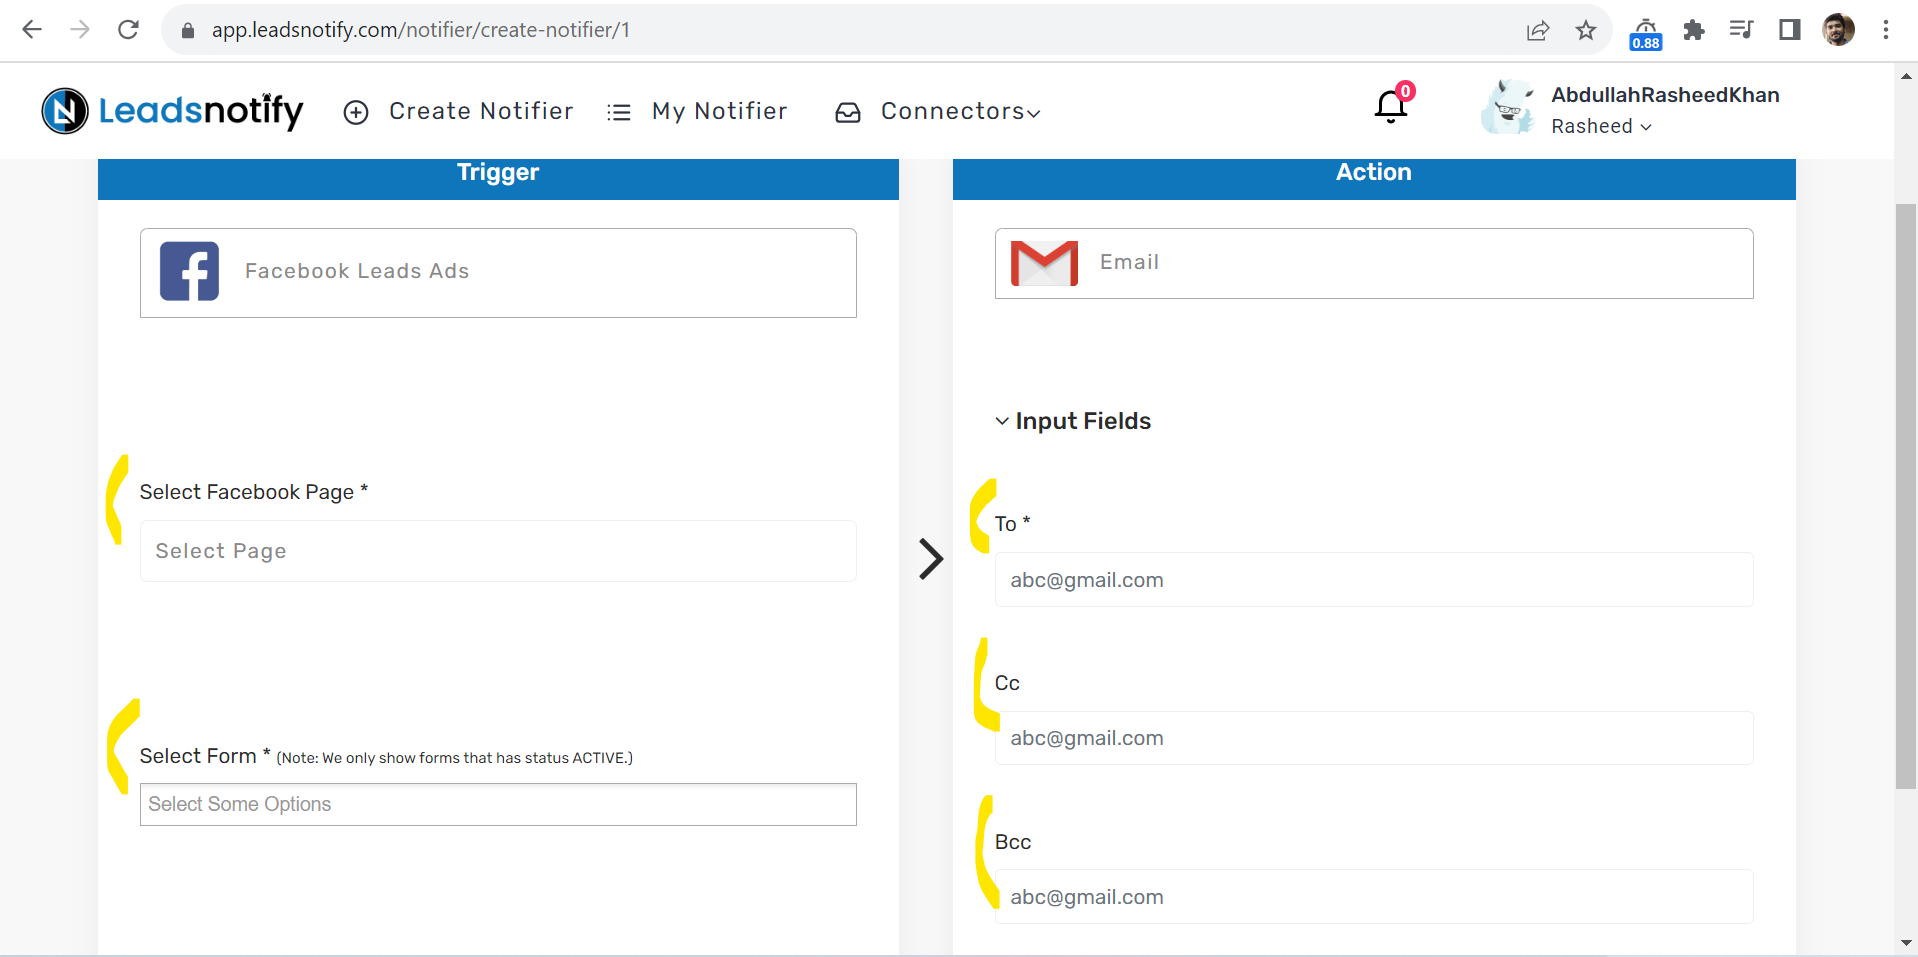
Configure the Facebook source and email recipients for your notifier:
- Facebook Page: Select the connected Page that owns your Instant Forms. This field is required.
- Page Forms: Select one or more Instant Forms from which you want to receive leads. LeadsNotify displays active forms available for the selected Page. This field is required.
- Email To: Enter the primary email address that should receive each lead. This field is required.
- Email CC: Add recipients who should receive a copy of the notification. This field is optional.
- Email BCC: Add recipients who should receive a hidden copy. This field is optional.
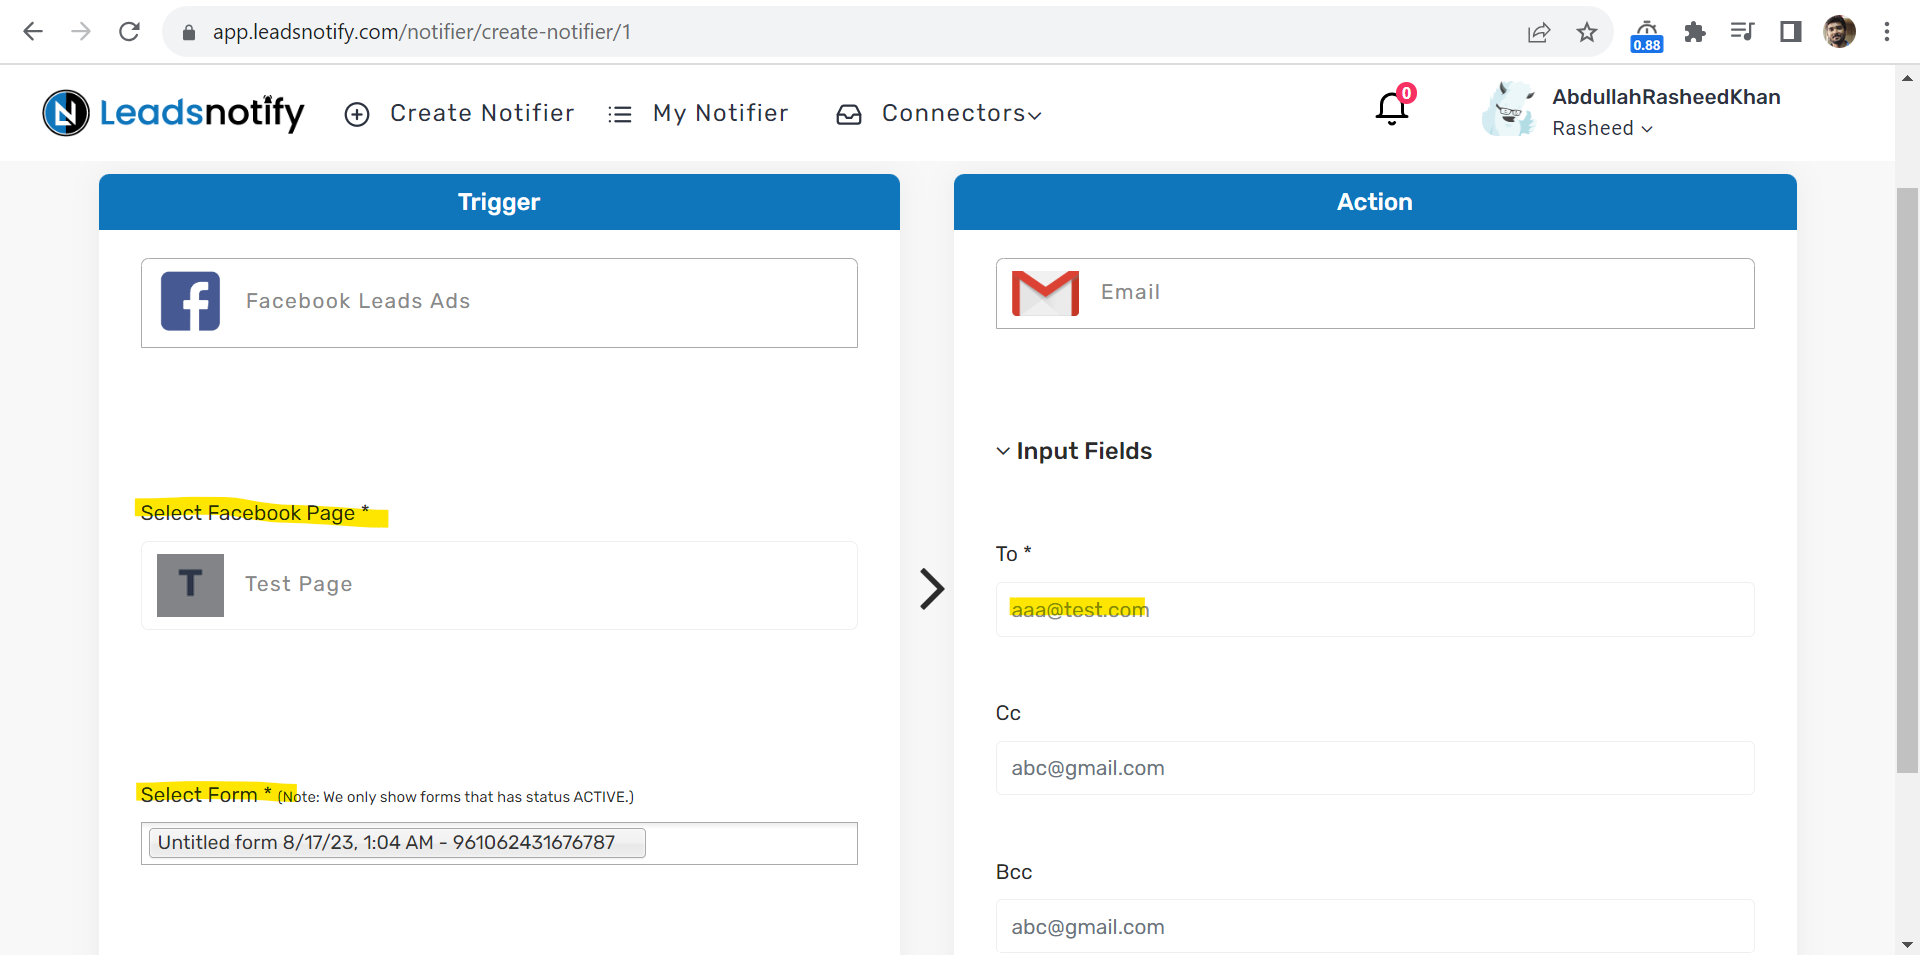
You can select multiple Instant Forms when creating the notifier. This allows one notifier to deliver leads from several forms belonging to the same Facebook Page.
Review the selected Page, forms and recipient addresses before creating the notifier.
Step 5: Create and Test Your Email Notifier
After confirming the Page, forms and recipient addresses, click Create Notifier. LeadsNotify will display a success message when the notifier has been saved and activated.
Click Test Notifier, choose one of the forms connected to the notifier, and send a sample lead notification. Check the recipient’s inbox and spam folder to confirm that the email was delivered successfully. You can repeat the test if necessary.
Customize Your Facebook Lead Email Notifications
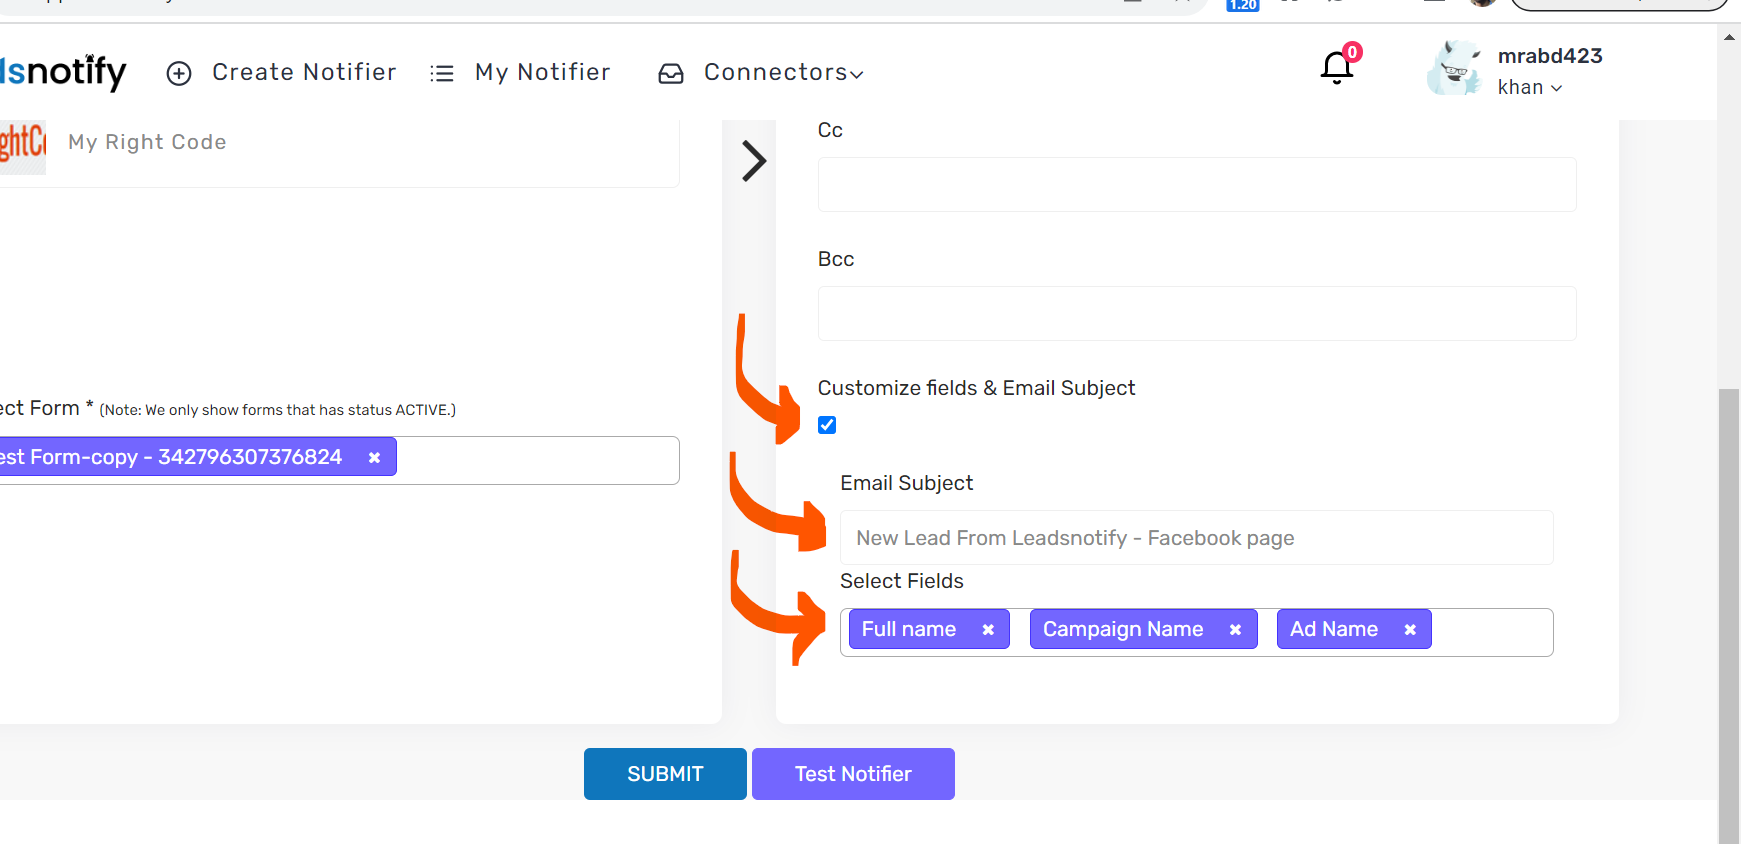
Enable the customization option when creating or editing your notifier to control the information included in each email.
- Select lead fields: Choose the Facebook Instant Form fields you want to include, such as full name, email address, phone number or appointment details.
- Customize the email subject: Create a recognizable subject line so your team can quickly identify new Facebook leads.
- Include campaign information: Add fields such as the Page name, form name, campaign name or ad name when this information is useful to your team.
If one notifier receives leads from multiple forms, review the selected fields carefully because different forms may use different field names. Selecting all available fields can help ensure that fields from differently structured or multilingual forms are included.
What Is Included in a Facebook Lead Email?
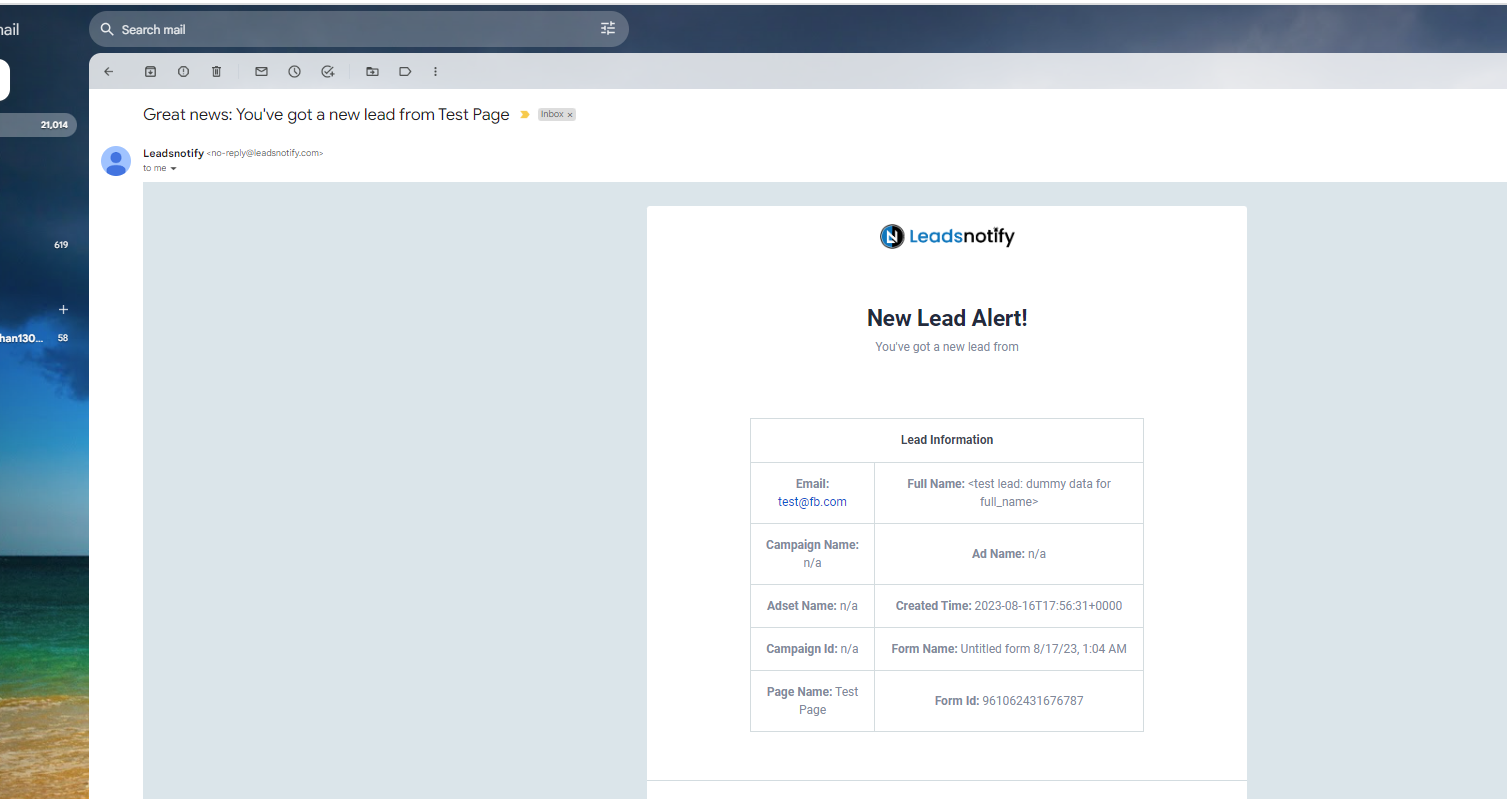
LeadsNotify sends each submission in a branded, mobile-friendly email that is easy to review on desktop and mobile devices.
- Facebook Page name: The email identifies the connected Page that generated the lead.
- Lead contact details: Selected information such as name, email address and phone number appears in the lead information section.
- Custom form answers: Answers to qualifying questions, appointment questions and other custom fields can be included.
- Original field labels: LeadsNotify uses the labels from the Facebook Instant Form, including custom or translated labels when they are available.
- Clickable contact information: Valid email addresses and phone numbers are displayed as clickable email and telephone links.
- Recognizable email subject: The default subject identifies the Facebook Page, or you can provide your own custom subject.
If a lead skips a field because of conditional form logic, LeadsNotify can still deliver the remaining information that was submitted.
Track Facebook Lead Email Delivery Status
LeadsNotify records the delivery status of your Facebook leads in the Lead Deliveries dashboard. This helps you confirm whether a lead was delivered successfully and investigate unsuccessful delivery attempts.
For each lead, the dashboard can display:
- The time the lead was generated by Facebook
- The time the webhook was sent and received
- The Facebook lead ID
- The connected Page and form
- The notifier destination
- Whether the delivery succeeded or failed
- The response returned during the delivery attempt
You can filter delivery records by date, status, Facebook Page or notifier. Delivery data from the last 90 days can also be downloaded as a CSV file for reporting or troubleshooting.
Facebook Lead Ads Email Notifications Not Working?
If a lead notification does not arrive, check the following items before creating a new notifier.
Confirm That the Notifier Is Active
Open the notifier in LeadsNotify and verify that it is active. Use the Test Notifier option to confirm that LeadsNotify can send an email to the configured recipient.
Check the Recipient Address and Spam Folder
Confirm that the email address in the To field is correct. Also check the spam, junk and promotions folders if the test notification does not appear in the primary inbox.
Verify the Facebook Page and Form
Make sure the notifier contains the correct Facebook Page and Instant Form. If you recently created a new form, edit the notifier and select that form before testing it.
Review Facebook Permissions
LeadsNotify requires permission to access your Facebook Page, Instant Forms and lead submissions. If permissions were removed or expired, reconnect the Facebook Page and approve the requested permissions again.
Check Customized and Multilingual Fields
Different Instant Forms can use different field names, including translated or custom fields. If a notifier covers multiple forms, select the fields used by each form or allow all available fields so that important lead information is not omitted.
Enable Lead Failure Email Alerts
When creating or editing a notifier, enable Email me when a lead fails. LeadsNotify will send one failure alert when that notifier cannot deliver a lead successfully.
The alert includes the Facebook Page, destination, lead ID, notifier ID, failure time and the technical response returned during delivery. It also provides a link to review the failed lead from the Lead Deliveries page.
Failure alerts are sent to the account email address. You can also configure additional recipients and choose which notifiers should send these alerts from your profile settings. Learn more about instant lead failure email alerts.
Frequently Asked Questions
Can Facebook Lead Ads Be Sent Directly to Email?
Yes. LeadsNotify can automatically send each new Facebook Lead Ad submission to one or more email recipients after you connect your Facebook Page and create an email notifier.
How Quickly Will a Facebook Lead Notification Arrive?
LeadsNotify processes new submissions in real time, so the email notification should normally arrive shortly after the lead submits the Facebook Instant Form.
Can I Send Lead Notifications to Multiple Email Addresses?
Yes. You can specify a primary recipient and add additional recipients using the CC and BCC fields when configuring the notifier.
Can One Notifier Receive Leads from Multiple Facebook Forms?
Yes. You can select multiple Instant Forms from the same connected Facebook Page when creating the notifier.
Can I Customize the Fields Included in the Email?
Yes. You can select the lead fields included in the notification and customize the email subject. If your forms use different or multilingual field names, review the selected fields or allow all available fields.
Do I Need Coding or Technical Experience?
No. The connection and notifier can be configured from the LeadsNotify dashboard without writing code.
Start Receiving Facebook Leads by Email
Stop checking Meta Business Suite manually for every new submission. Connect your Facebook Page to LeadsNotify and deliver new leads directly to the people responsible for following up.
For additional protection, you can also enable instant lead failure email alerts so your team is notified when a lead cannot be delivered successfully.
Last Updated on October 7, 2026 by Abdullah Khan
Set up a free notification in a few minutes.

Abdullah Khan
A Technical Lead and backend architect with 10+ years of experience building reliable, high-scale APIs and automation systems. At LeadsNotify, he helps build and maintain the integrations that route Facebook and LinkedIn leads to email, CRMs, and marketing tools in real time.
Connect on LinkedIn ↗