
Use Leadsnotify to automatically send your Facebook leads to Mailchimp, saving time and effort & execute autoresponders or other workflows to make things faster.
Here are the simple steps to follow to get this integration done.
- Login into your Leadsnotify account
- There will be plenty of integrations available there you need to select Mailchimp from the list
- In Leadsnotify action box it will ask Mailchimp API key & Server prefix.
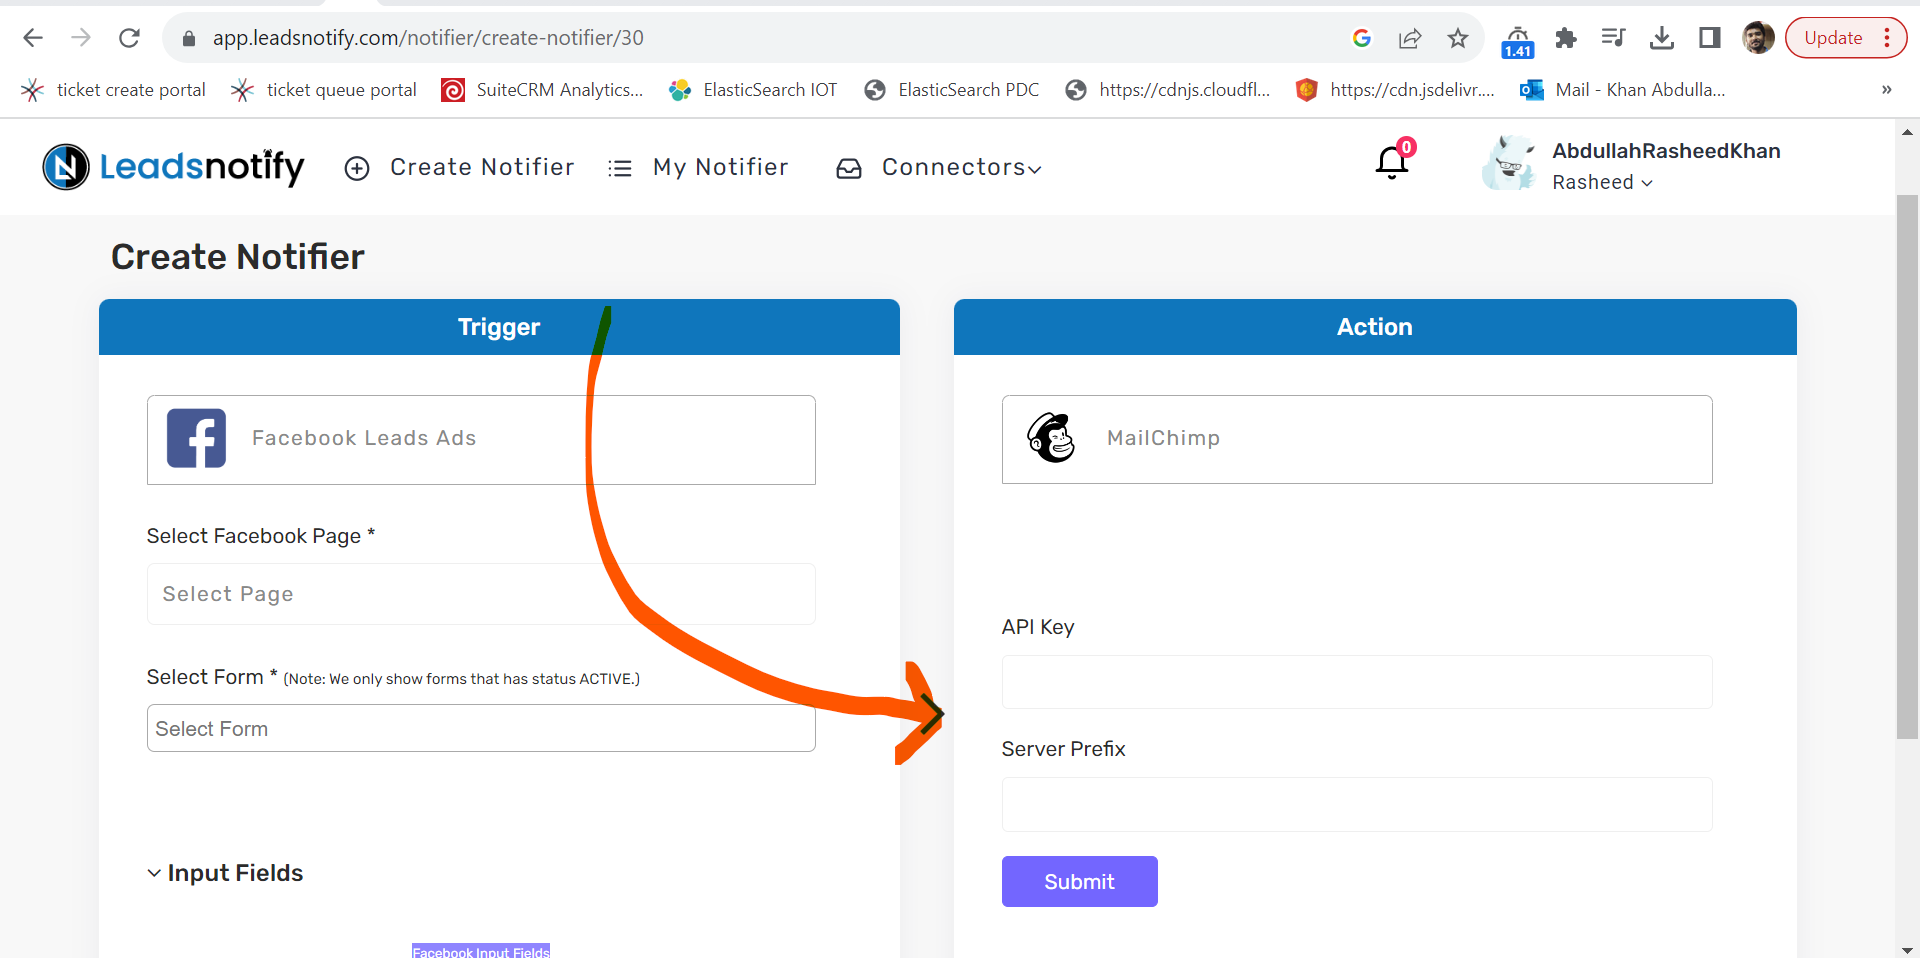
- To obtain your API key, navigate to your account settings. Look for the API key creation option there. Alternatively, you can simply add /account/api/ after your Mailchimp domain and use the generated key in Leadsnotify.
- The Server Prefix is a domain identifier like us5, us4, or us3. Copy and paste this prefix. In my case, it’s us5. It activates the audience list dropdown after authentication.
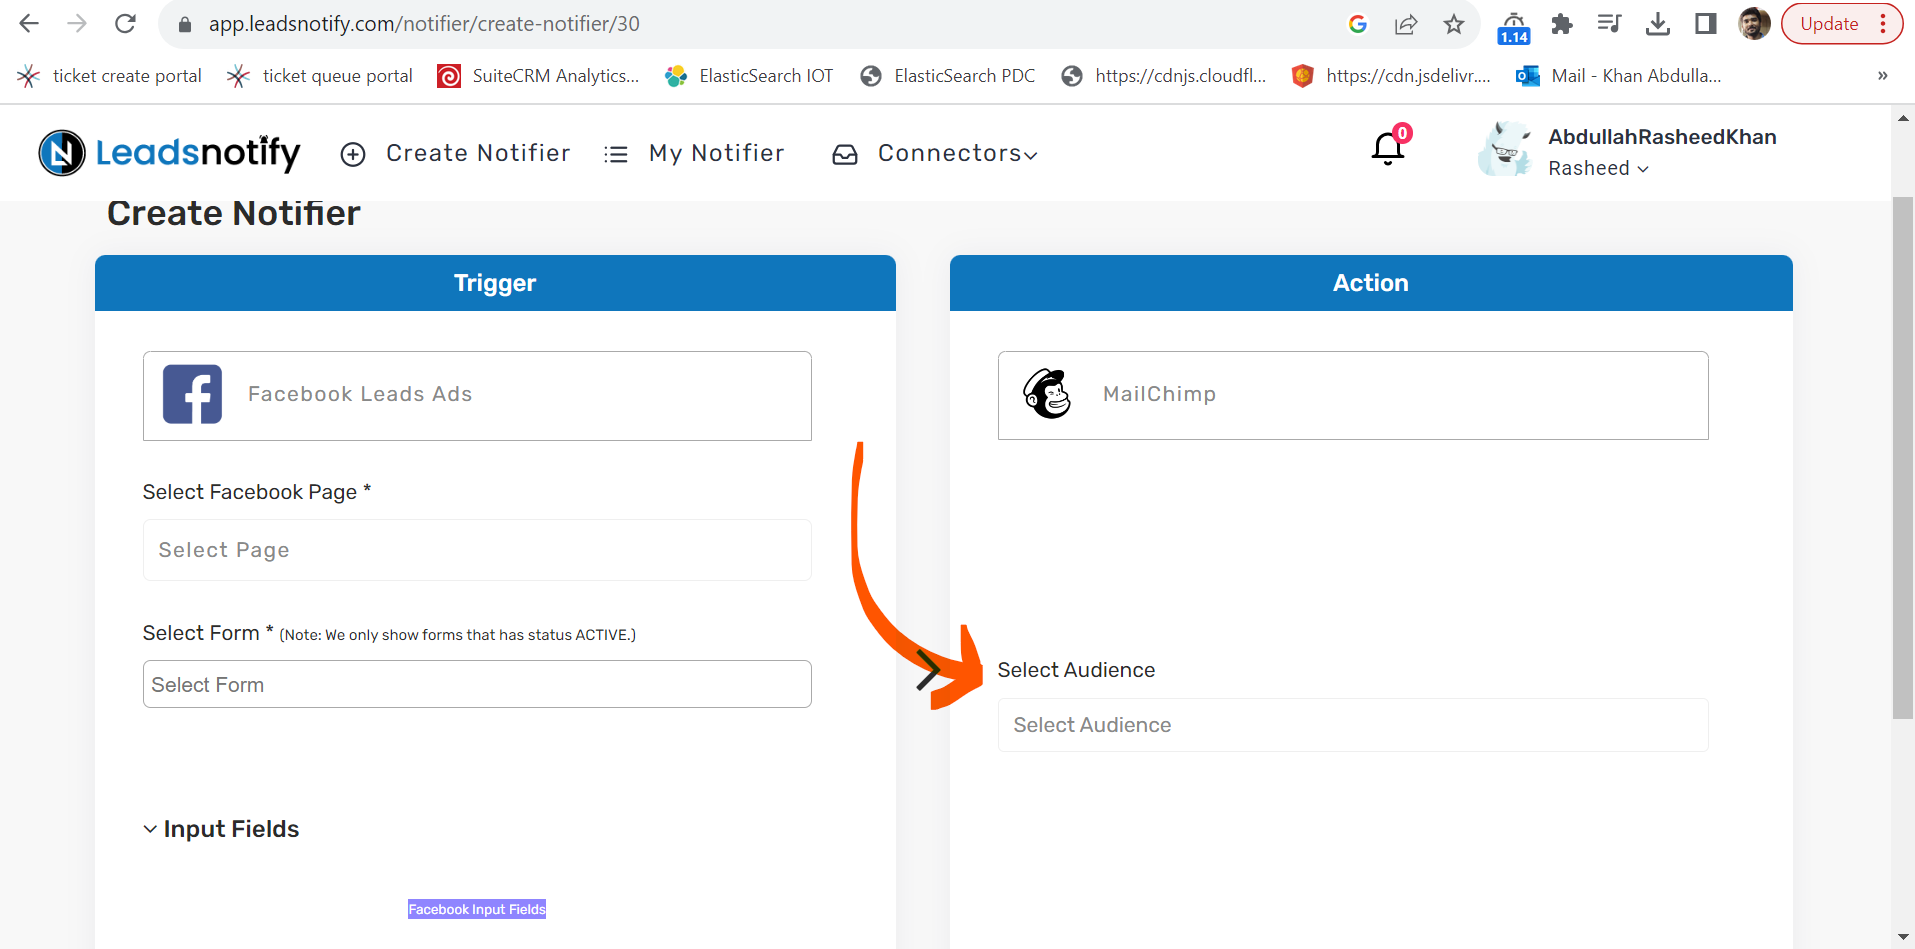
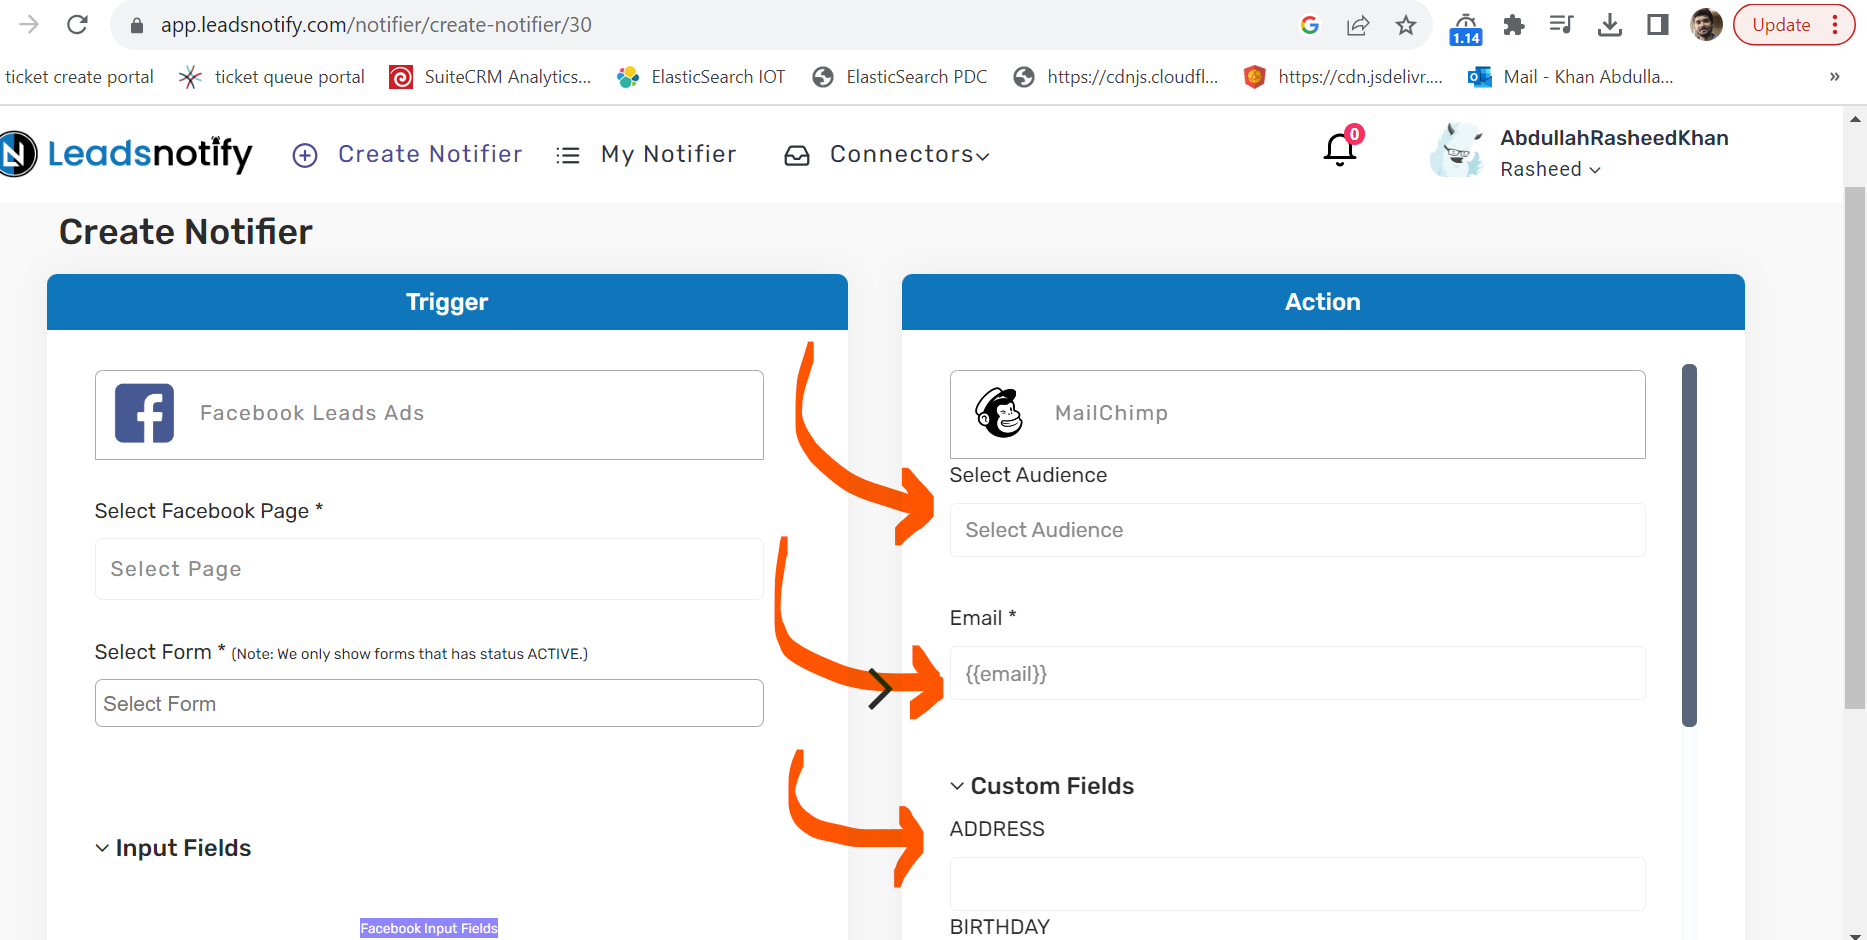
- After selecting ‘Audience,’ the Mailchimp fields become visible. You can then seamlessly align Mailchimp and Leadsnotify fields, ensuring smooth integration of lead information into Mailchimp when sent from Leadsnotify.
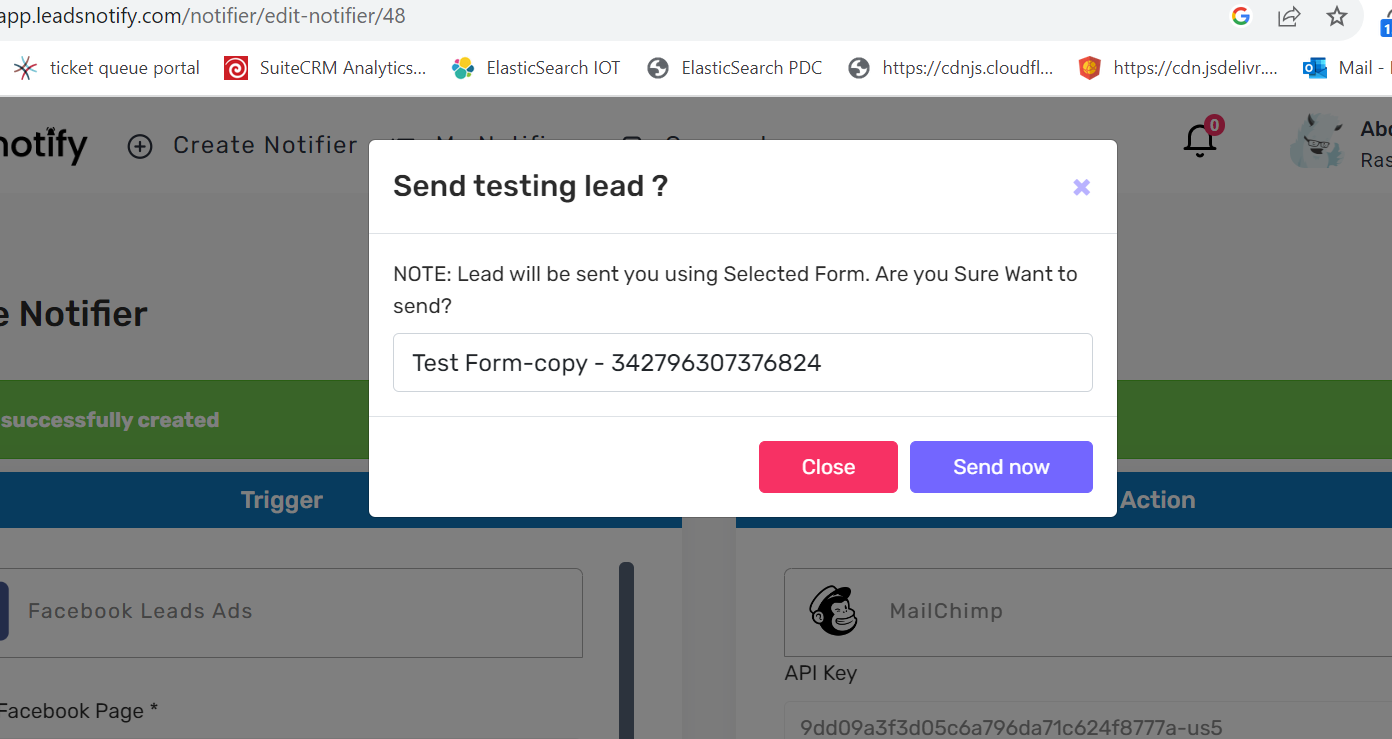
- After aligning the fields, submit the form. A prompt will follow to send a test lead for integration confirmation, which will be directed to your Mailchimp.
That’s how you do integration with Mailchimp. Thank you for reading my article. Feel free to contact Leadsnotify support if you are not able to do it.
Last Updated on September 30, 2023 by ABD K